In this blog, you will learn how to automate posts for your social channels in bulk. ContentStudio 2.0 brings you the functionality of Bulk Upload which lets you schedule multiple messages in multiple languages to your social media channels via CSV data import. This feature is useful for when you want to perform a similar action multiple times, in a single go.
Why do you need Bulk Scheduling
Before further explaining anything else, I would like to throw some light on the importance of bulk scheduling. It’s an amazing thing that could totally transform your content marketing campaigns. Bulk scheduling is basically a synonym for proactivity in marketing jargon.
How? Let me explain it to you.
They say that planning your campaigns and content is the best thing that you could do to your social channels, your audience, and your business perspectively. Because that way, you are able to keep your best content under a spotlight and educate your audience without doing much effort.
While you’ll still need to do a great deal of effort for creating content, bulk scheduling makes content distribution a piece of cake for you.
Imagine how productive you would become if you don’t have an axe hanging over your head that you have to schedule posts for your social channels to stay visible among your audience.
Also, this is a bit (actually a lot more than just a bit) inconvenient for the social media managers and content marketers to stay awake all night just to share the content among different populations. Although, that’s a good time pass for you if you’re going through insomnia.
Jokes apart, we understand your pain points and we’re here to help you. Which is why once again we have released the functionality of bulk upload for you.
All you need is a computer, some kickass content that you want your audience to amuse with, and an account in ContentStudio (Obviously!!).
Bulk Upload in ContentStudio
First of all, sign in to your ContentStudio Account and go to Publish. Find Automation on the top left corner of your screen.
Bulk Uploader is the sixth Automation recipe. Click on the New Upload button to create a campaign.

The bulk uploader provides a template CSV file in which you can:
Follow the guidelines and see how you can create a campaign using the Bulk Uploader.
Upload your CSV
In this step, you have to upload a CSV file. You can download the template CSV file and edit it, but your file must contain the following information.
- Date and Time
- Message
- Image URL
- Link
Date and Time
In this column, you have to enter the date and time (in the format dd/mm/yyyy hh:mm or mm/dd/yyyy hh:mm) for the posts that you want to schedule. You have to strictly follow the date and time format in order for it to get executed successfully.
Message
This column lets you add the messages to your posts (better known as the captions for your posts; be it an image or a link post). You can customize messages for four different kinds of posts.
Note: You can schedule up to 500 posts for your social channels via the bulk upload recipe.
Text only post If you want to create a post in which you just want to add some text, you can do that by adding that text in this column.
Text with image post If you want to create a post in which you want to add an image and some text along with it. You can do that by adding your custom text in this column and then the image URL in the next column.
Text with link preview If your post has a link and you want to add some message with it, enter your message here and the link in the fourth column.
Text with Custom Image on Link preview If you want to create a post in which you want to add a link, a custom image, and a message, enter your message/ caption in this post and image URL and link in the next two fields, respectively.
Image URL
You can add images to your posts by adding the image URLs in this field. Use the URLs of any public image.
Link
Add links for articles, blogs, or any kind of public content to your posts by entering the link URL in this column.
Note: ContentStudio 2.0 provides multi-lingual support, allowing you to broaden the spectrum of your social media posts. The language support in the new version will be diversified by allowing you to choose any language in your bulk posts.
In the end, your CSV file should look something like this:

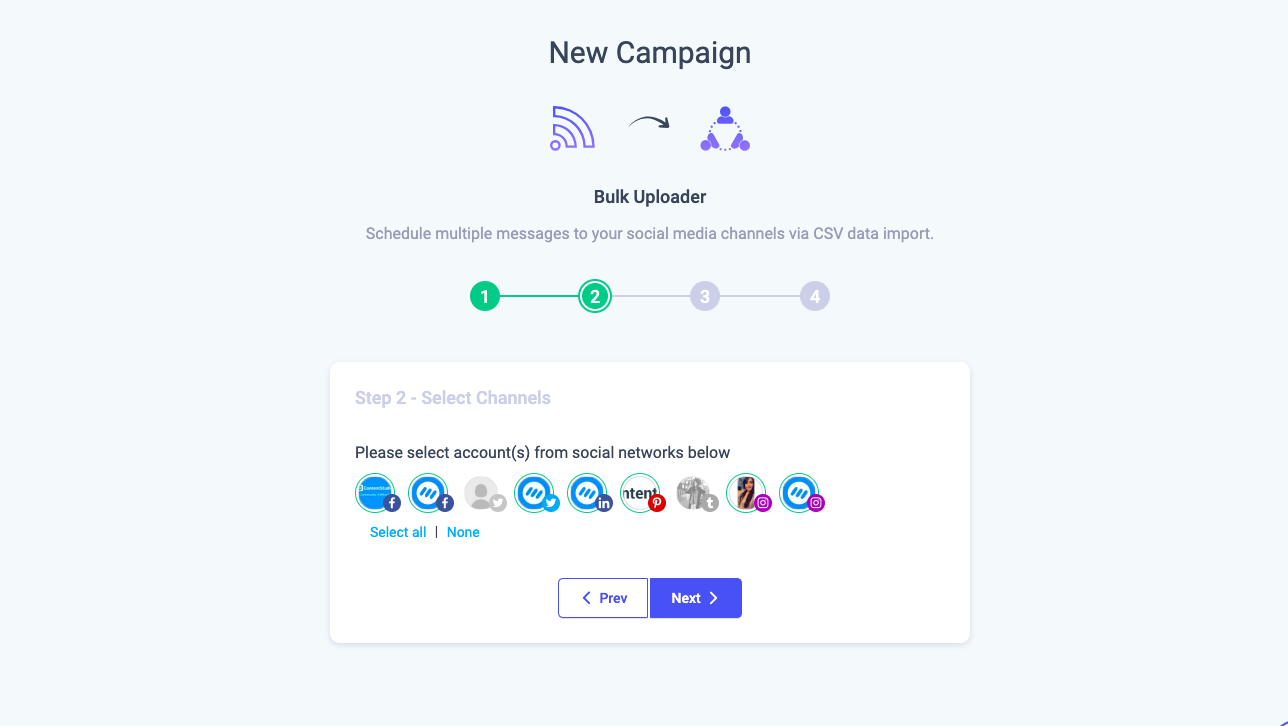
Select Channels
In this step, you have to select your social channels for which you want to create your Bulk Upload campaign.
Scheduling Options
In this step, you have to schedule your posts for your selected social channels. You have three scheduling options for your bulk posts which are explained below.
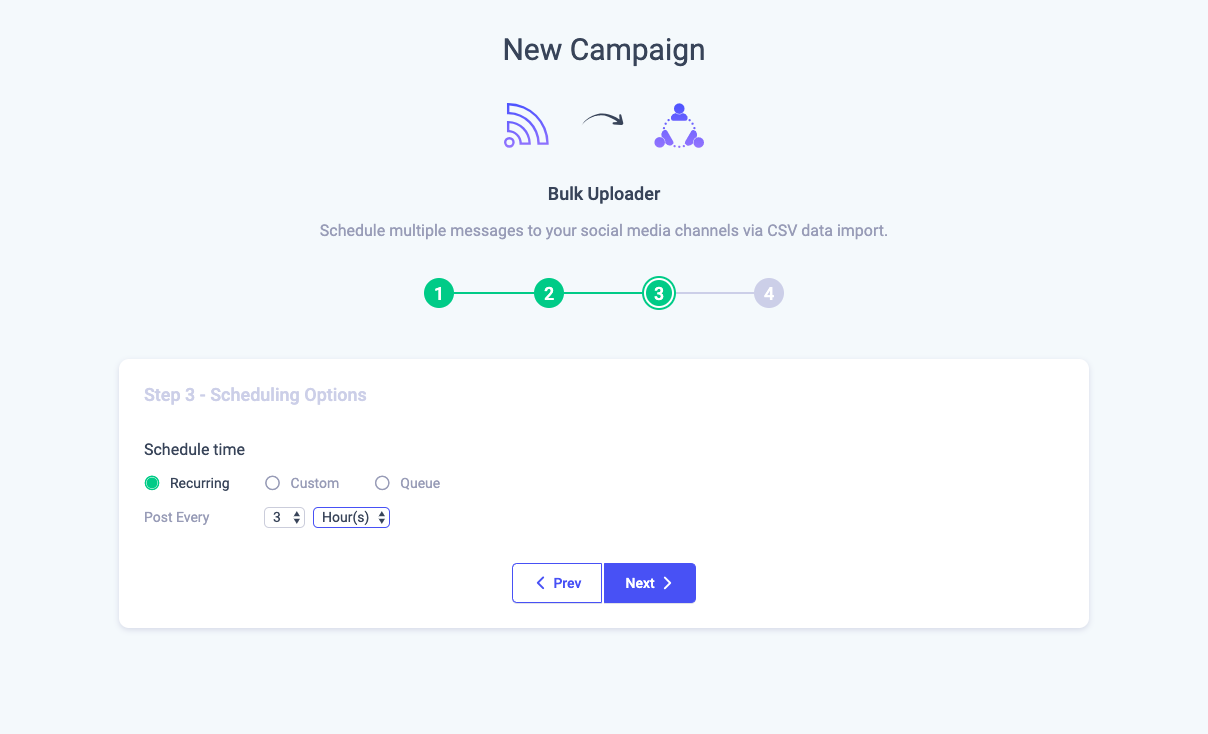
Recurring
If you choose this option, the date and time entered by you in the CSV file will be ignored and the posts in your file will be scheduled according to the recurring time that you select. You can choose to schedule your posts according to hours, days, or weeks.
For example, you could choose to post after every 3 hours by selecting this routine. As shown in the image below.
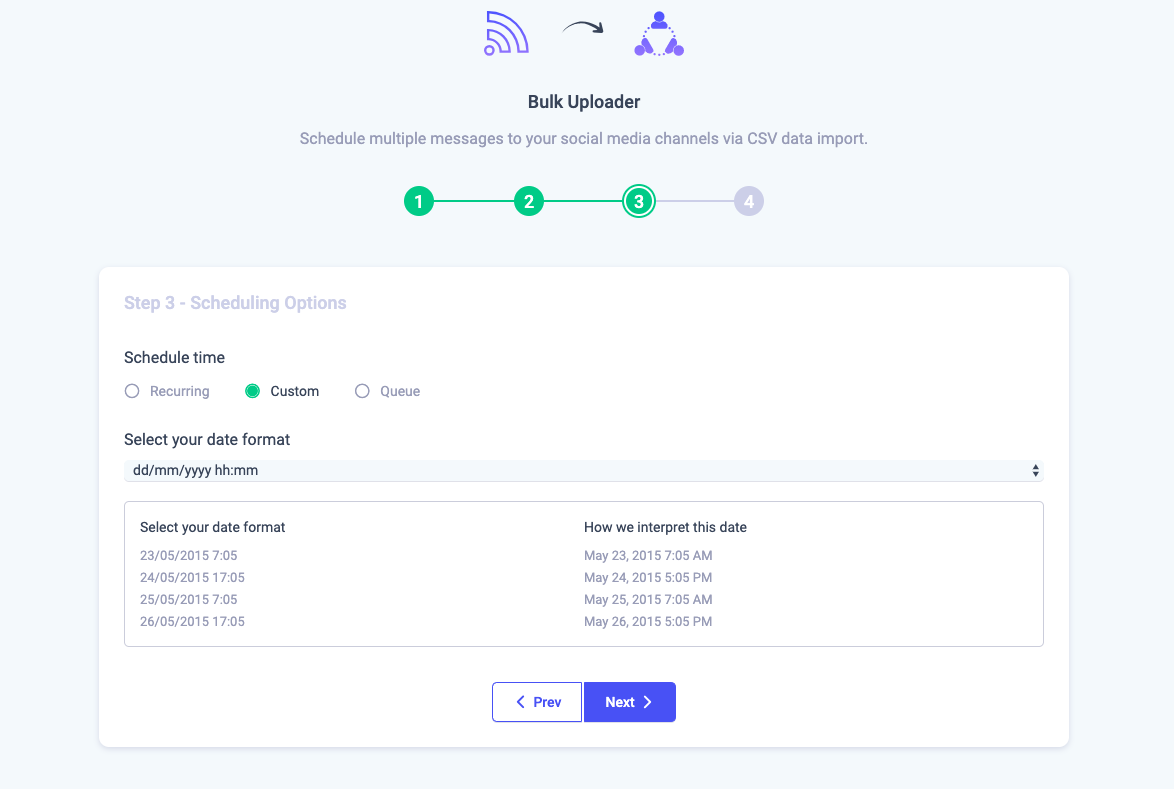
Custom
Here, you can allow the bulk uploader to make use of the date and time that you entered in the first column of your CSV file. It is very necessary for you to choose the same format as you chose in your CSV file. Your selected time format and how the system interprets can be shown in the image below.
Queue
The third and last option for you is to choose the queue scheduler. Upon choosing this option, the date and time entered by you in the CSV file will be ignored and the posts in your file will be scheduled according to the queue that you have created for social posting.
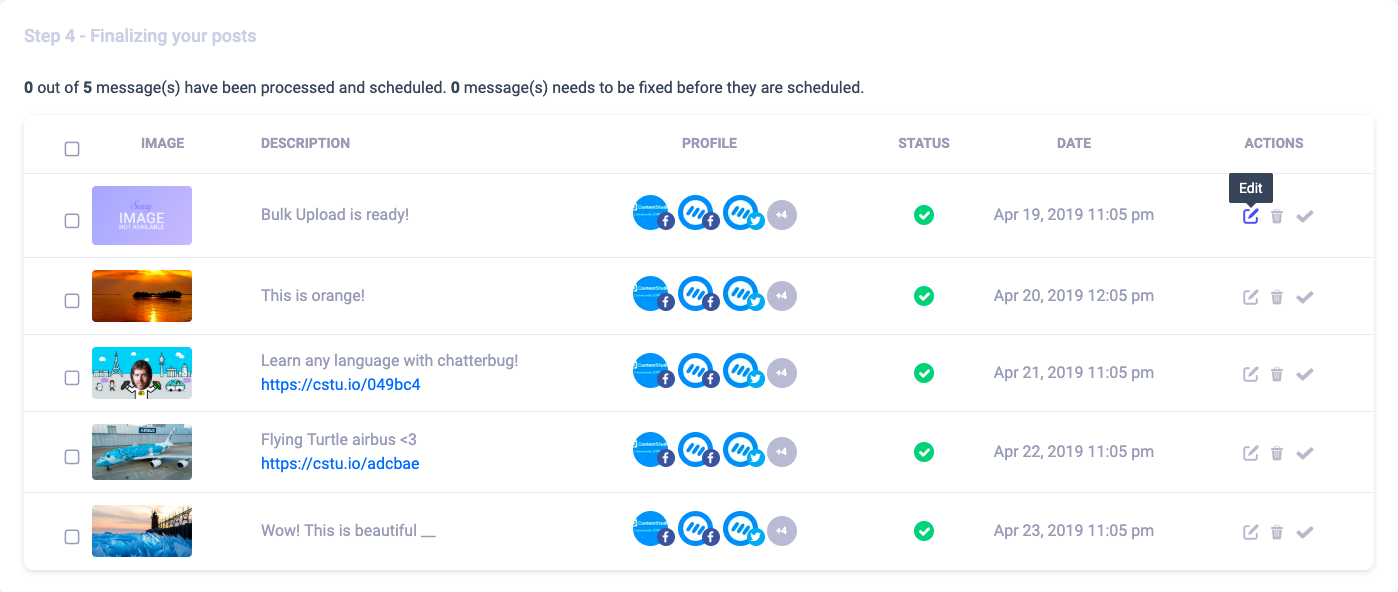
Finalizing your posts
After clicking on the Next button of step 3, your CSV file is thoroughly read and processed by the system.

Once the processing is finished, a list of all your scheduled posts appears in the tabular form. You can perform the following actions on your posts.
Edit an individual post
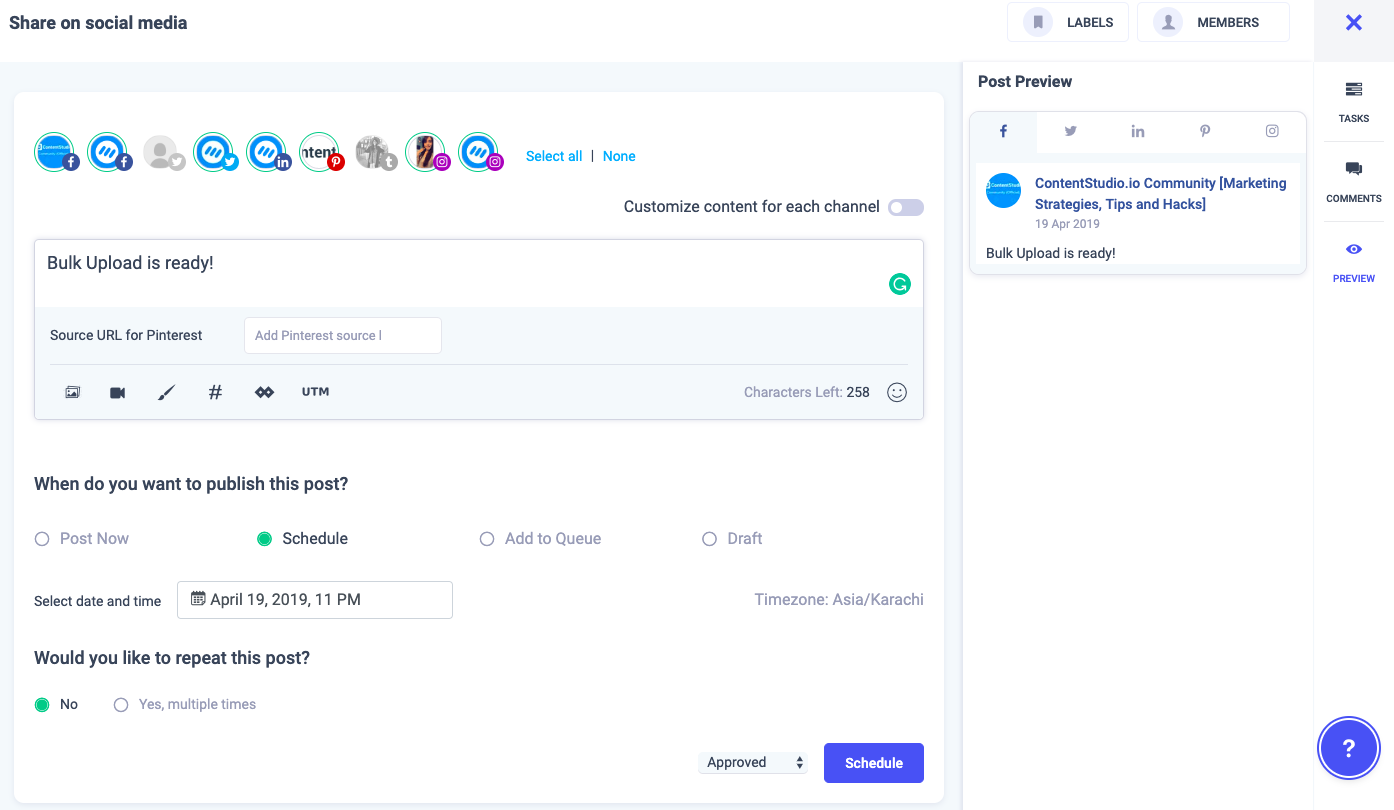
You can edit a post in this step by clicking on the pencil icon in front of the post under the Actions heading.
Your post will appear in the editor where you can change the text, add any link or image, change the time and date, change social channels; add labels, images, or tasks, etc.
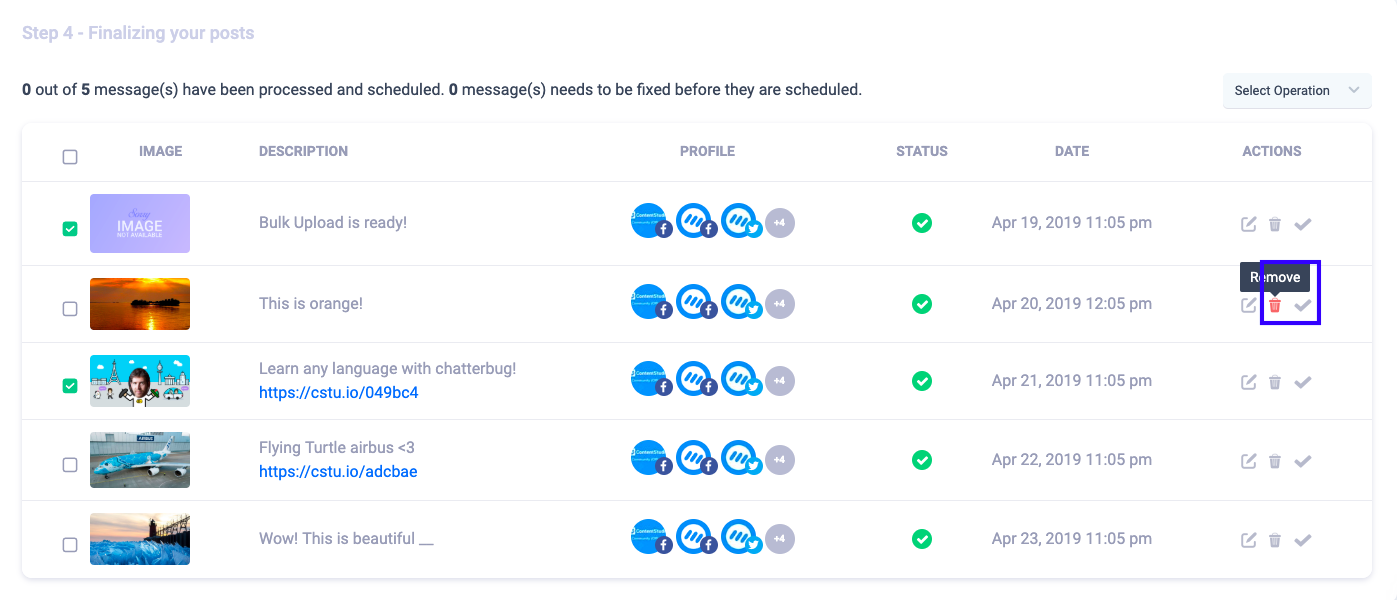
Approve/ Delete posts in bulk or Individually
You can select an individual post and approve or delete it by clicking the two buttons under the heading Actions.
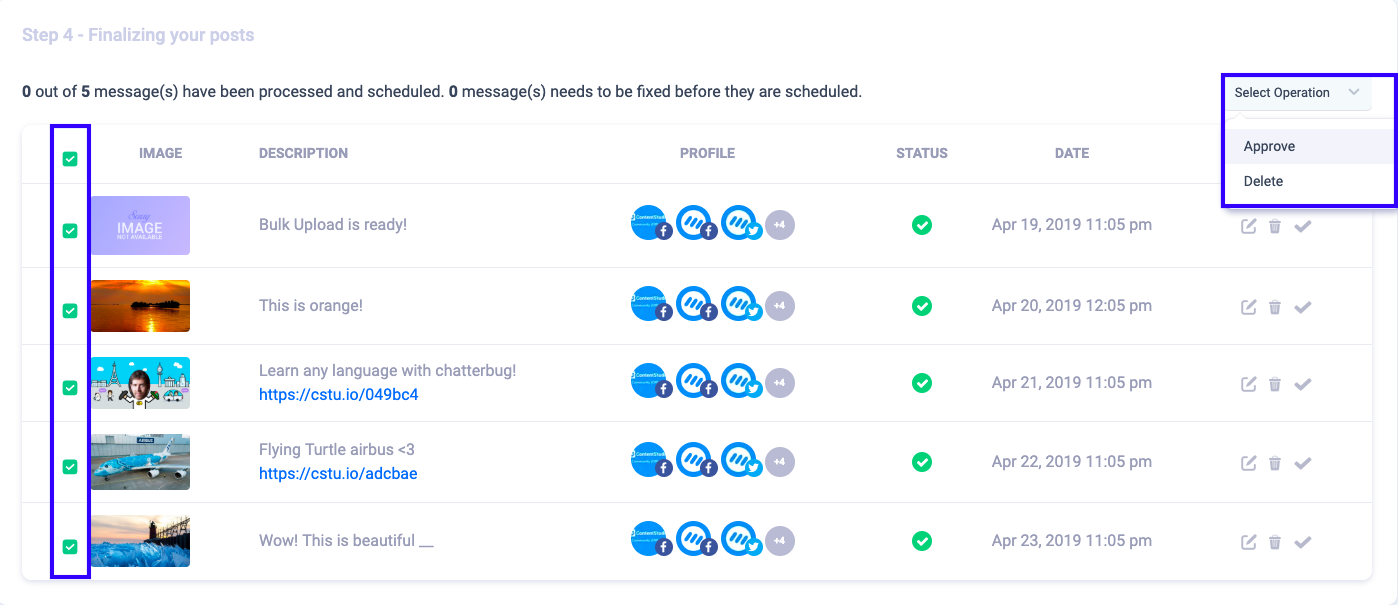
Or, you could also select all the files and perform a bulk operation (approving or deleting in bulk). For that, you have to select multiple files and Select Operation (the drop-down menu is located just above the table). For reference, see the image below.
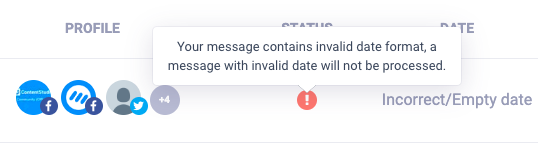
When your posts are processed by the system, it verifies the posts by showing you the status of each post. If you see a green tick in front of your posts, it means that your post is fine and it has no errors.
If you see a red cross in front of your posts, the most probable reason for this is if the date and time format in your CSV file and that you selected in your third step, don’t resonate. Make sure that both the formats are the same to avoid this error.

Wasiq Naeem
Wasiq Naeem is a content and digital marketing veteran who is passionate about his writing. Extensive research and producing high-quality content is just another day at the office for him.