The selling point of any great content management tool is how easily and neatly you can compose posts to be published. A flawless process in the composer module instills confidence in the creator’s mind to effortlessly create and publish engaging content.
The art of creating great, SEO law abiding content can only be achieved through an intelligent Composer module. The need for creating a new module from scratch was imminent as the new version surpasses its predecessor in practicality, performance and reach.
So let’s examine what the new composer is all about.
Introduction
In our effort, we set, achieved and then transcended our own expectations in producing a remarkable composer module which assists you in creating amazing content. This composer gives you a wholesome sense of content creation with the additional knowledge of how it would be performing once published.
With a futuristic design layout and great accessibility options, this composer is your new front in content management. The composer consists of three sections
- Composing a social post
- Composing a blog post
Composing a Blog Post
According to a survey by Hubspot, 53% of marketers say blogging is their top content marketing priority. This number raised to 66% when marketers admit to using blogs in their social media content.
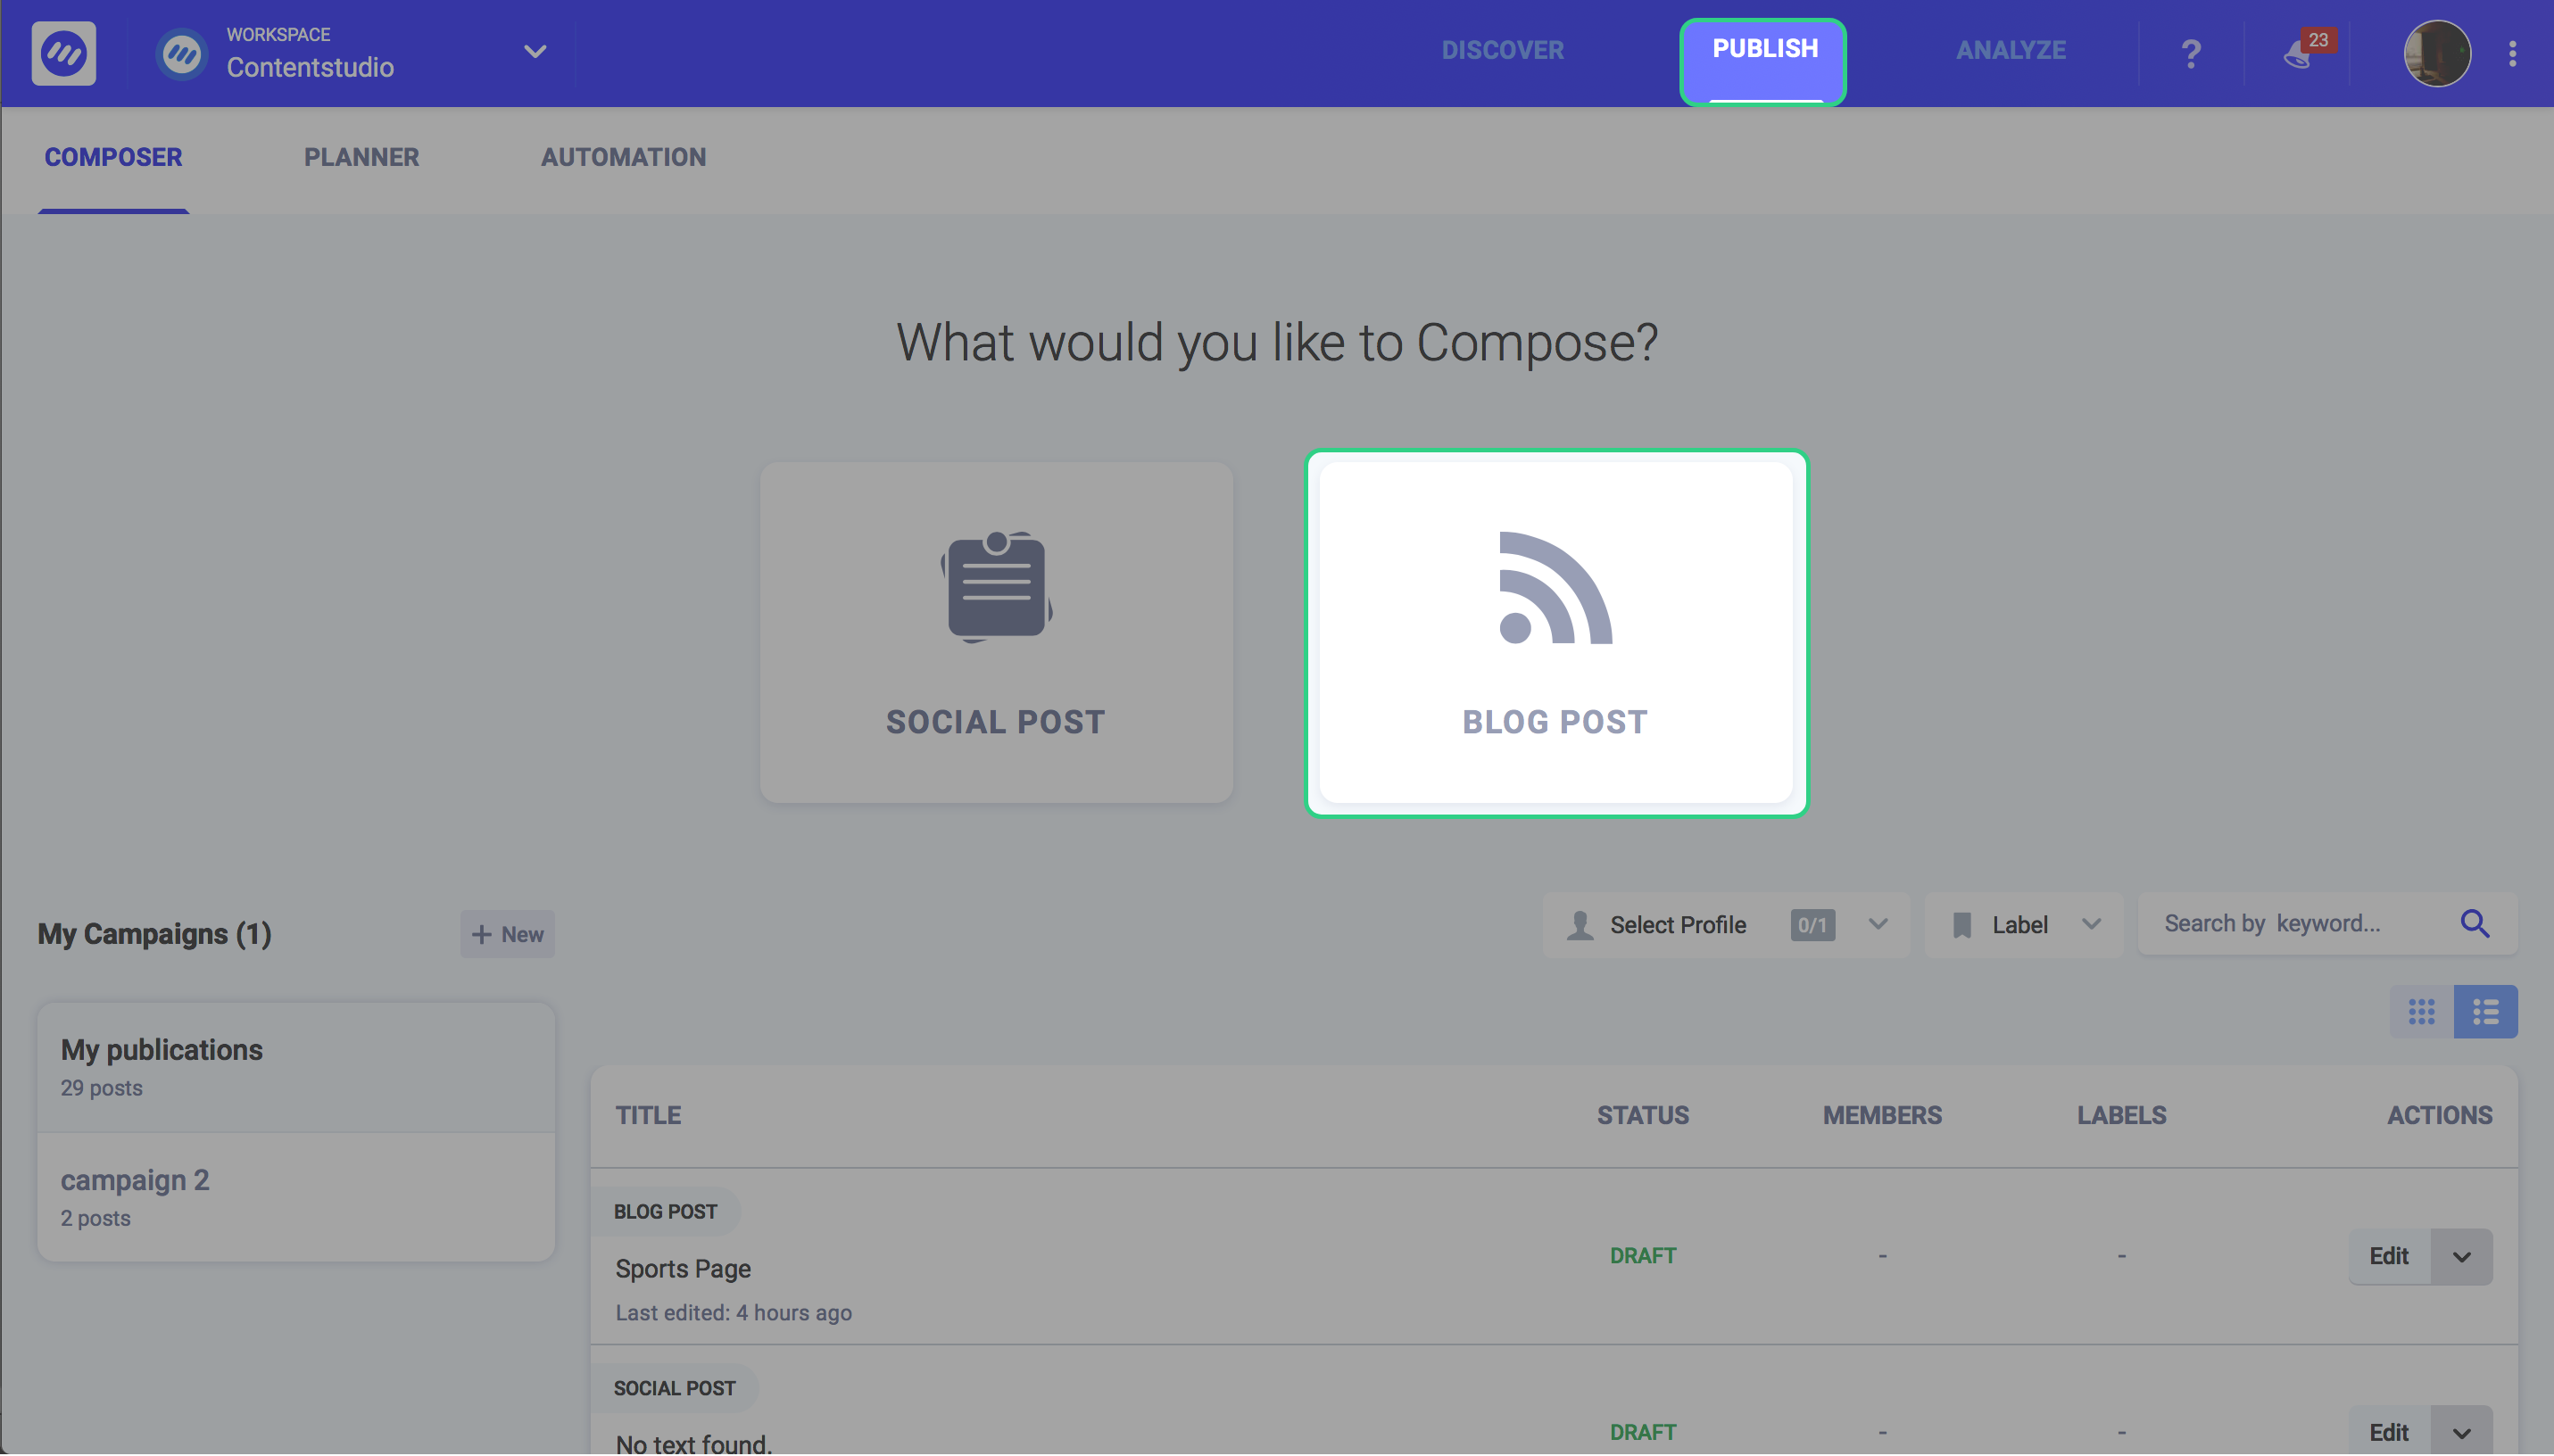
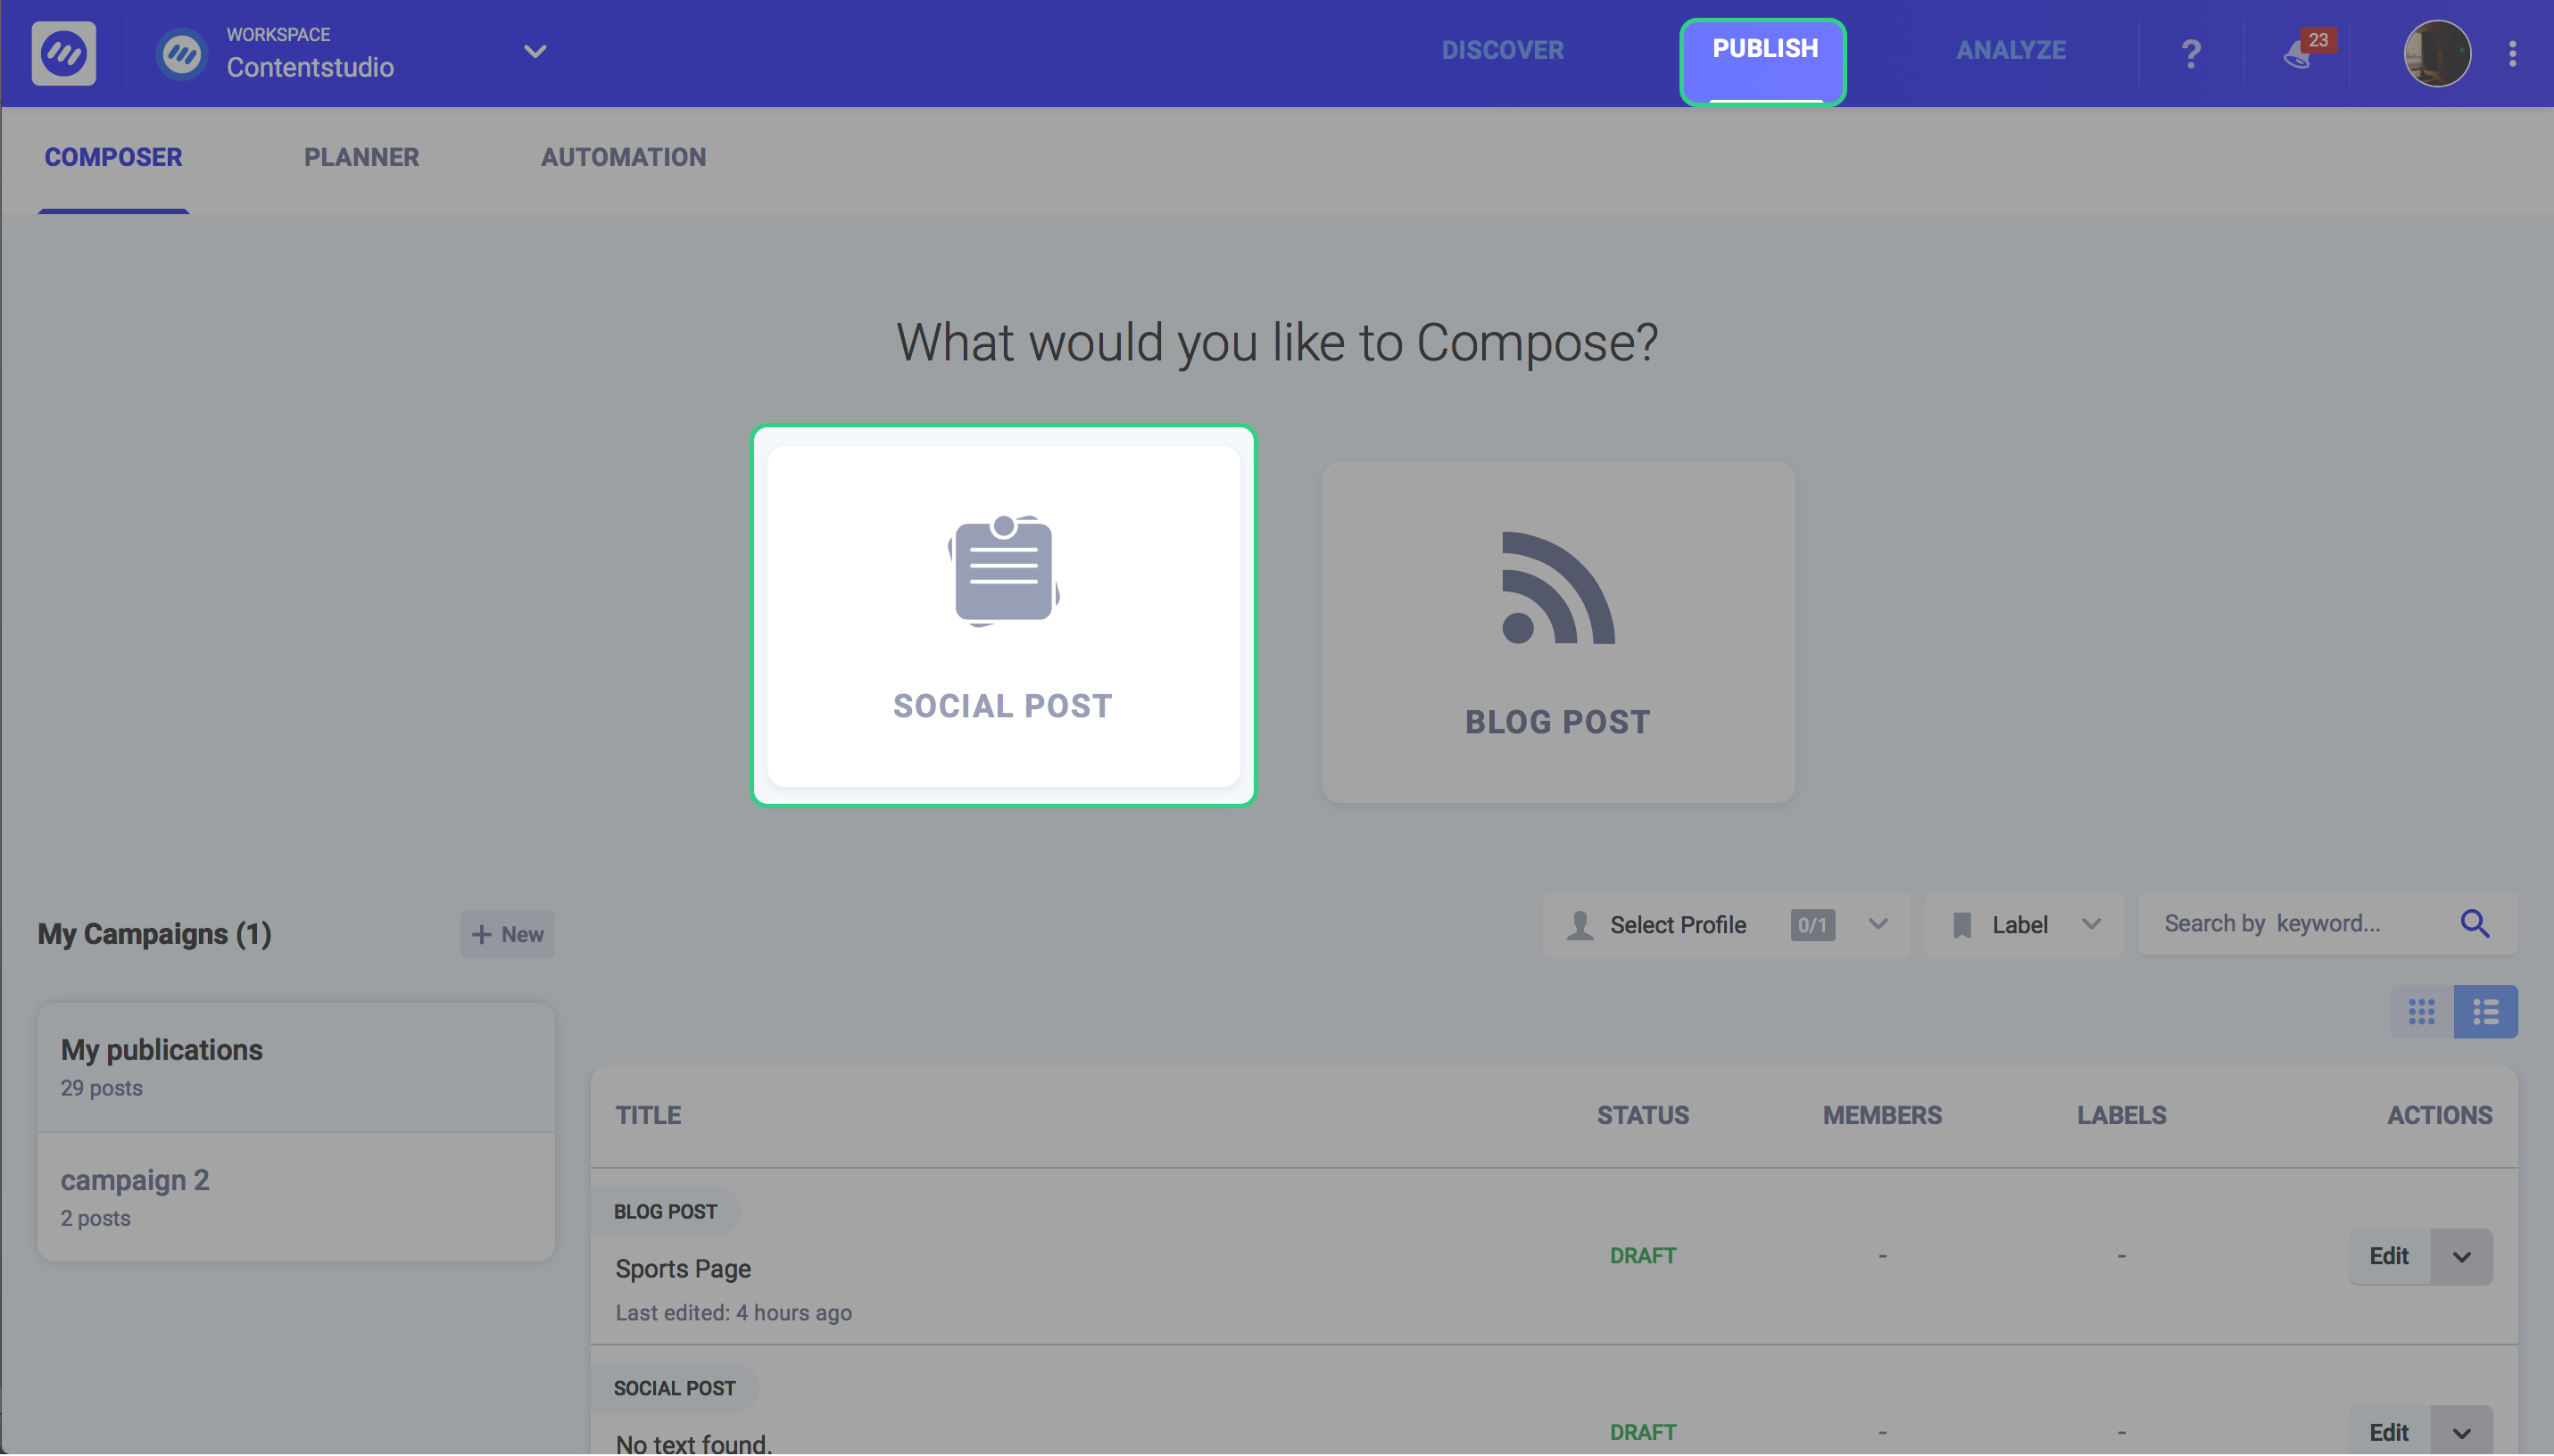
There is no denying the power a beautifully composed blog post holds. Click on “Publish” and then “Blog post” to enter the editor.
The first thing you will notice is that we have included the “Draft” feature in this composer. This has strengthened the composer significantly in a way that you can compose blog posts and save them as a draft to review, edit or publish later. This option was missing in the previous version.
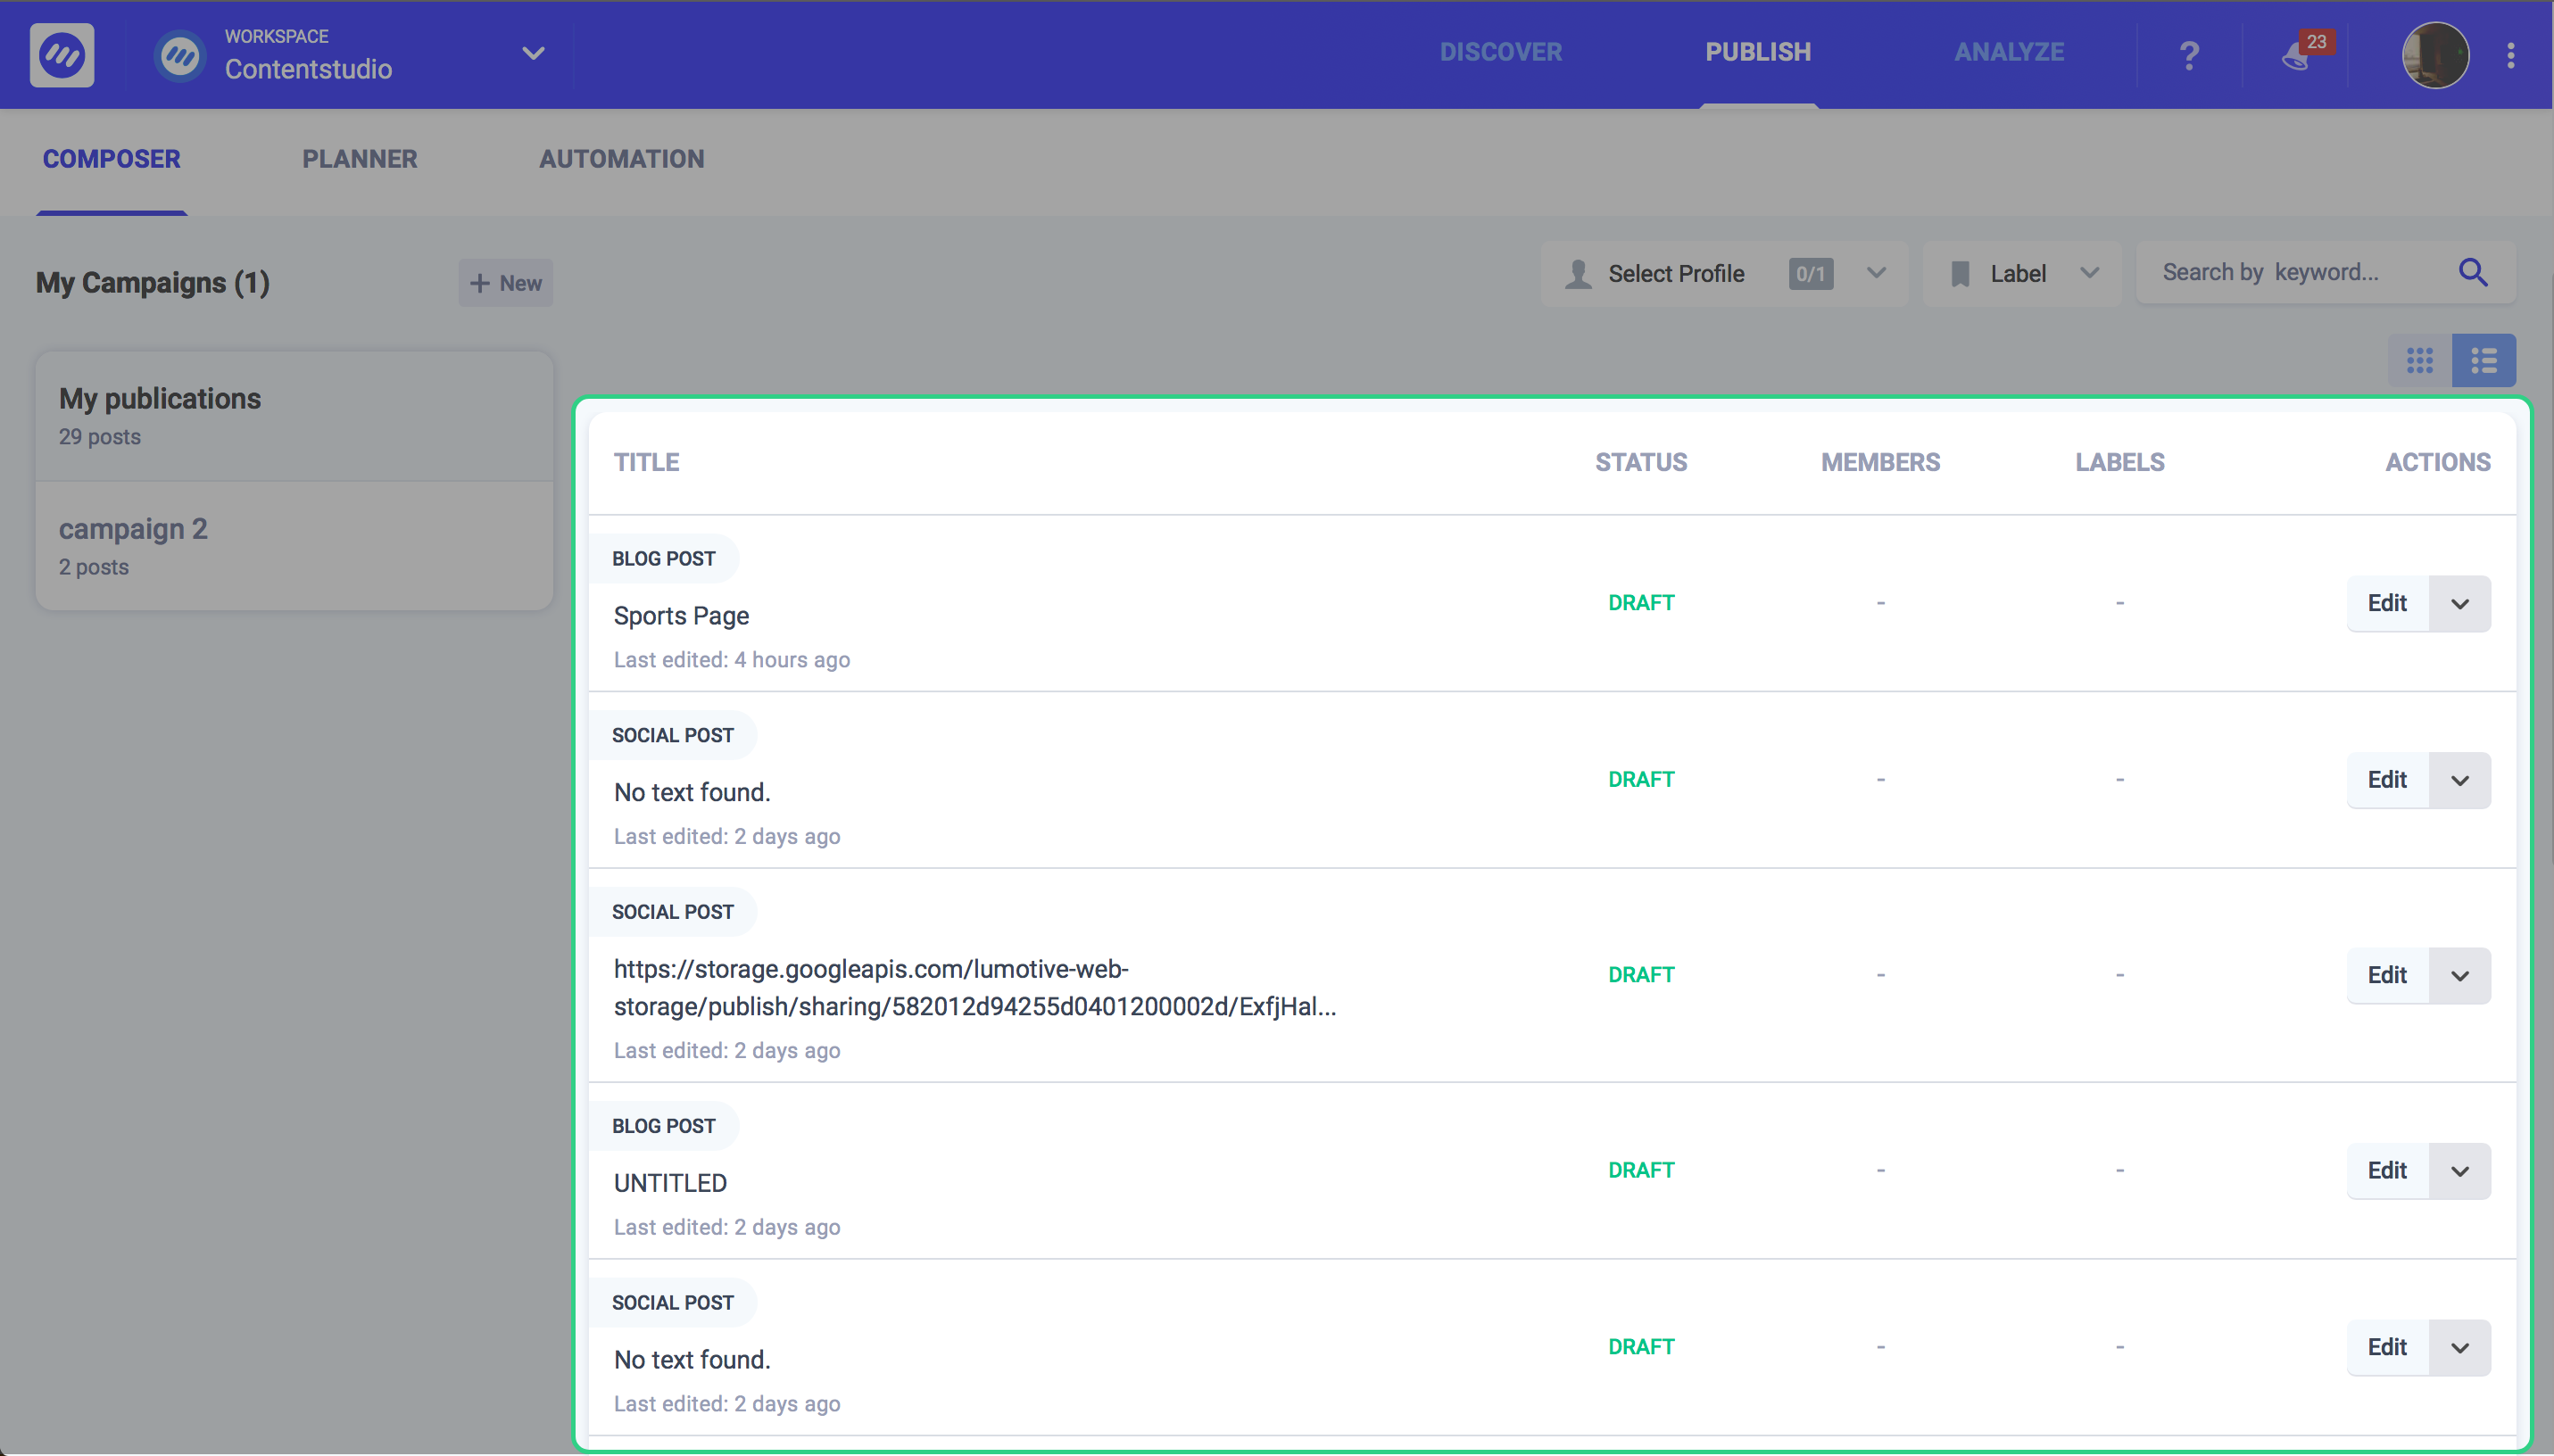
You will see a list of draft posts along with their status, members who composed them, labels and actionable items (edit, delete, and move) against them. You can also shortlist these drafts w.r.t the social profiles against which they were created, distinct labels or keywords.
By clicking on the “Blog post” icon, you will be redirected to the editor.
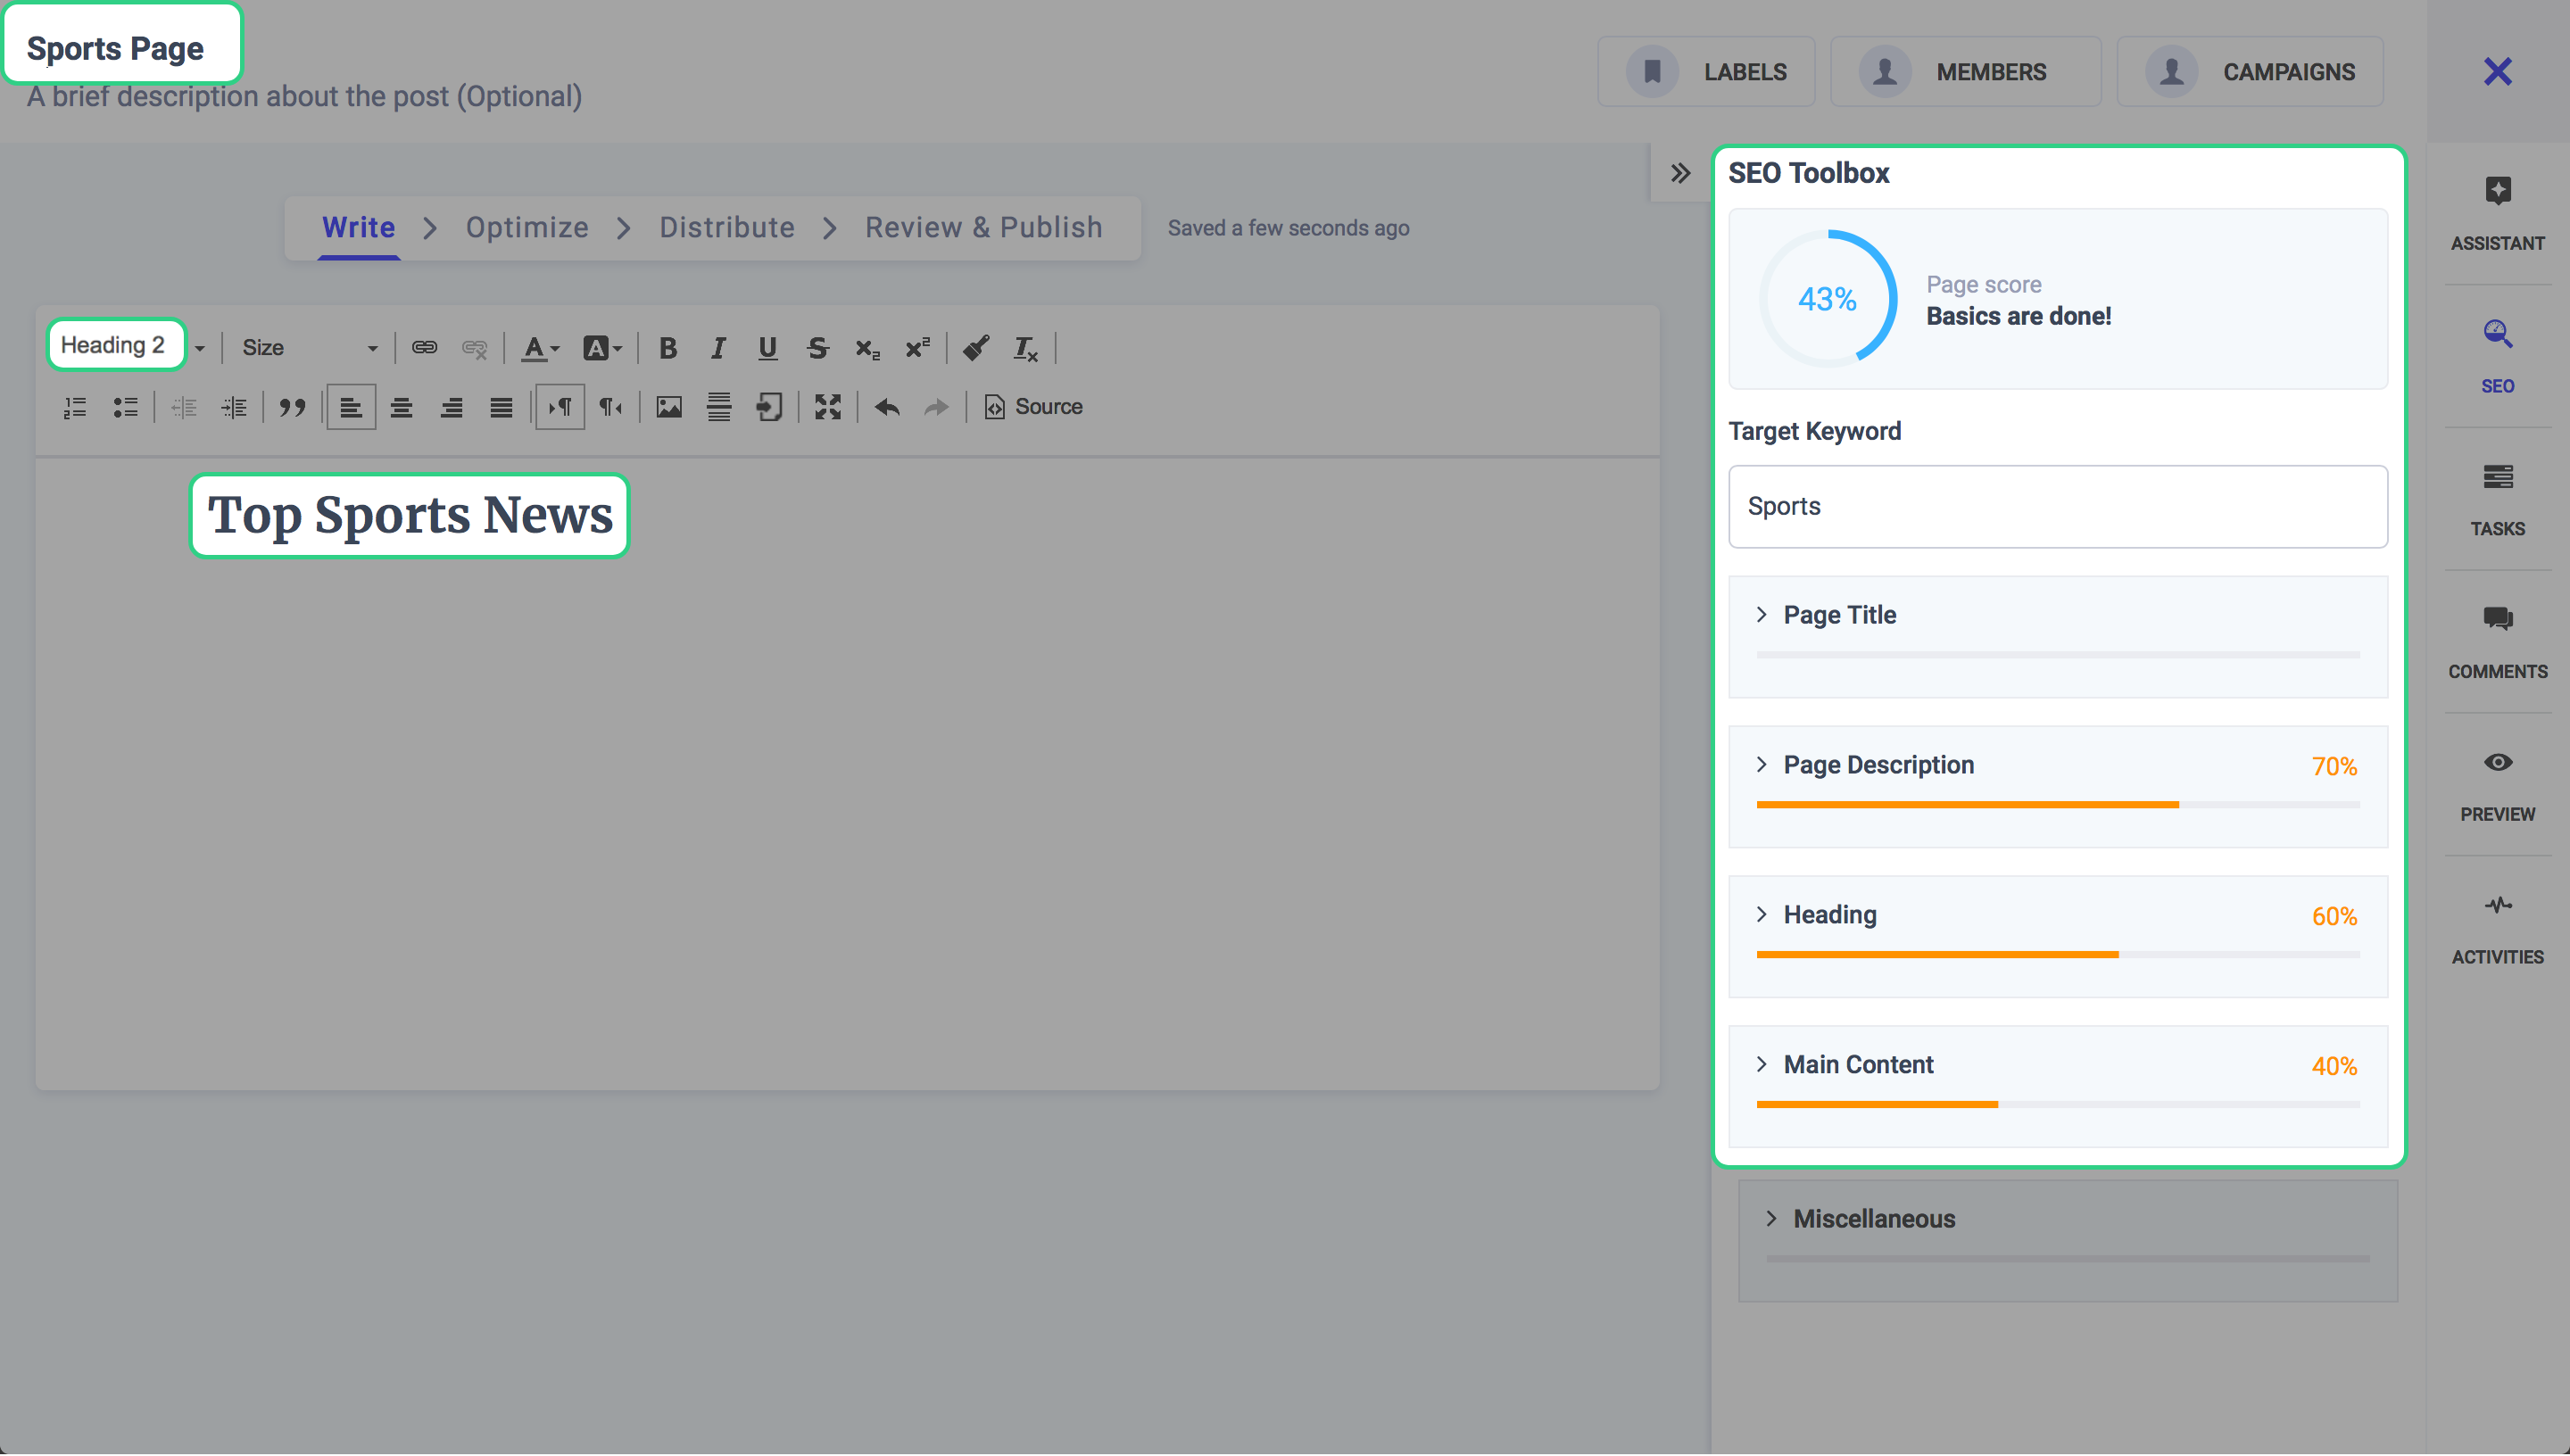
The blog composition consists of 4 steps namely Write, Optimize, Distribute, Review & Publish.

Let’s start with the first section i.e. writing.
Write
This section is essentially the composer, where you can create the initial draft of your Blog post. To the top right of your composer screen, you have the options to assign this post a label, members, and campaigns as described previously.
The editor gives you all the standard options to edit and modify your text. Options such as headings, font size, link, text and background color, all the way to adding images, files and sources are available to make it as presentable as possible.
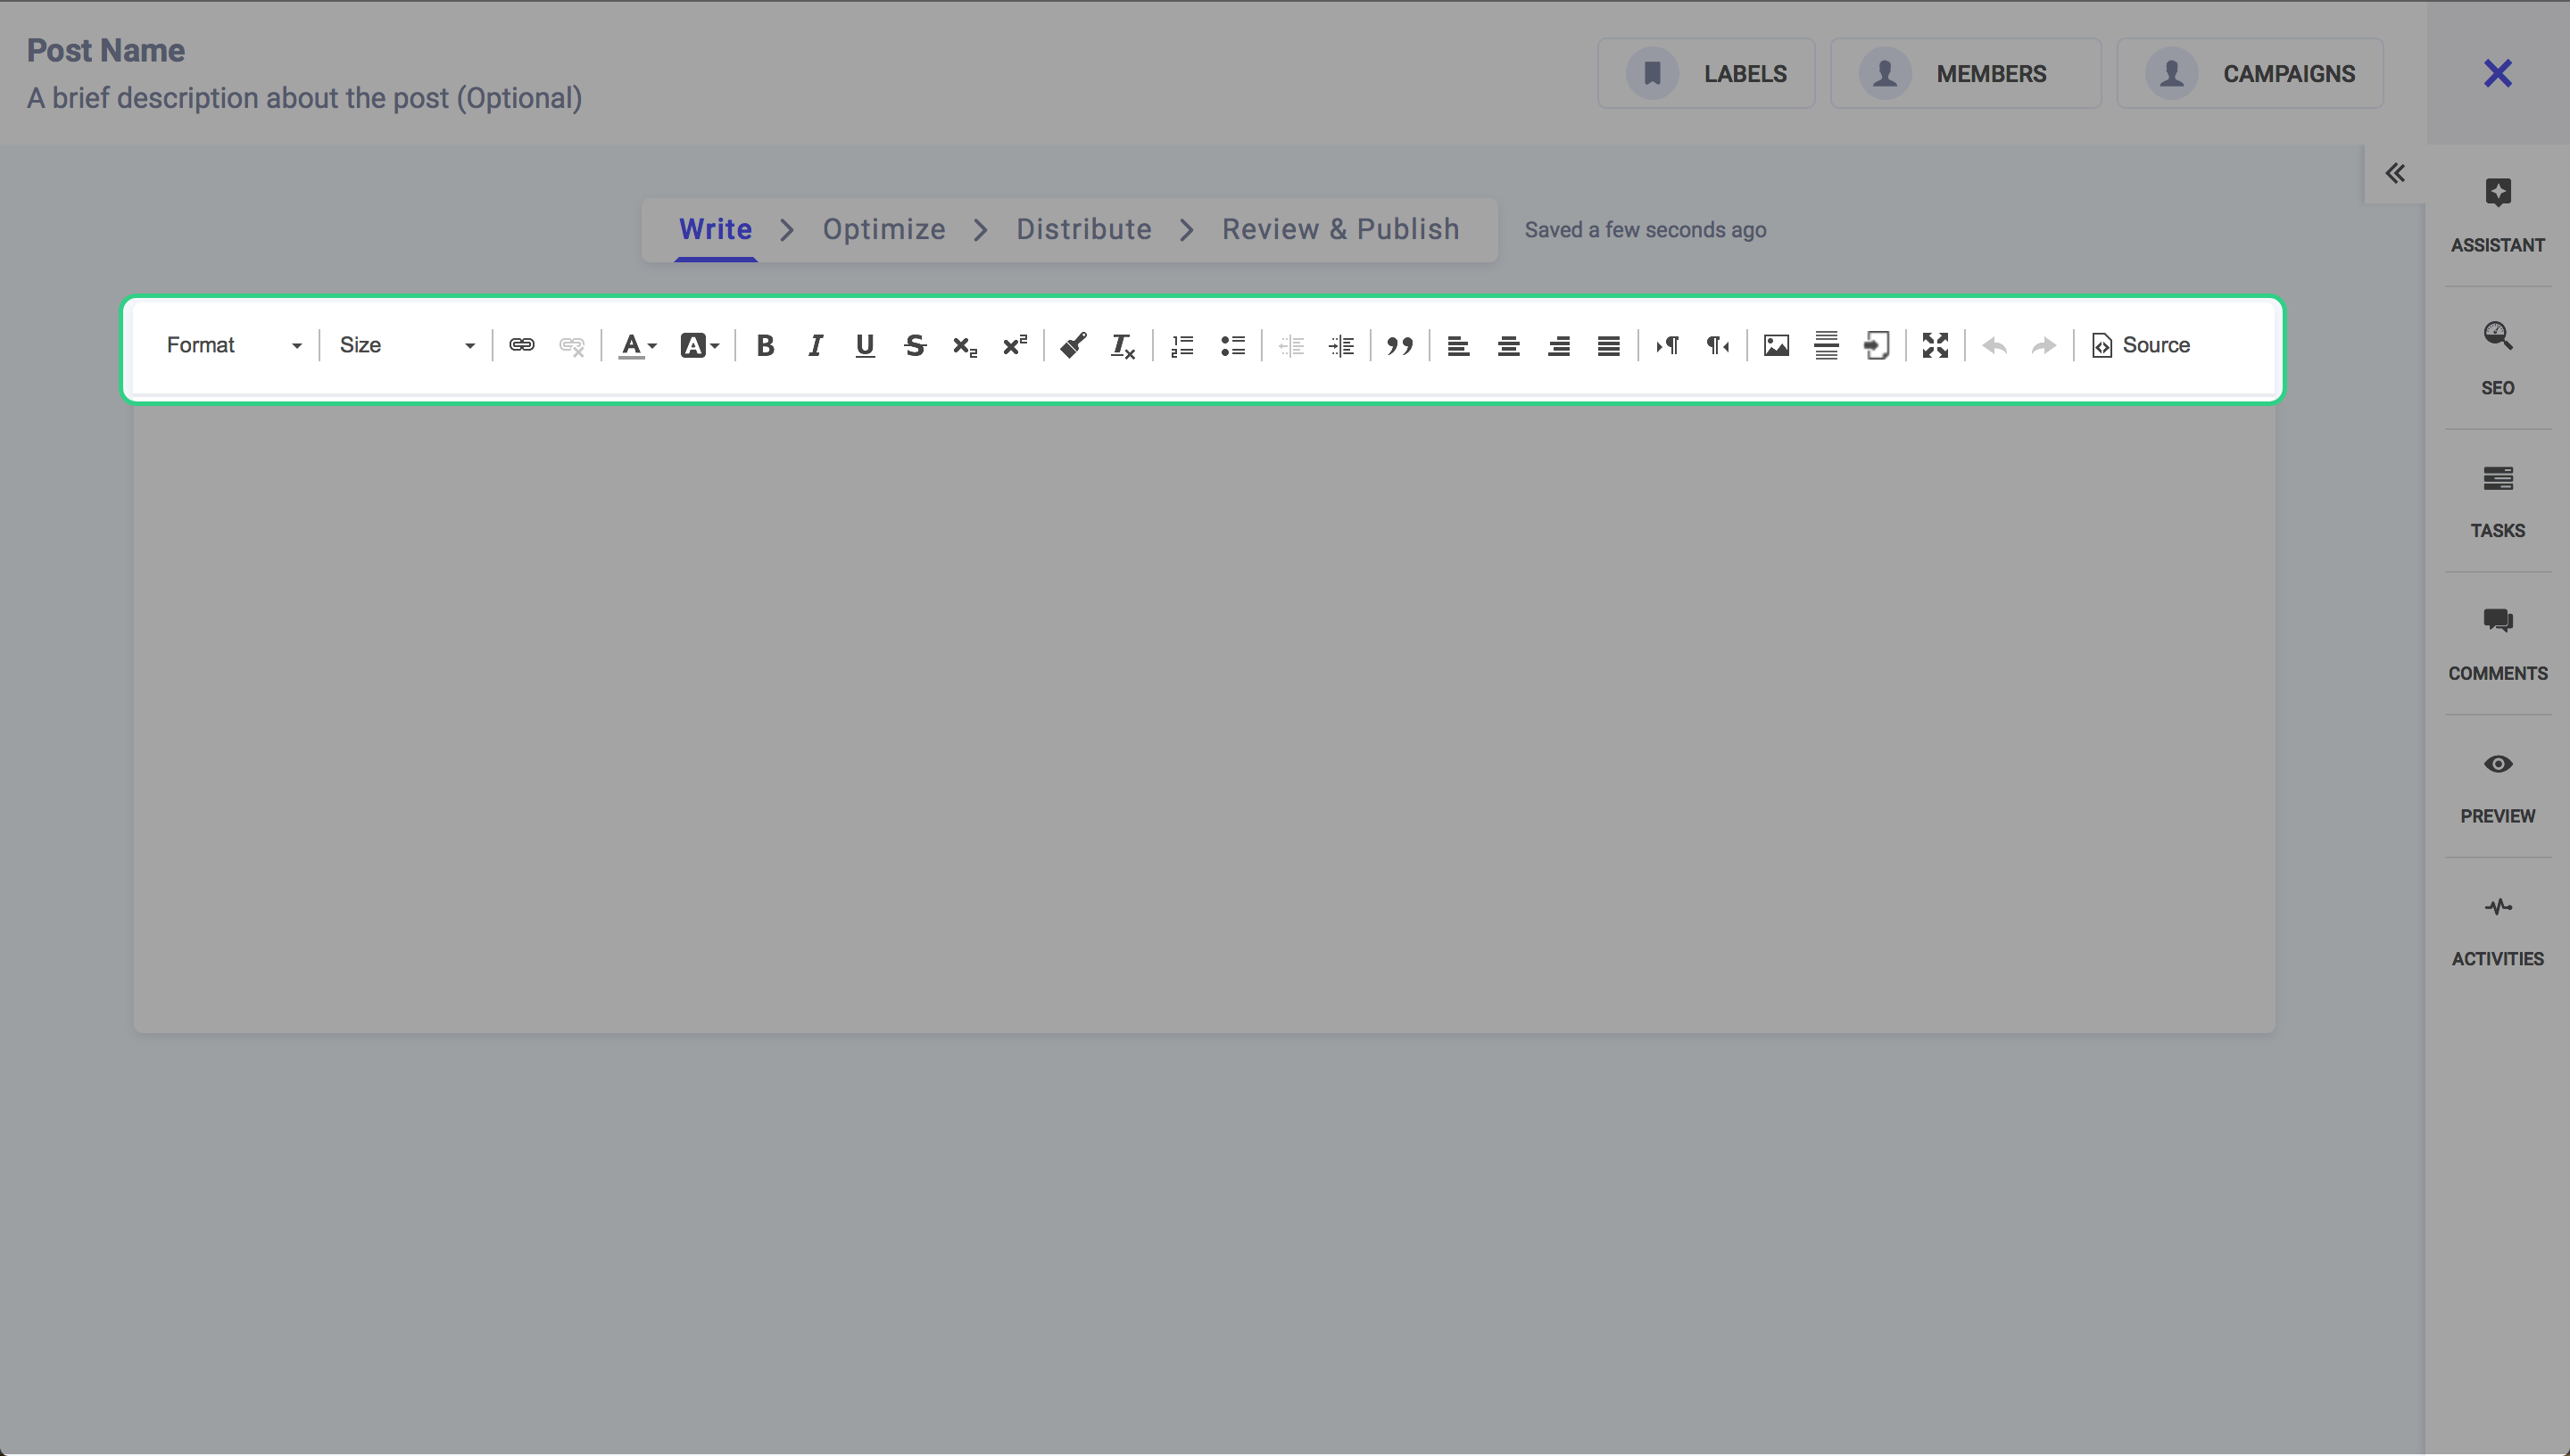
The toolbar to the right of your screen provides a different set of options to aid you in creating and analyzing amazing content.
Let us explore these options and see what they have to offer.
The first thing you need to do is give a befitting name to your post and a description so you can identify it in the future. This can be done by writing a post name on the top left corner of your screen.
It is important to keep the content SEO optimized from the start, so your post name and description should include the target keyword around which you are creating the post.
Assistant
The assistant is the quickest way to curate content. You can simply search the web using a specific keyword that suits your content strategy. The search returns the content that is relevant to the keyword.
You can then sort this content w.r.t trending score, time and location. Once you have shortlisted your desired content, just drag and drop this article to the composer section.
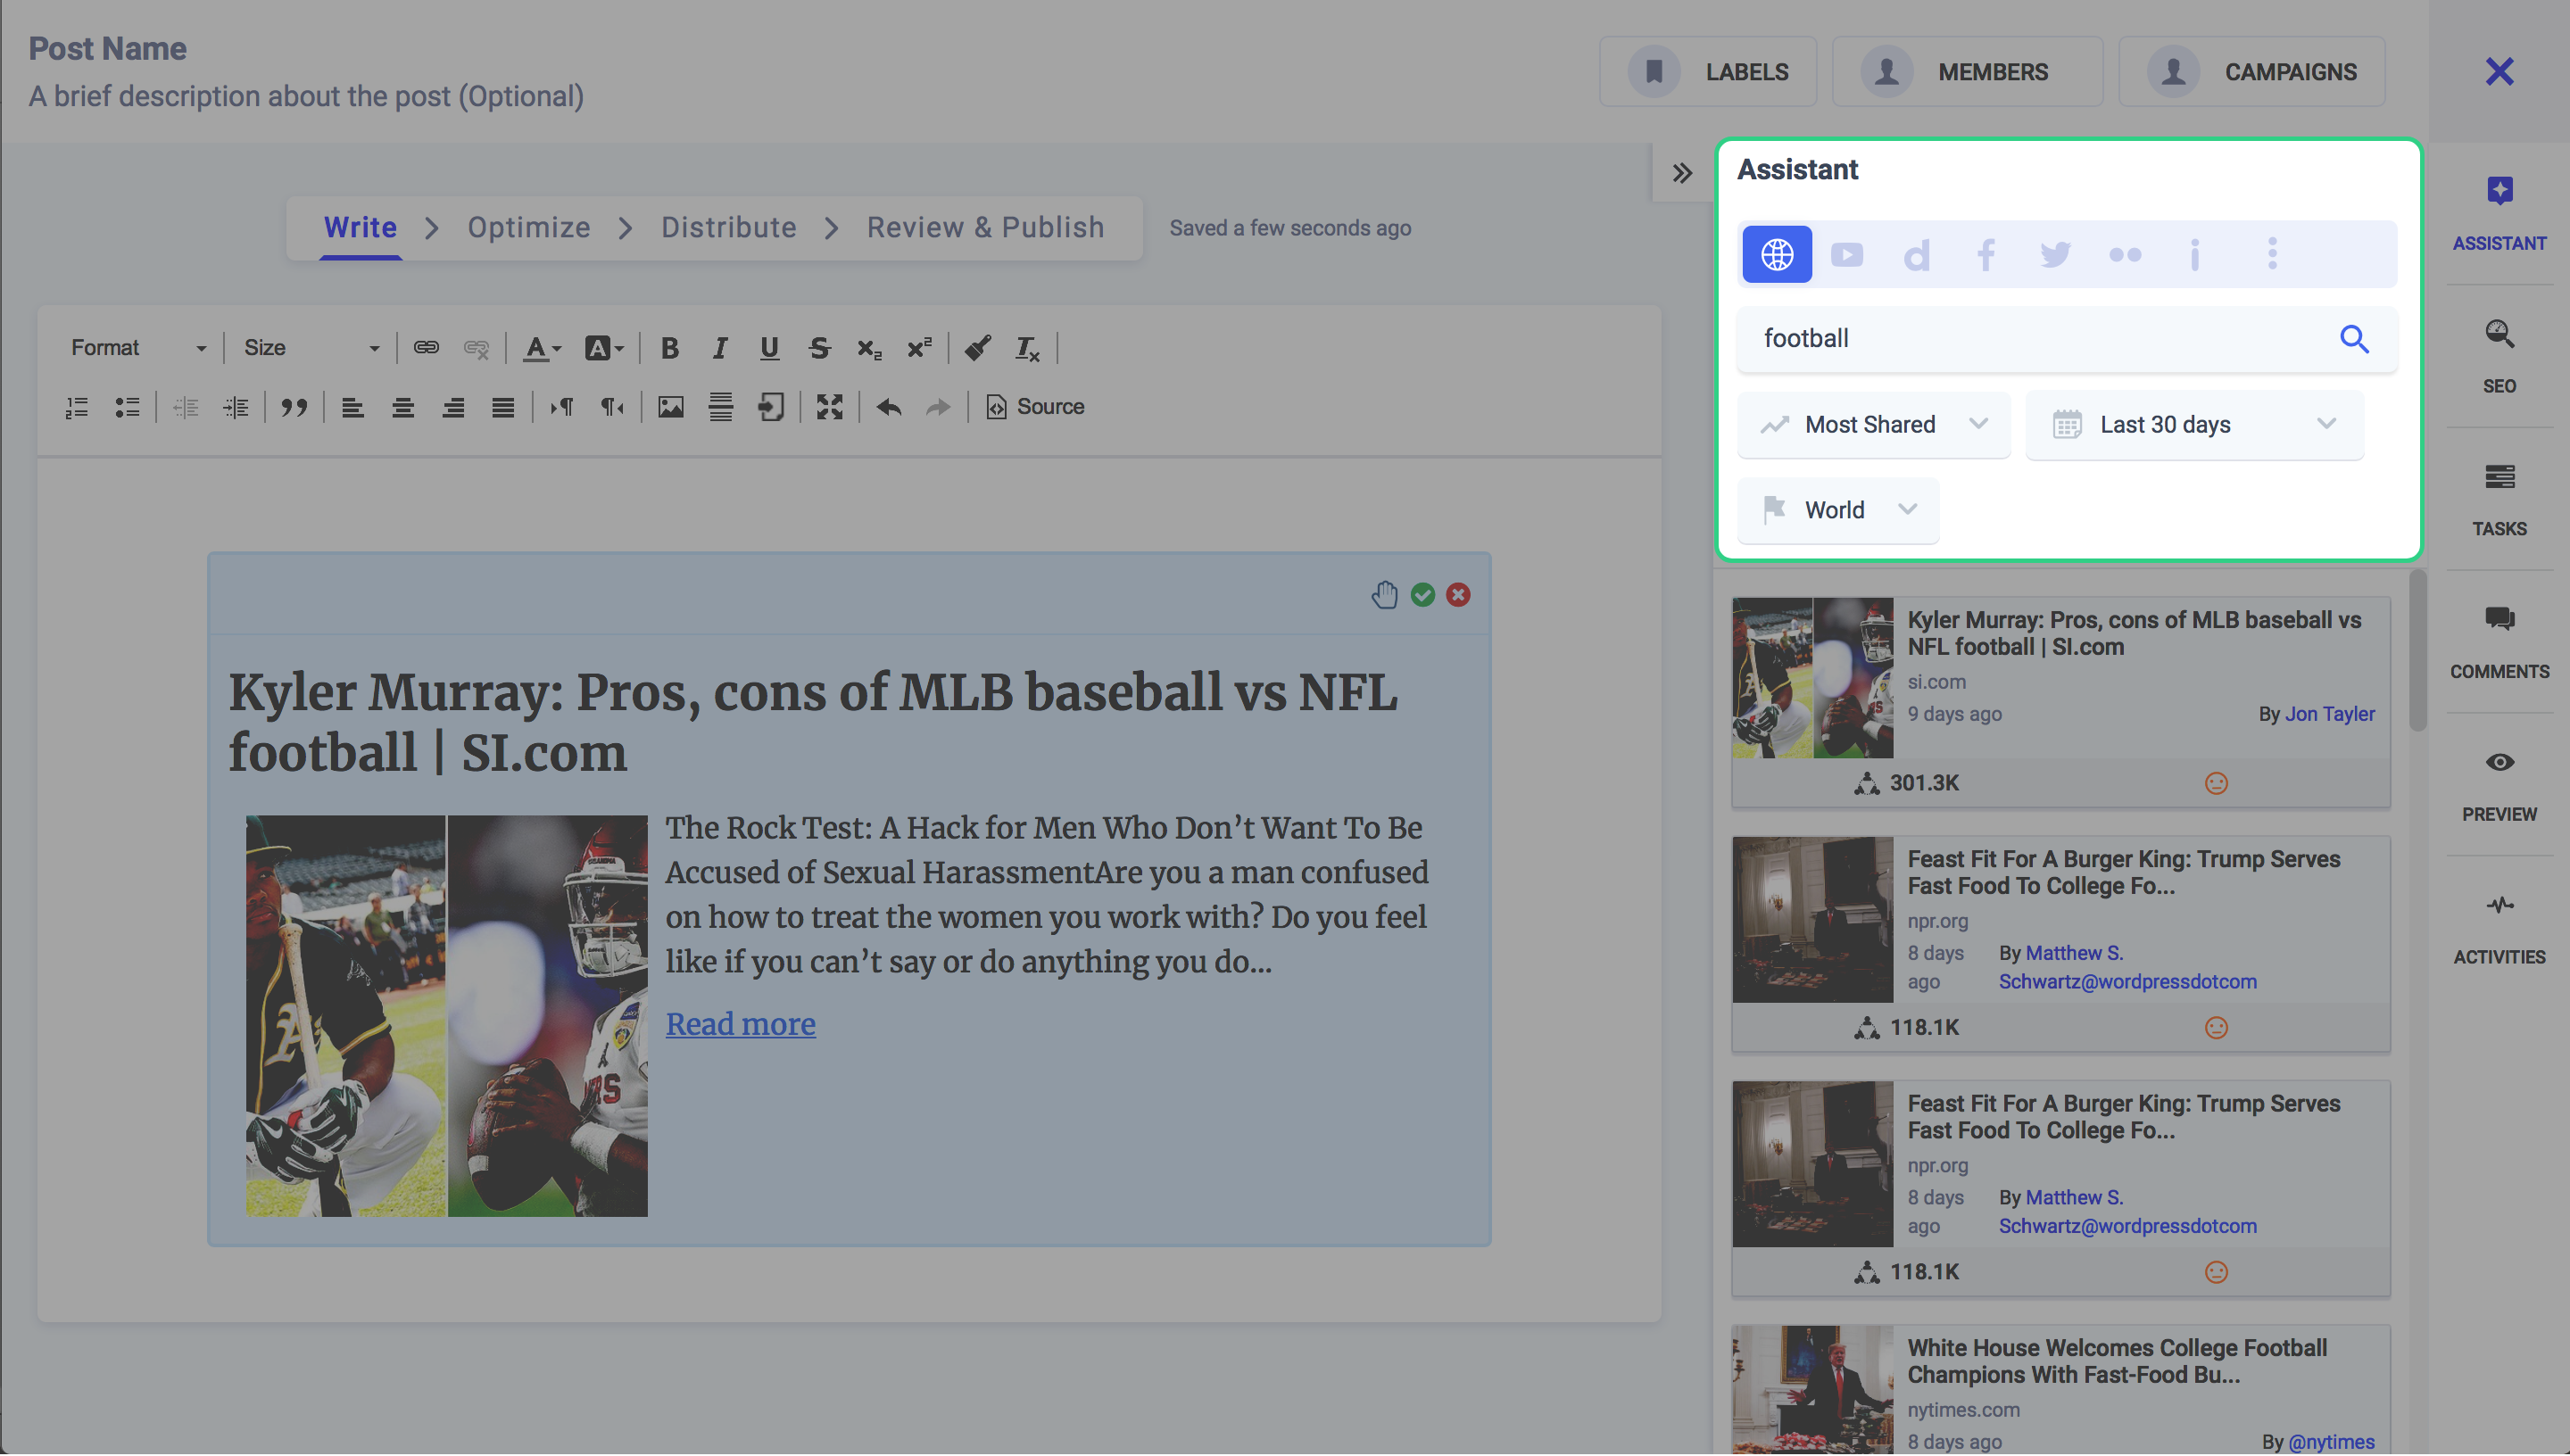
An engagement score and a sentiment are also associated with each article to help you better choose the content you share. You can also choose the type of content you want to search from a wide set of sources e.g. the web, Youtube, Dailymotion, Facebook, Twitter, Flicker, Imgur, Pixabay, Giphy, Quotes, and Pocket.
Tasks
Consider a scenario where you are working on a piece which needs revision from an expert in your team. The “Tasks” sections can initiate a job mid-composition or at completion. You can tag the people in your team to perform specific duty on the content. This allows for better management of content while it is being composed.
The assigned team members will be notified of this activity. They can then take appropriate action and mark the task as completed which will again be notified to the task initiator.
Comments
The “Comment” section helps team members indulge in useful conversations pertaining to the draft at hand. People can leave constructive criticism or notes which will help the writer improve their piece. Again you can tag team members in comments to let them know you have mentioned them. A notification will be generated in their respective account.
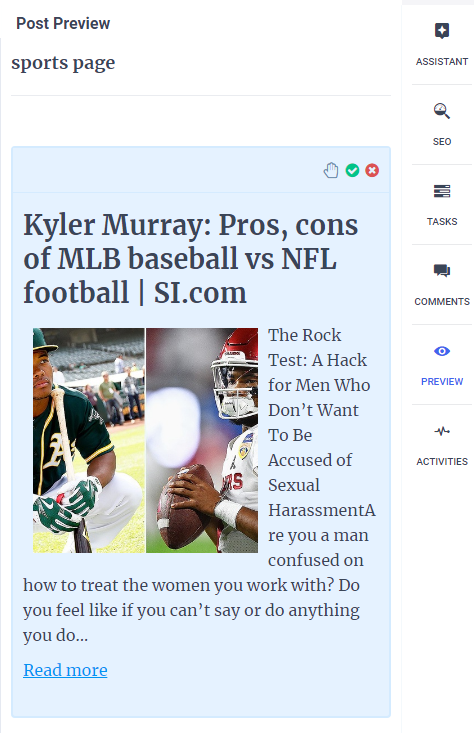
Preview
In the preview section, you can view how your blog post will actually look like once published. There are a lot of small errors that are oblivious to the writer. The preview gives you a wholesome view of how each section, heading, image, and text will look like in its final form.
Activities
The activities tab shows the cumulative affairs of a project. All completed tasks, new tasks, the status of tasks as well as the status of the post is recorded here.
Optimize
The next section is where you can optimize your content to make it more appealing to the reader. One of many ways you can achieve that is by adding an appropriate feature image to your article which complements the content in your blog.
You can also drag and drop a pre-designed image or create a new one using the built-in Pixie Editor.
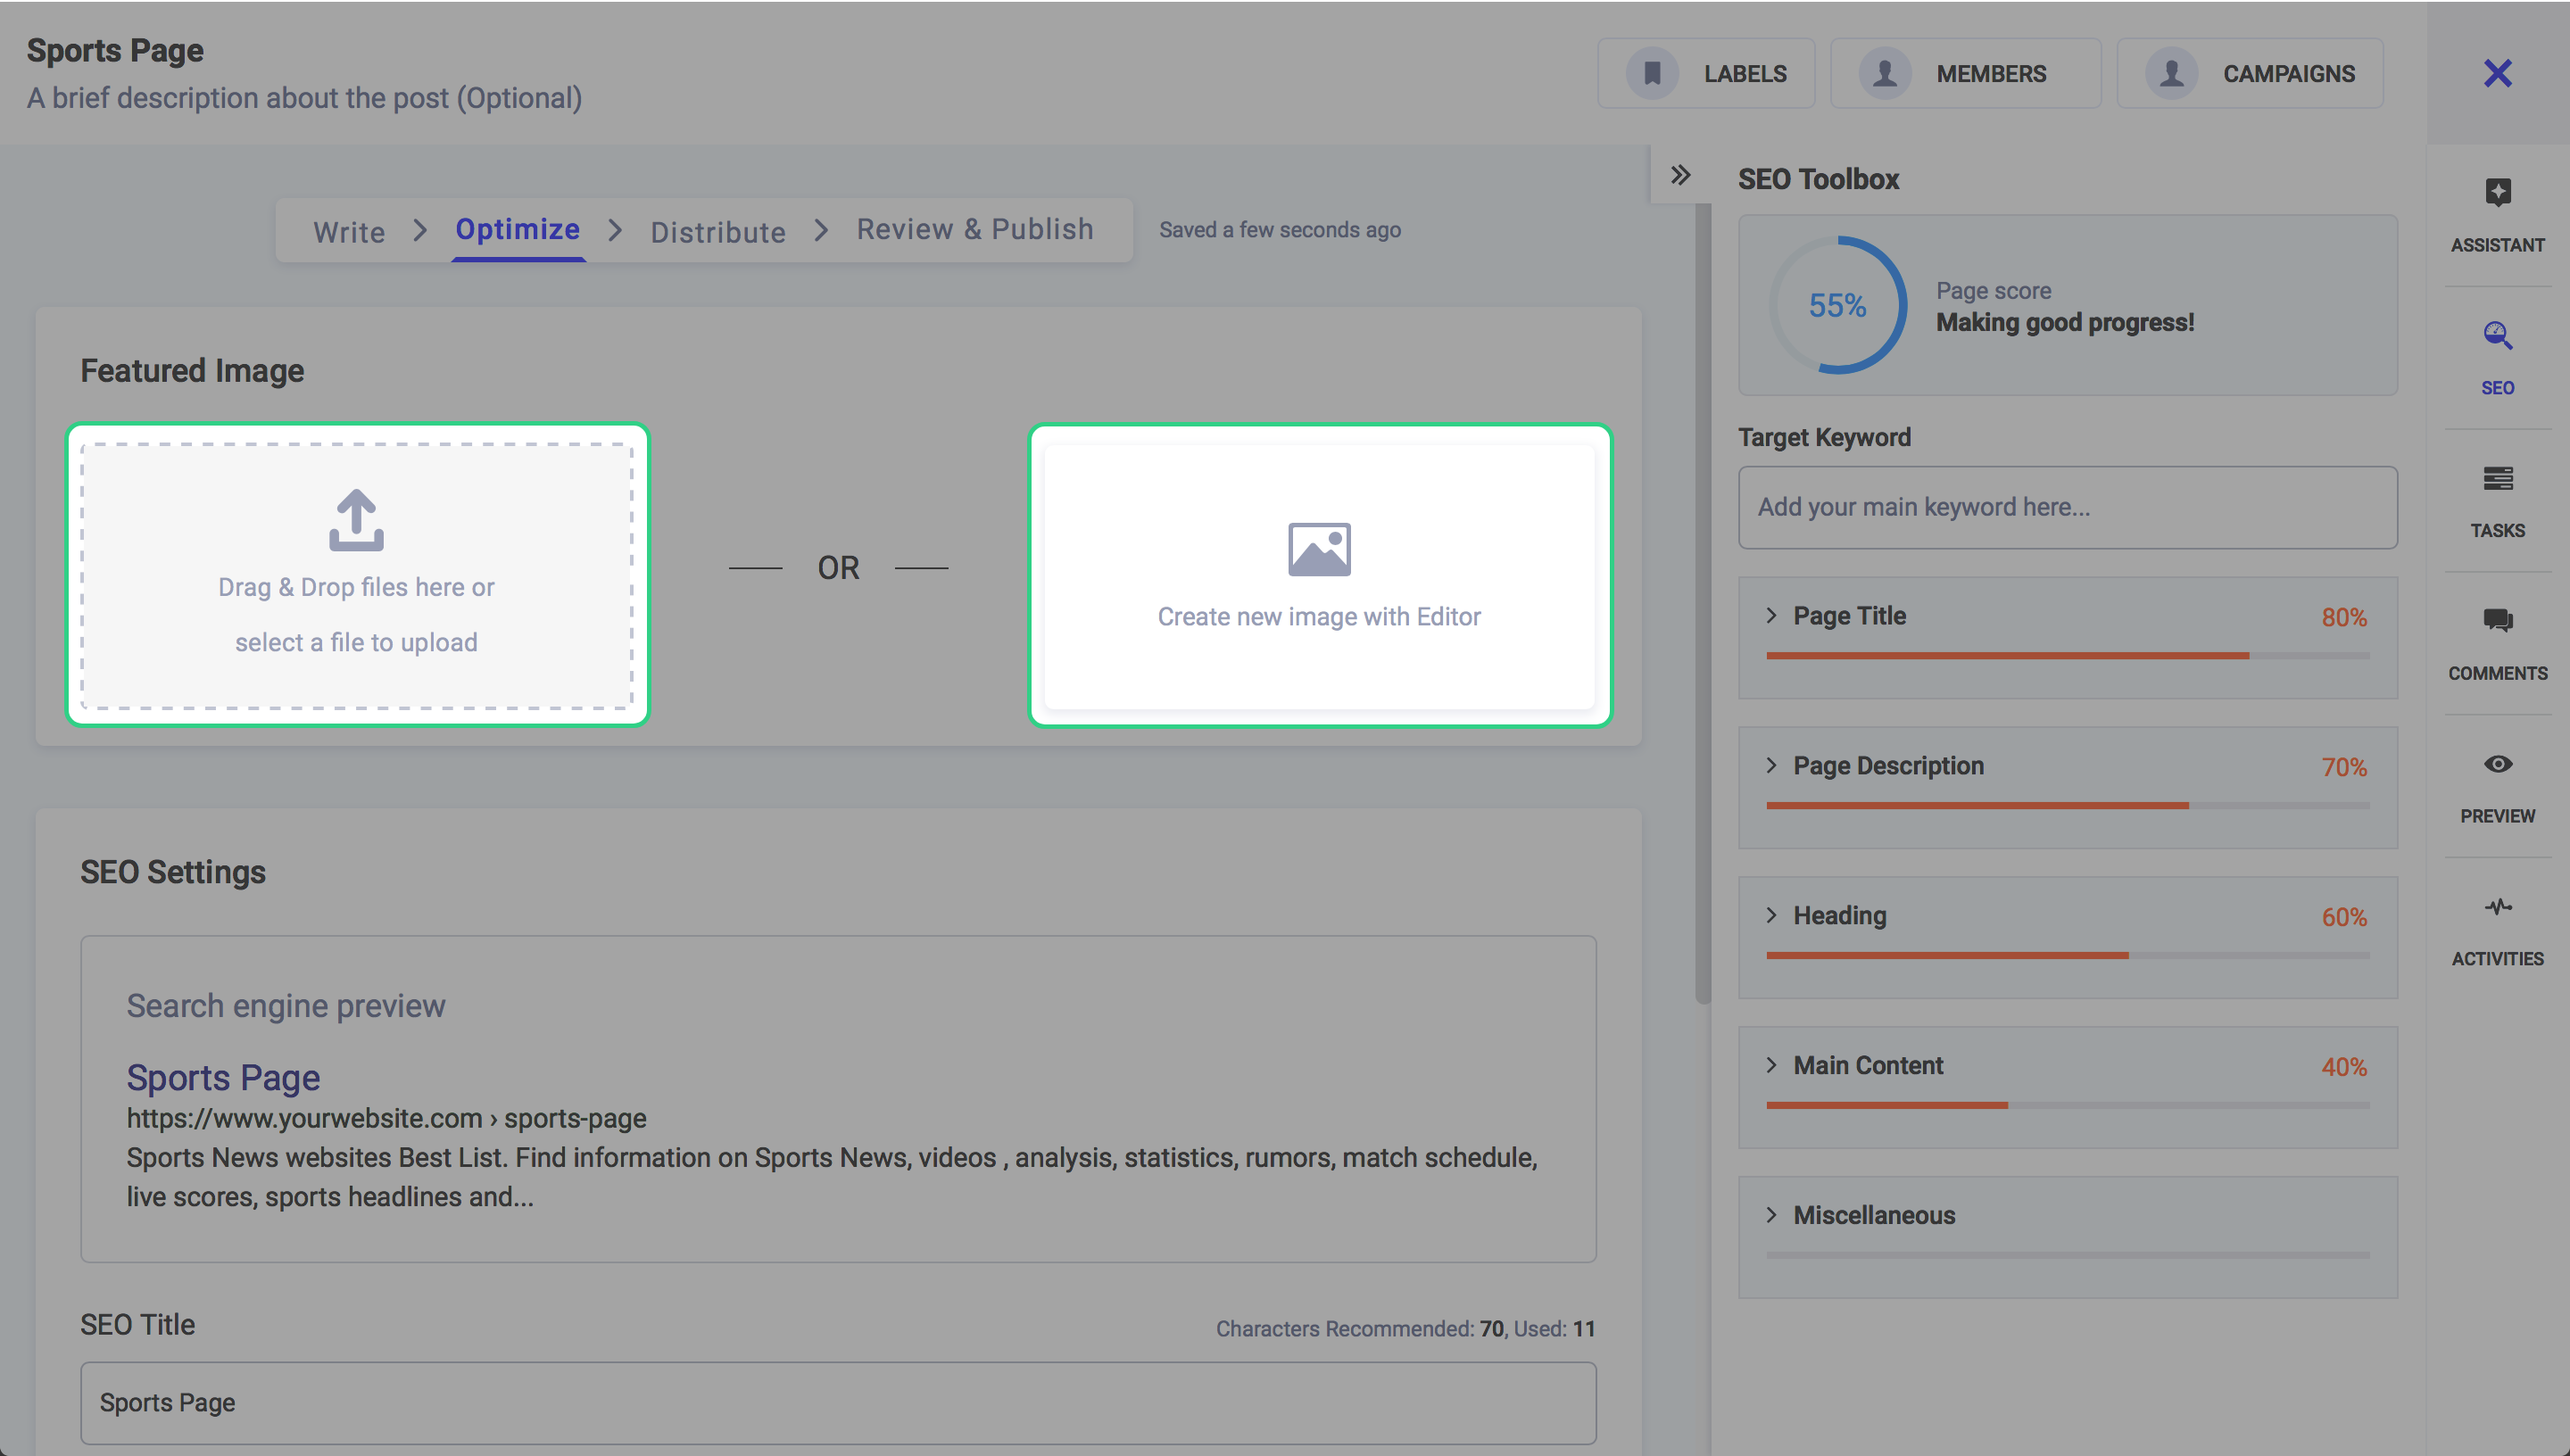
The other part of optimization is the setting SEO parameters. Let us see how.
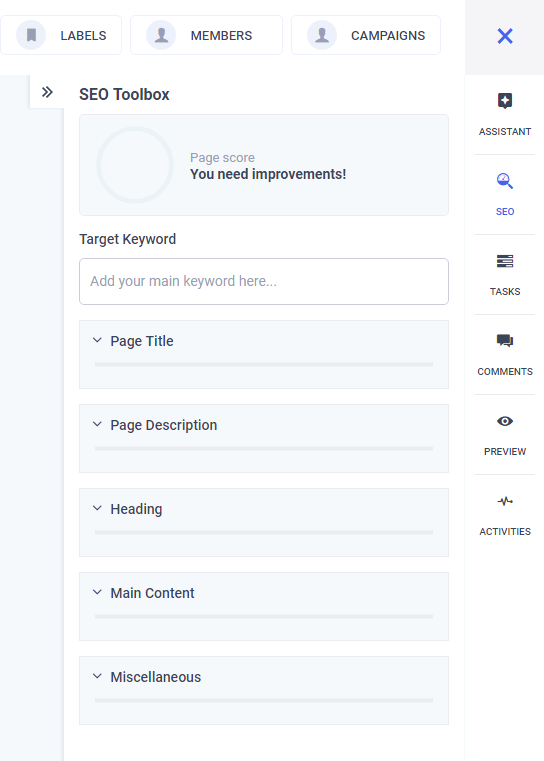
SEO
Search engine optimization helps the content you publish to be visible to other people searching for the same topics on the web. This will increase engagement and drive traffic to your money website. Setting SEO parameters is easy and having this liberty right next to the composer improves the chances of your articles going viral.
The new composer module takes optimization to a whole new level. This is achieved by providing a real-time SEO evaluator to the writer. So as you are composing your article, its real-time SEO score will be displayed both in numeric as well as a digital meter.
So as you write along, you have a real sense of how this article will be performing once published. This insight in the future enables writers to infuse SEO friendly words in their articles for better online visibility.
Let us see how the SEO parameters can be optimally utilized.
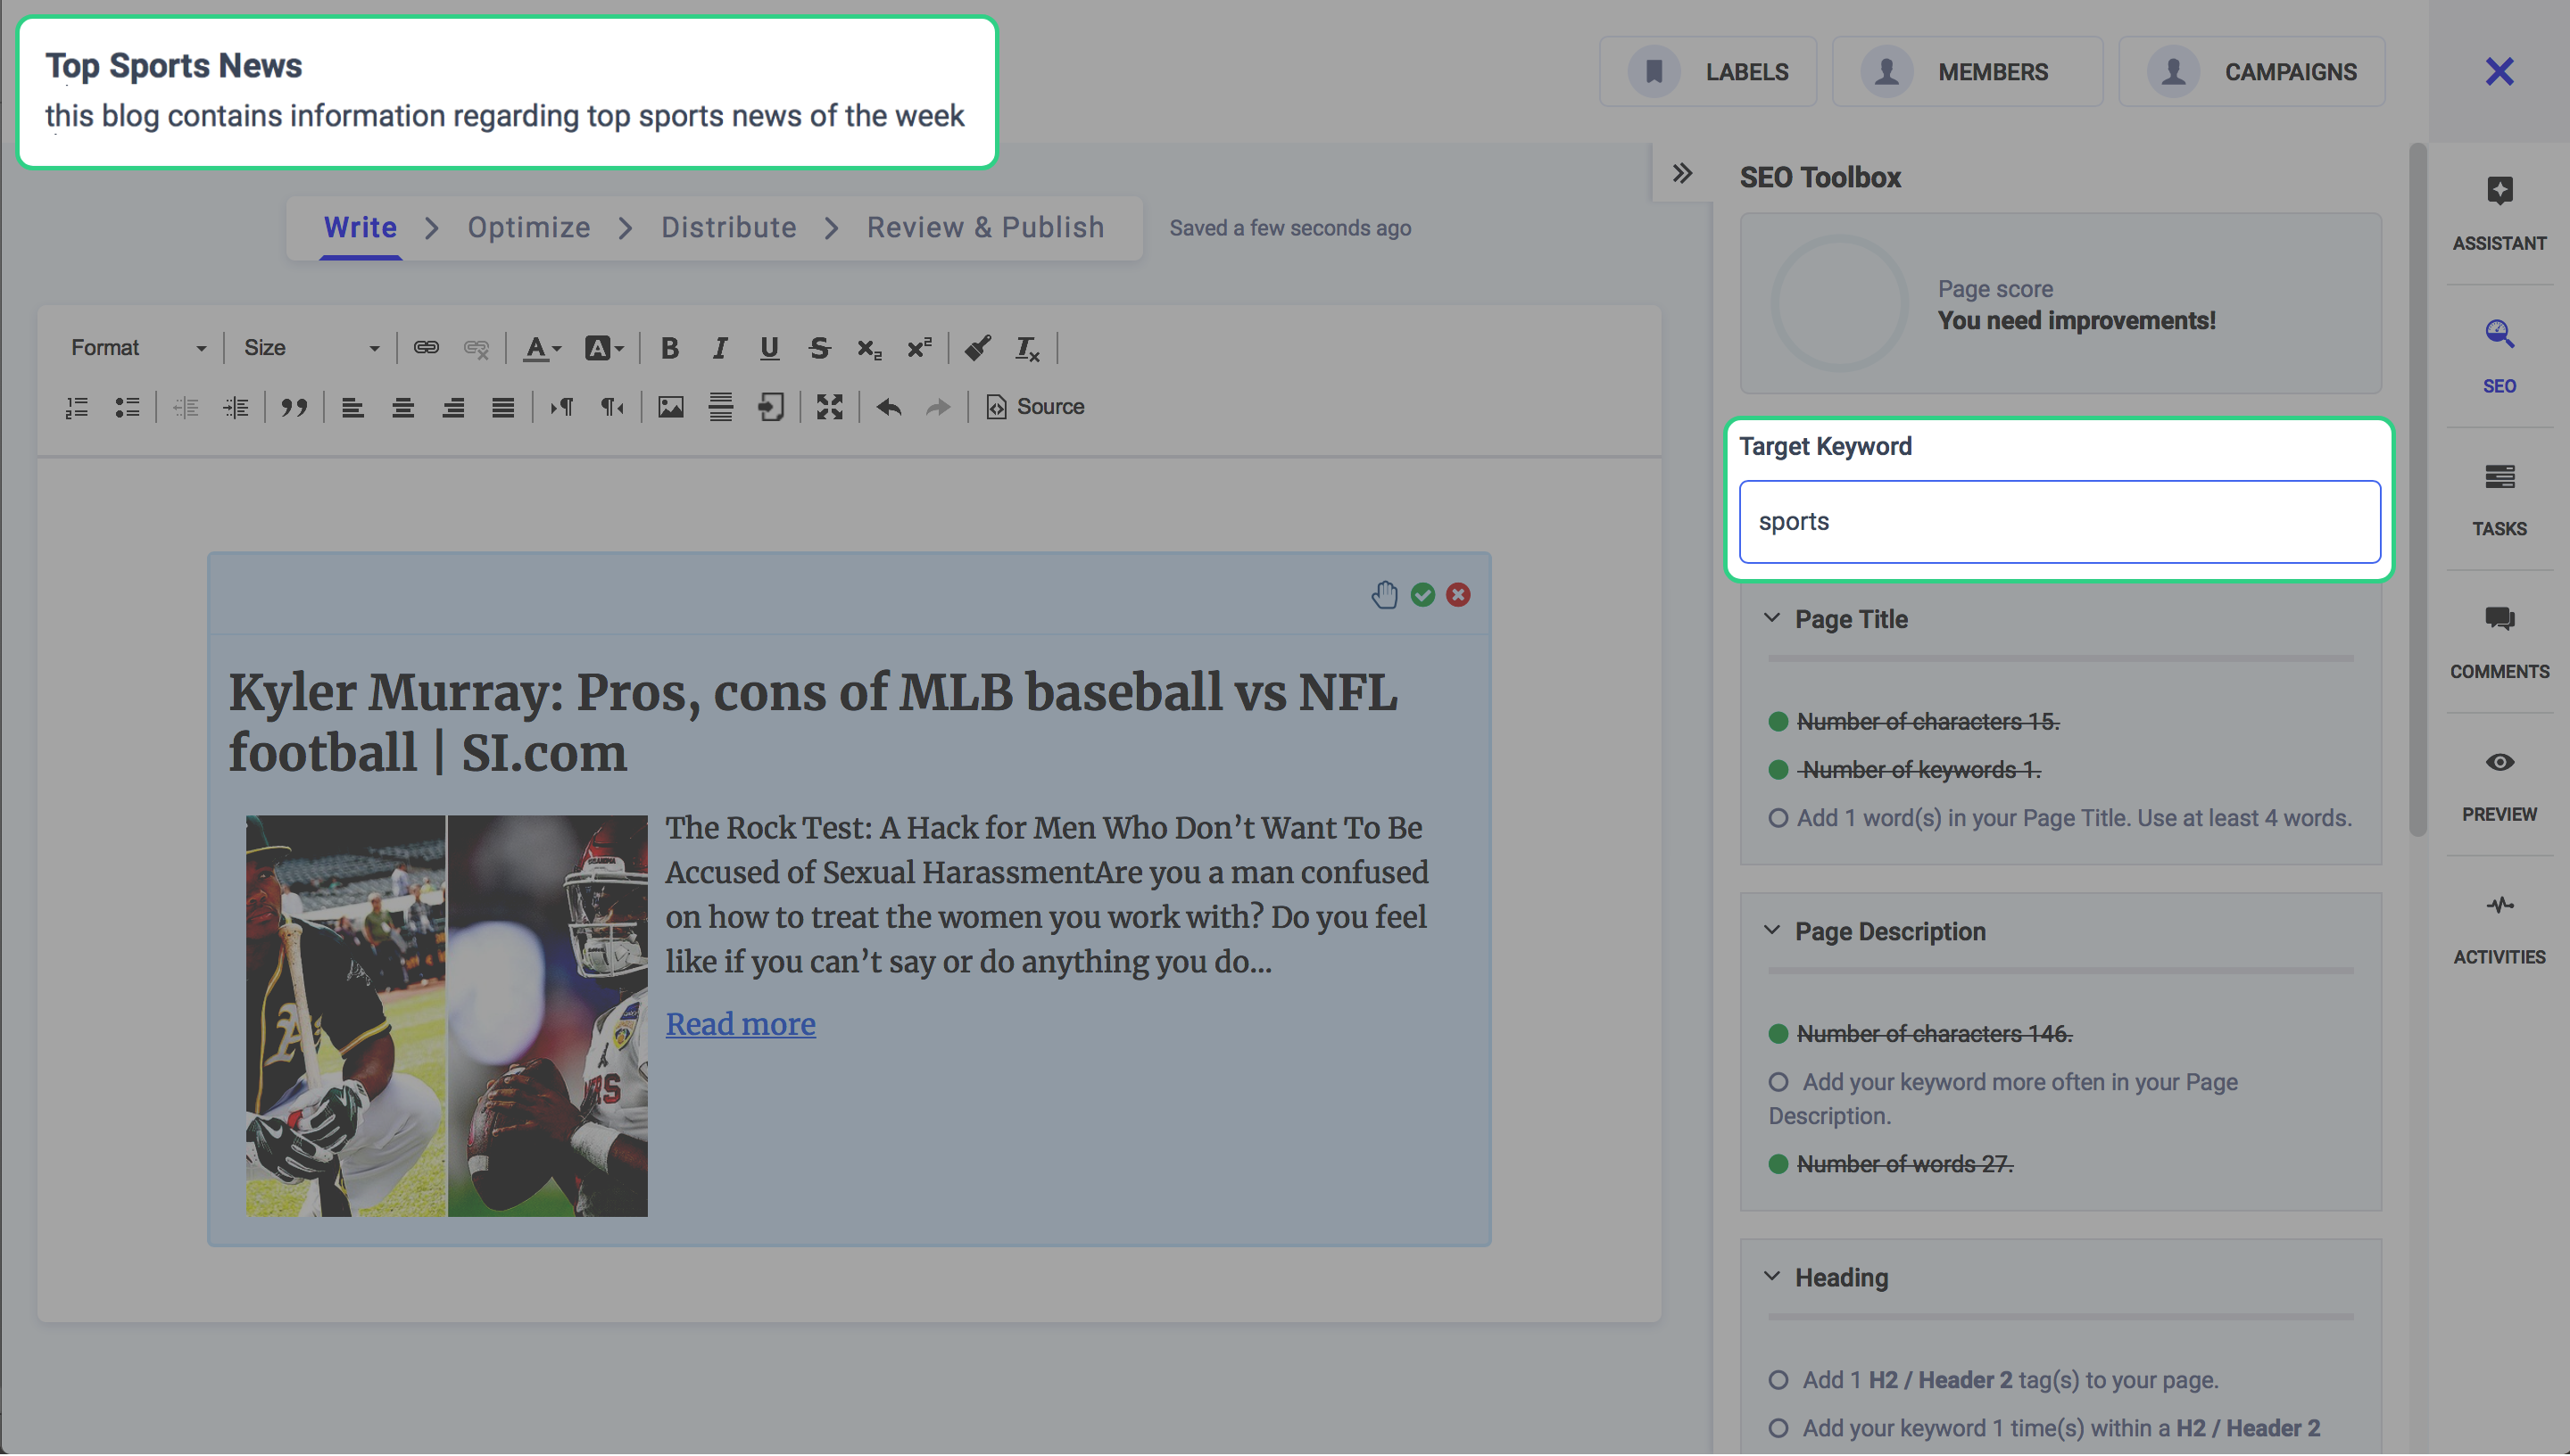
Target Keyword
A target Keyword is one word or phrase that best summarizes your page. This is what you hope people will type into a search engine to find the page. Your target keyword must be absolutely clear to you before you write even one word of the article. It is the word around which all the content revolves.

Set the proper target keyword for your article by opening the SEO assistant in the right side toolbar of the composer. For the sake of example let us suppose our article revolves around digital marketing. So we input “digital marketing” as our target keyword.
Page Title
A page title, also known as a title tag, is a short description of a web page and appears at the top of a browser window and in SERPs. page. A page title should include the target keyword in the title tag.
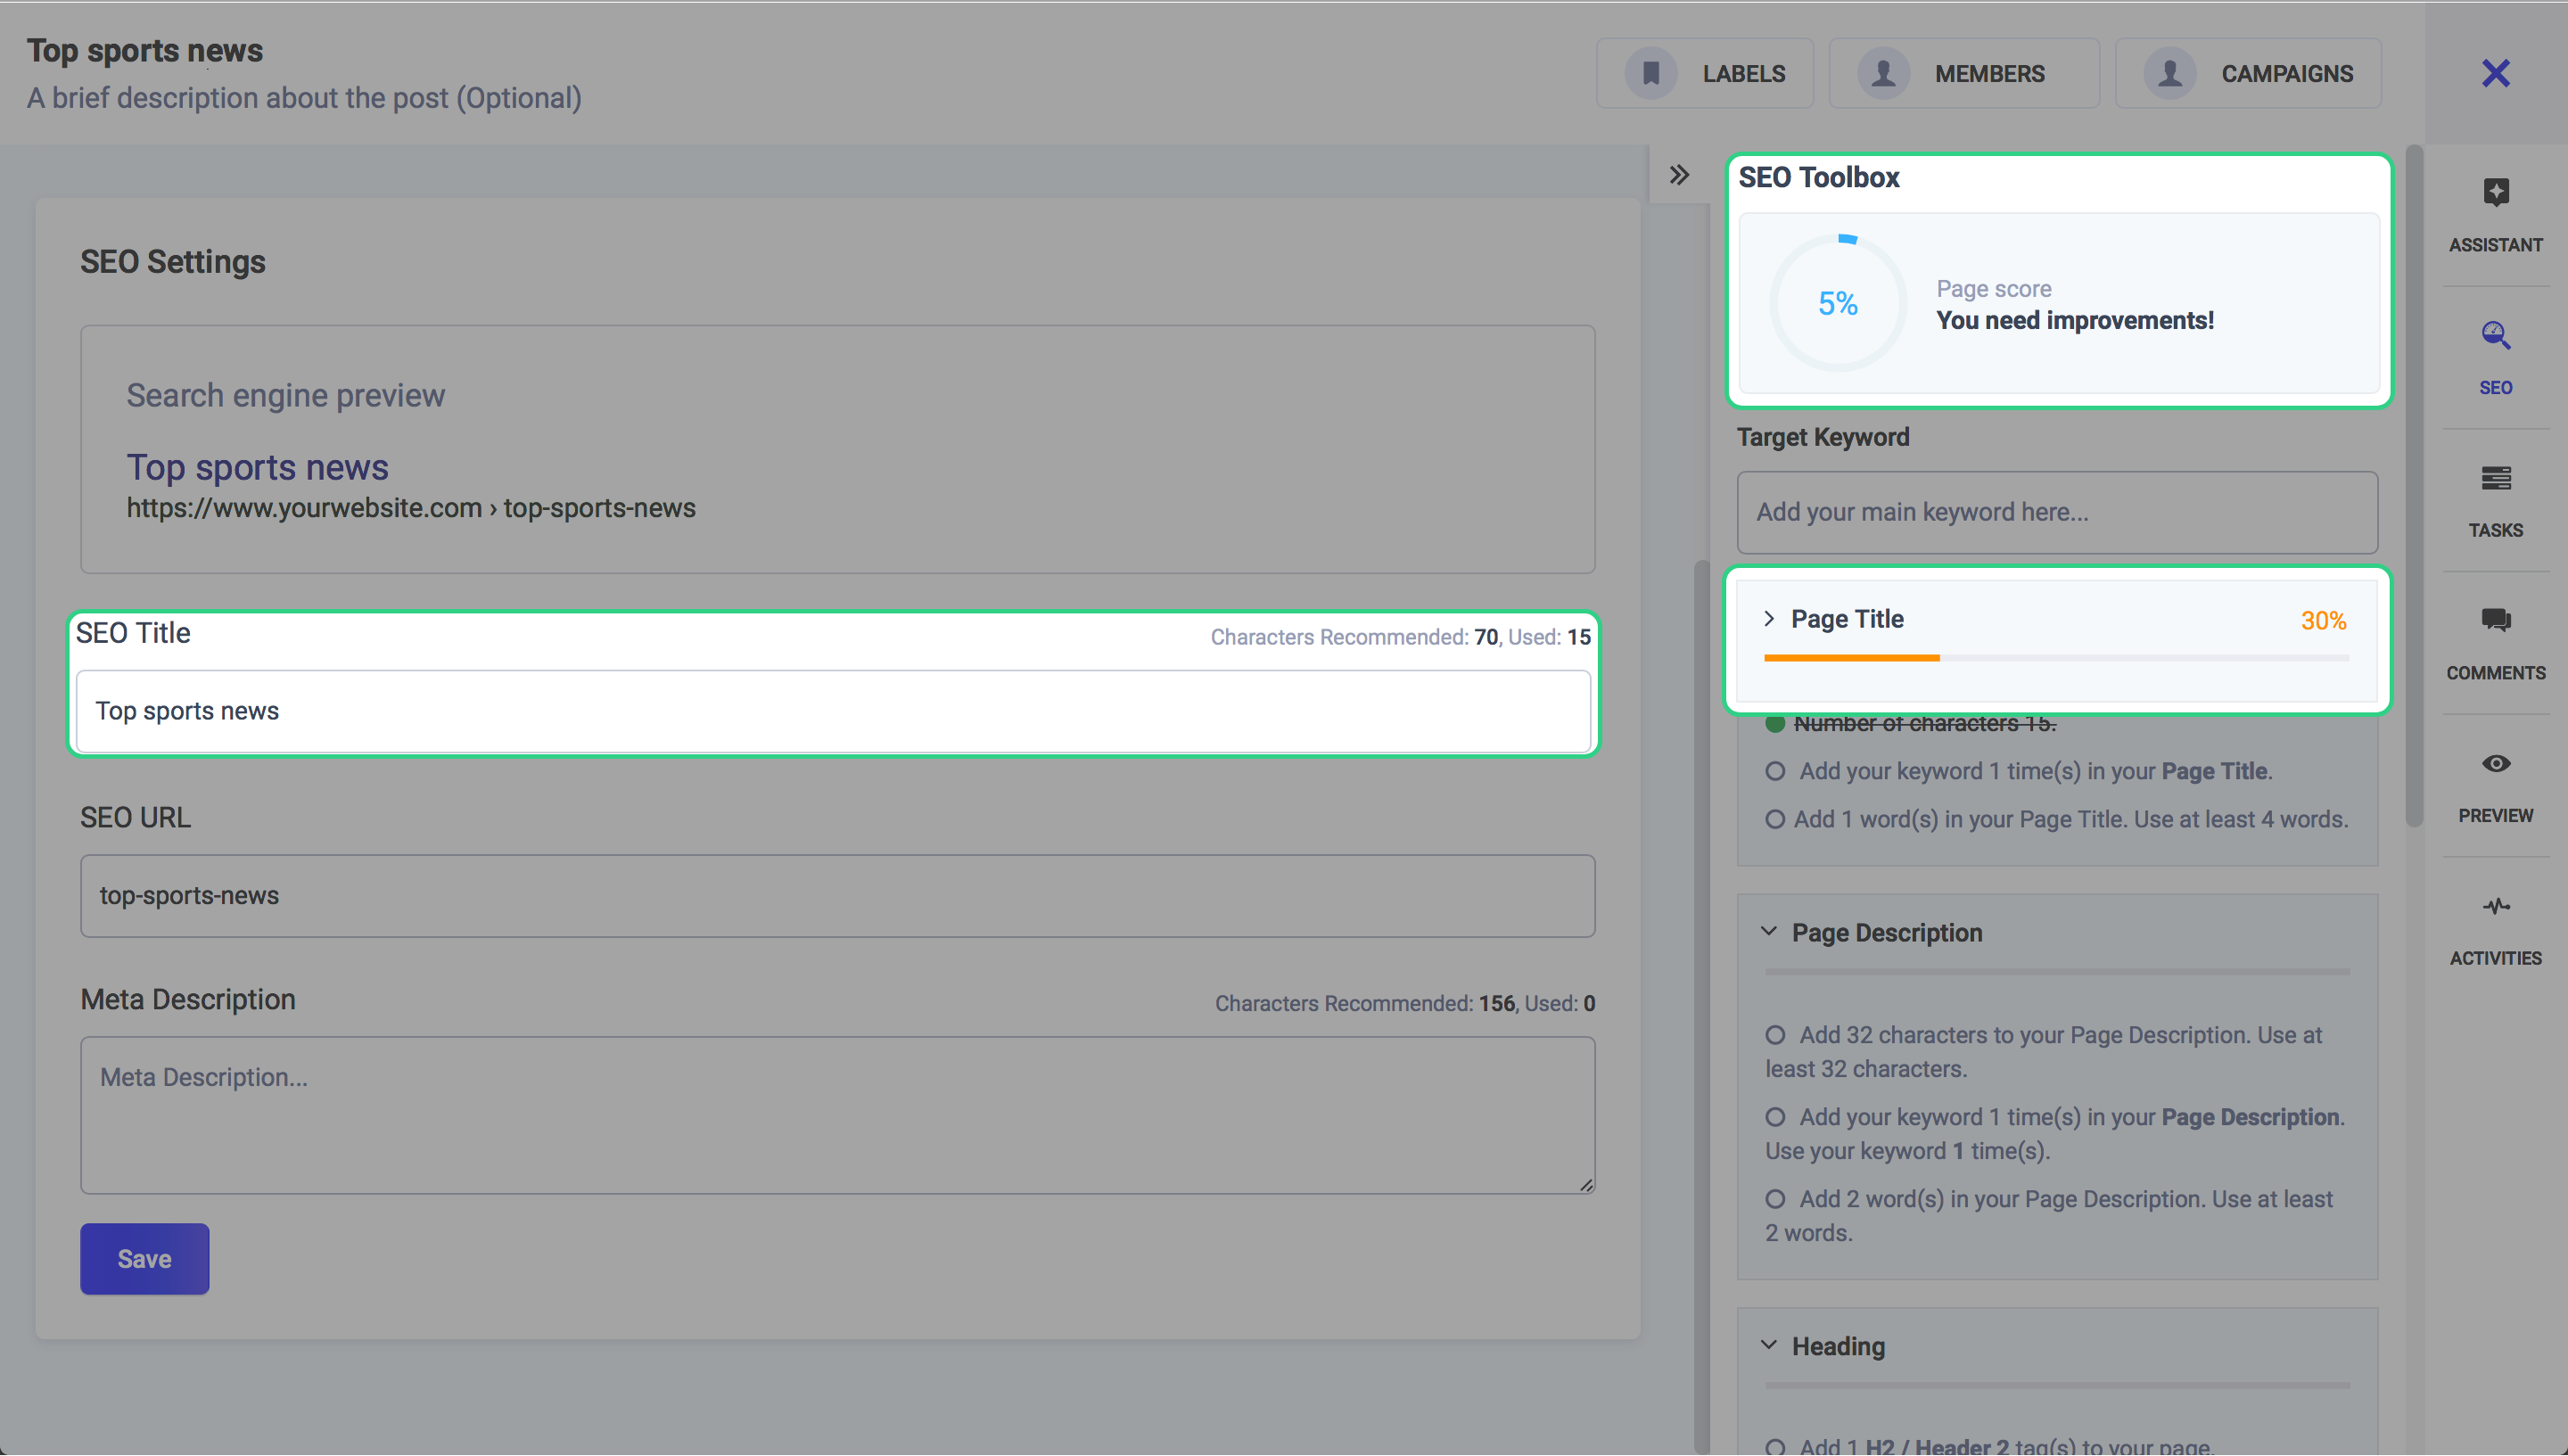
Your page title should include the keyword at least one time and that too in a natural way. Try to adjust your keyword at the beginning of the title.
As you begin to set the title with appropriate keywords, you will notice that the meter on the right will show you how optimized your content is in relation to the keywords.
Page Description
Page or meta description summarizes the content of a page. Search engines show the meta description in search results mostly when the searched-for phrase is within the description, so optimizing the meta description is crucial for on-page SEO.
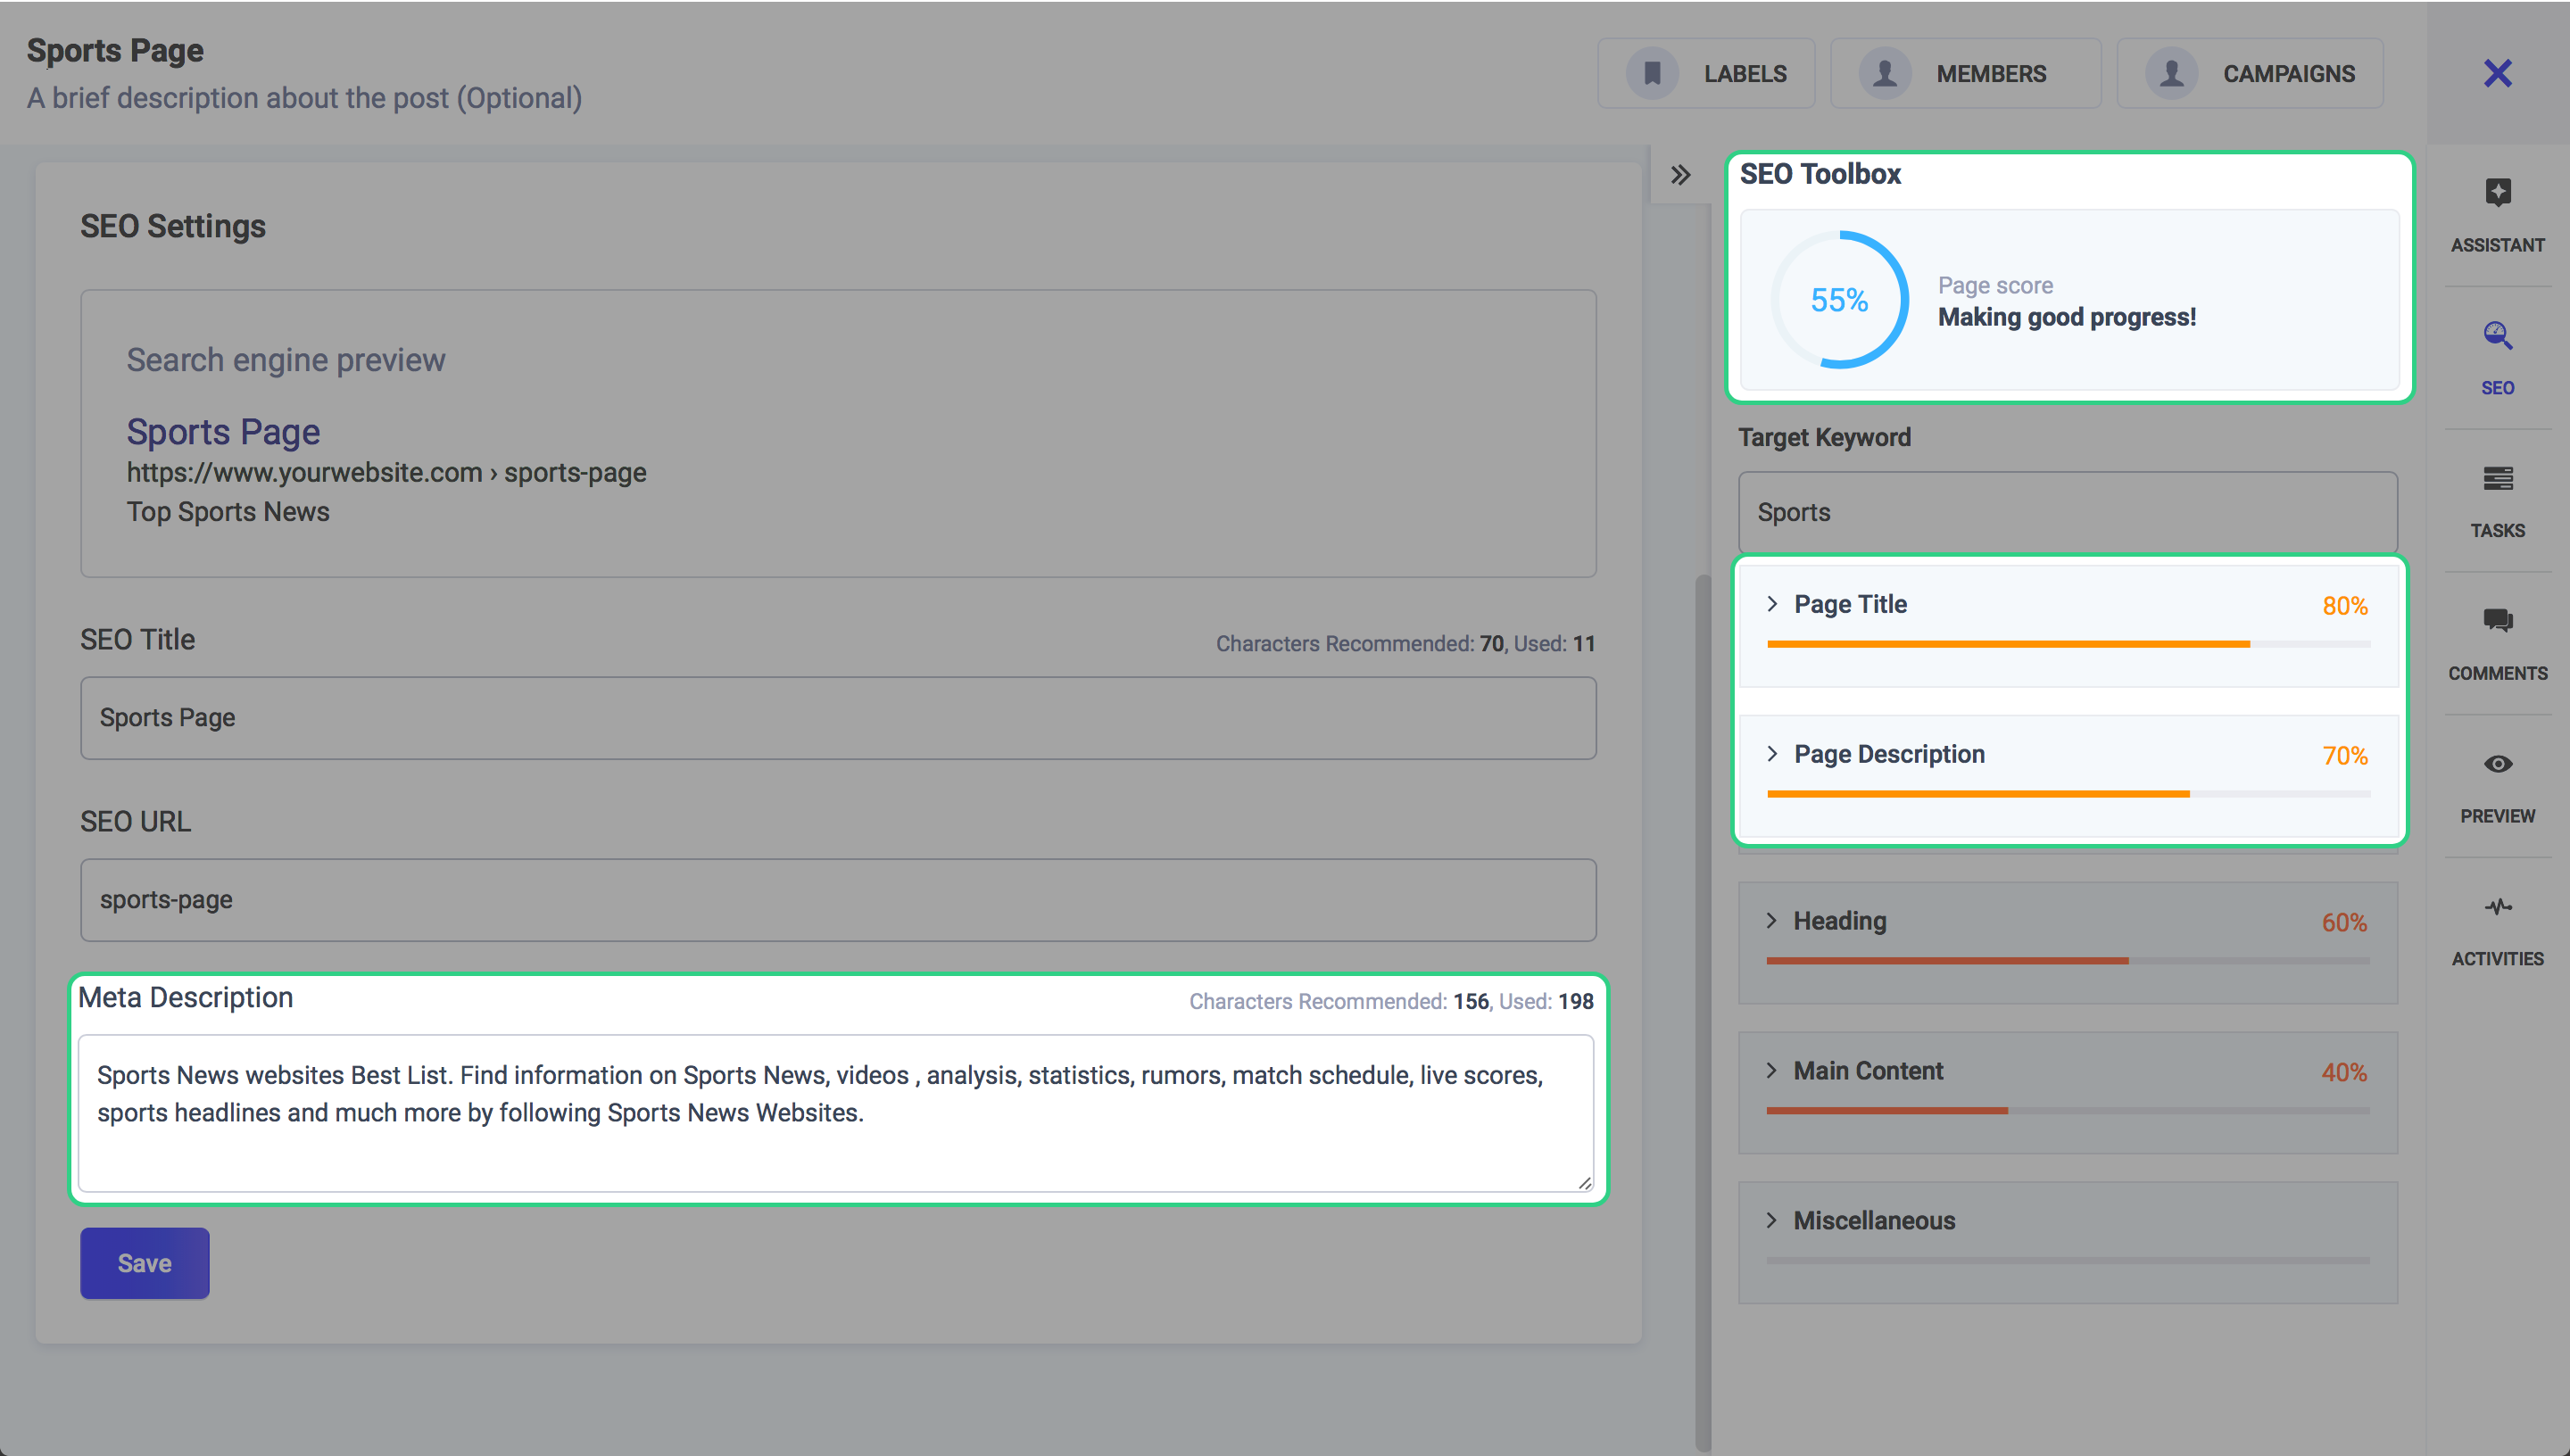
H1 and H2 Heading
Header tags have their own place on a page and have to be used in a proper order starting with your H1. The H1 tag should contain your targeted keywords, ones that closely relate to the page title and are relevant to your content. The h2 tag is a subheading and should contain similar keywords to your H1 tag.
Main or Body content
This section highlights some of the important factors that your content must include for it to be appropriately visible on the web.
Miscellaneous
In this section, you can add long tail keywords in your content. Also, highlight or add italic tags to your content.
Distribute
The penultimate step in the blog composition process is distribution. Here you have the opportunity to select the blog platform you want your content to be published to.

The options presented are WordPress, Tumblr, and Medium. Choose the appropriate channel as well as the publishing profile you have pre-added in the platforms.
Select your desired channel from the provided options to which you want to post to.
Primary Channel
The primary channel should be your main blogging platform. This is where your post gets published first. You can select only 1 primary channel here to avoid the duplicate content issue.

The options presented are WordPress, Tumblr, and Medium. Choose the appropriate primary channel as well as the publishing profile (WordPress Author) you have pre-added in the platforms as shown below.
Select your WordPress blog, select the profile through which you will be publishing i.e. “Author” and assign an appropriate category to your blog if you have already created them in your WordPress account.

Now you have the option to either publish or save your work as a draft. As mentioned earlier, saving as a “draft” option was not previously available.
Click on the “Add” button to continue. You will be notified that the primary channel has been added.

You can now choose to publish the blog immediately or schedule it for later. Scheduling it means that you have to select a time and a date from the options bar presented to you.
Secondary Channel
As soon as you are finished with selecting the primary channels, you will see the option to select your secondary channel. You can add multiple secondary channels to amplify your content’s outreach.
This magic recipe lets you exhibit similar content on different channels but without duplication. Also if you share content on social media from your blog channels, it will be shared only once through the primary channel and not multiple time.

Your secondary channel might include WordPress, Tumblr or medium blogs channels as well as your social media channels. You can add them one by one as shown below. Suppose the secondary channel you want to add is a Tumblr blog.

The similar content could dwell on different secondary channels. But, they would all redirect to the canonical URL (the focal URL of your primary channel). Click on the add button to add this profile as your secondary channel for publishing.

You have the option to publish this content immediately or schedule it for later by choosing appropriate date and time from the drop-down menu.
Social Channels
The final step is adding social channels on which you want to share content. Select the channels from the list provided. The ones you select will be highlighted as shown below.

Once you have selected the channels, scroll back up and click on “Review and Publish” to move onto the final step.
Now you have the option to either publish or save your work as a draft. As mentioned earlier, saving as a “draft” option was not previously available.
A post save as a draft will not be shared on social media profiles.
Review and publish
This is the last step. Review your post one final time and hit publish to share your content piece on blog channels.

Composing a Social Post
Social Media is the most powerful medium for communication these days. According to We are Social’s 2017 global overview report, one million new active social media users are added to the social community every day. This breeds a huge opportunity for social media marketers to raise their businesses among this audience and earn a worthy ground.
We provide you with a great platform that centralizes all your social media activities under one roof. Whether it’s about sharing your curated posts or scheduling your campaigns, we have it all covered.
We have remodeled the experience of creating social media posts for you via the updated version of our application. Let’s see how you would be able to create your social posts in ContentStudio 2.0
Design your Post
Firstly, connect all your social channels for which you want to design your post. You could choose your Facebook groups & pages, Pinterest channels; Twitter, Tumblr, and LinkedIn profiles here. Just like composing a blog post, you can add curated content from the Assistant; search for content relevant to your keywords and drag it to the editor. The editor provides you with various features to polish your post.
Add Images
You can make your posts more expressive by uploading images from your local system. With Adobe’s photo editor, you can further edit your image and save it for your post.
Create New Image
Sometimes, while you’re writing a post, you want an image to visually support your content. And you don’t always find relevant images right there and then that also exhibit 100% of your thought. We provide you with a facility to draw an image right when you get a fresh idea. We have integrated a drawing tool Pixie Editor that lets you draw an image using its advanced features.
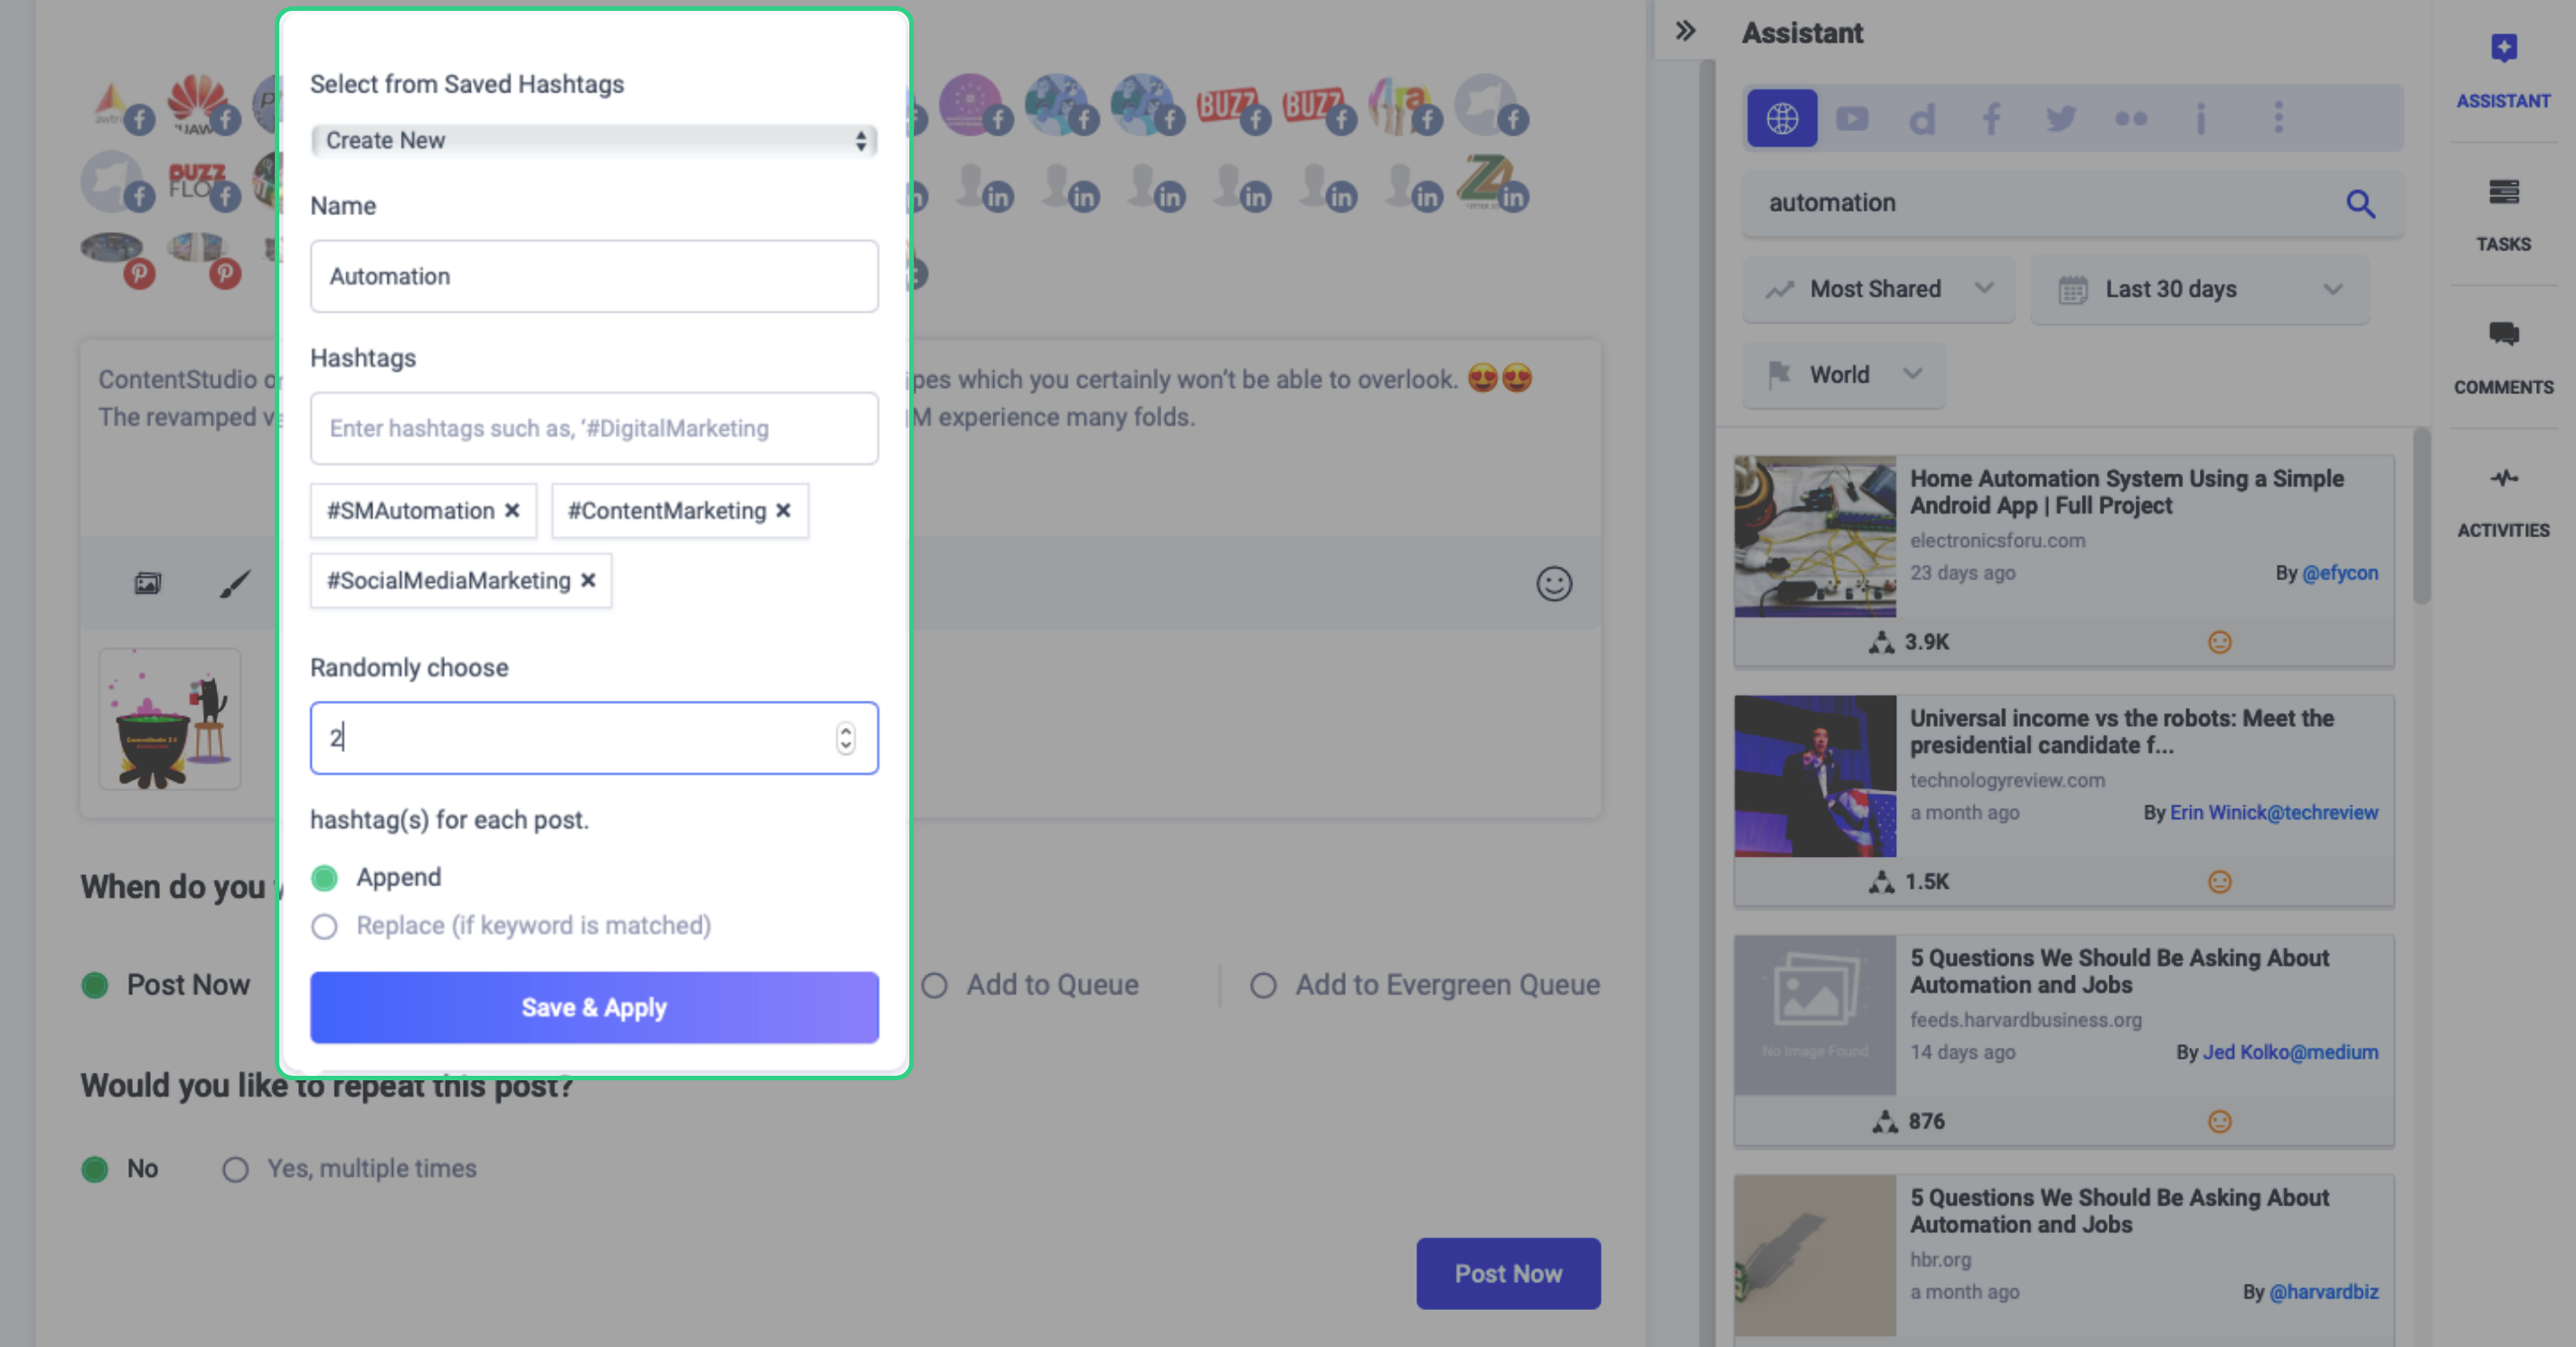
Add Hashtags
Hashtags help you rocket your post’s fame. In the editor, you can also create new hashtags for your posts to help your viewers find you quickly by searching for those keywords. You can also select from your already saved hashtags and append them to your posts.
Add Replug CTA
With each of your social media post, you can invite your audience toward your sales, deals, promotions, or offers via a call to action. All your CTAs created in your connected Replug account is fetched against your selected brands and campaigns.

Add UTM
In order to track and monitor your campaigns, you can also add a UTM (Urchin Tracking Module) tracker to your posts. A UTM tracker is a code that you simply attach with your custom URL and let it trail that link for you. This tracker helps you calculate the worth of each link/campaign by analyzing the conversions caused by a particular link and the medium which brought in the maximum traffic.

You can create a UTM on the run-time by selecting the URL, Campaign Name, and the Campaign Medium that you want to track; or add an existing tracker to your post.
Customize content for each channel
Mold your post according to each platform’s requirements by customizing your post for each selected channel.
Let’s say, you want to create a post for your Facebook and Twitter pages. Twitter only allows 258 characters in a single Tweet. So, you either have to create a post having 258 characters for both of your channels or design posts for both your pages, separately, which sounds inconvenient.
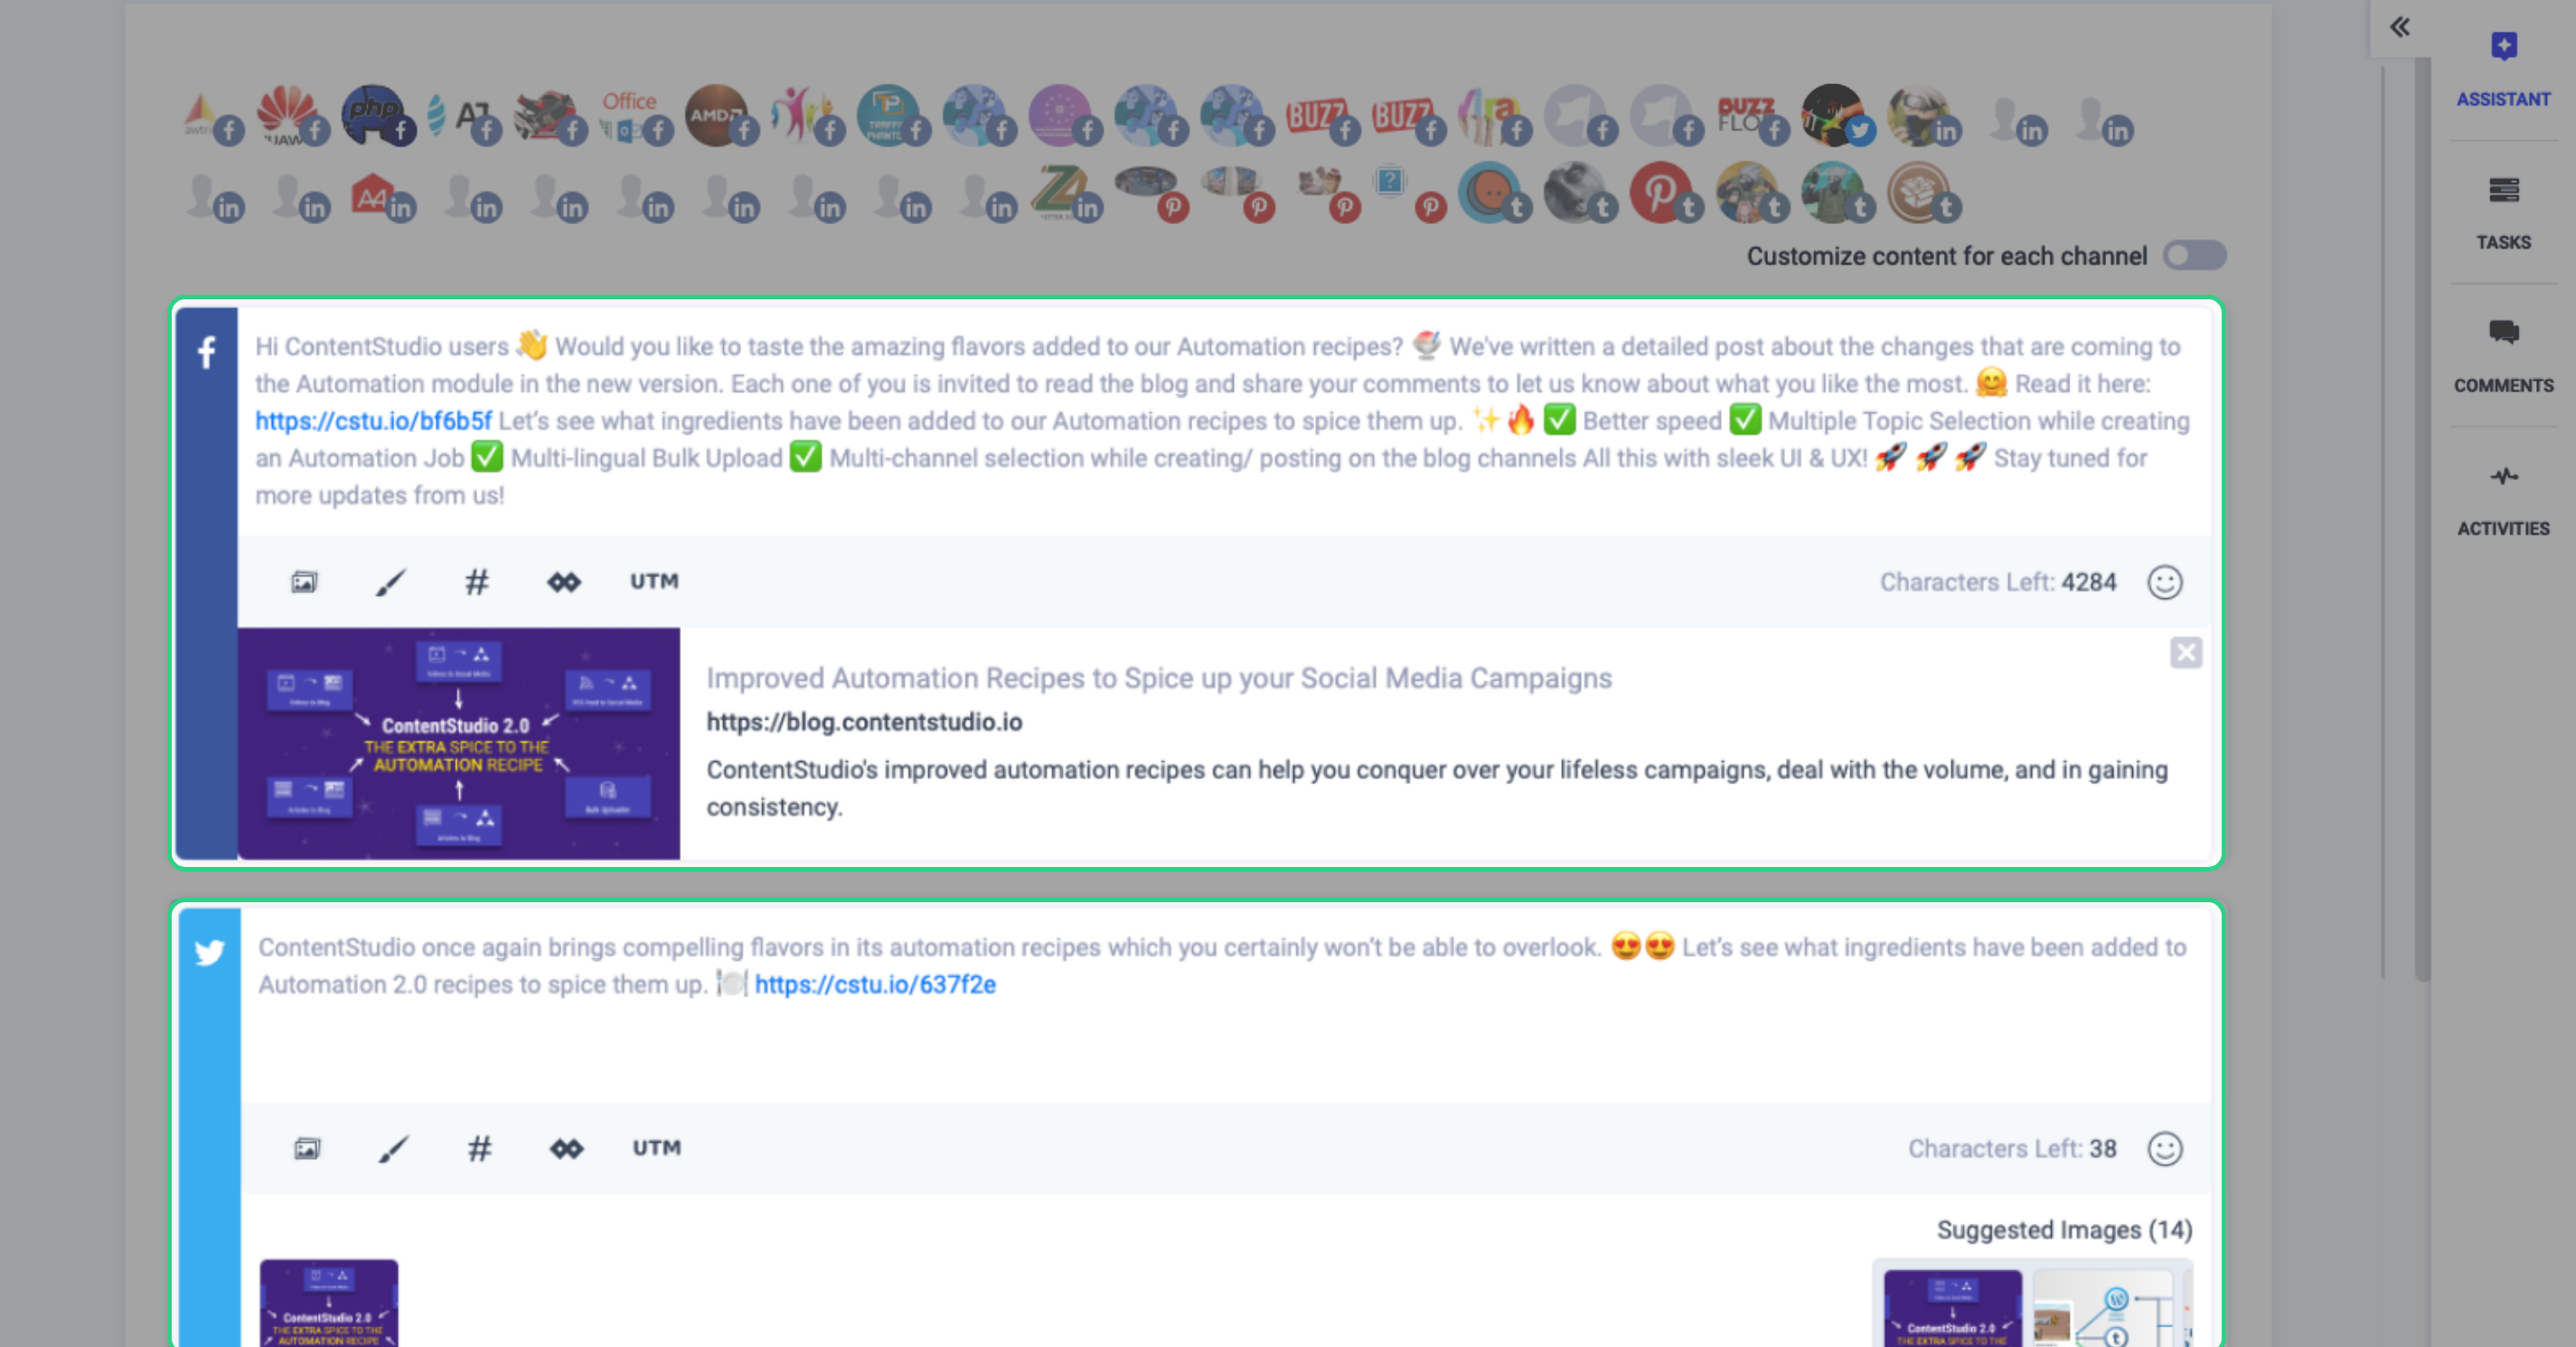
This will eliminate any kind of dependency between the platforms and let you design a custom post for each of your social channels. This way, you can take care of each channel’s requirements and shape your post accordingly.
Schedule post for Social Media
Once you’re done constructing your post, you can preview it for each channel and check how it would actually look like after getting published.
After finalizing your post, you will then be able to schedule it for your social channels. You can plan to share your post via three schedulers.
Post Now: Choosing this option, you can share your post right at the moment of planning it.
Schedule: You can choose a date and time and schedule your post for it.
Add to Queue: You can create a custom queue and add your posts to it. This option executes automatic back-to-back posts for your channels at your desired time.
Takeaway
The composer module truly is a one-stop shop for all content curation activities. It takes you step-by-step through the editing process, so you know what impact your publishings will have.
With all the latest changes combined, we have made ContentStudio a complete content marketing tool. From content discovery, planning, composing, scheduling, distribution, all the way to analytics and insights.

Wasiq Naeem
Wasiq Naeem is a content and digital marketing veteran who is passionate about his writing. Extensive research and producing high-quality content is just another day at the office for him.