Social media success is defined by communication and making a connection with your audience. You and your team must have a 360-degree view and control of all communications being initiated across all social channels.
This blog introduces Content Studio’s Social Inbox Feature, but if you’re a Beginner and require info regarding rest of the features, watch the video below:
Whether somebody is requesting information about the payment methods you offer, the color of a particular dress, or the shipping cost, you need to be aware and engaged with every conversation.
ContentStudio’s Social Inbox is across channels shared team inbox for social customer interaction. Here you can interact with people interacting with your brand on social media and provide them with amazing customer experience. Create a network of social conversations, resolve support tickets and transform your customers into brand ambassadors.
Collaborate seamlessly with your team to efficiently handle customer support and queries coming in through social channels. Assign the right conversation to the right team member to provide refined customer experience, quicker.
The Social Inbox handles two types of customer interactions
Conversations:
These are the private messages you would receive from your social media pages. People who want to discretely send feedback or request information about your business.
Posts:
Some people will also interact with your business’s social account via comments on the content/ posts you have published on the pages. This is further divided into 3 classes
- Posts that are created by admin or page editors
- Posts/ Comments where your business is tagged by a group member
- Posts that users have posted on your business page and tagged you in them
* It is required that you turn on the page messaging permissions in order to receive messages and comments in your Social Inbox.
The interface
The layout is simple and elegant. When you arrive at your inbox, you will see four columns where the information is distributed. Choose from a variety of filters to segregate conversations from different accounts/ pages. Skin through all social channels and find the desired user interaction. See private messages and comments on posts and instantly reply to them. User information and tags for
Page Interaction Overview
In the left top corner of your screen, you will see the conversations head. This section contains a statistical overview of all your conversations. This includes how many conversations have been unassigned, assigned to you, marked as done, or archived.
You can further filter out conversations based on their status. You can also use a combination of filters e.g. all conversations marked as done by a particular team member. You can do this by selecting both the “Marked as Done” filter and the team member in the second column.
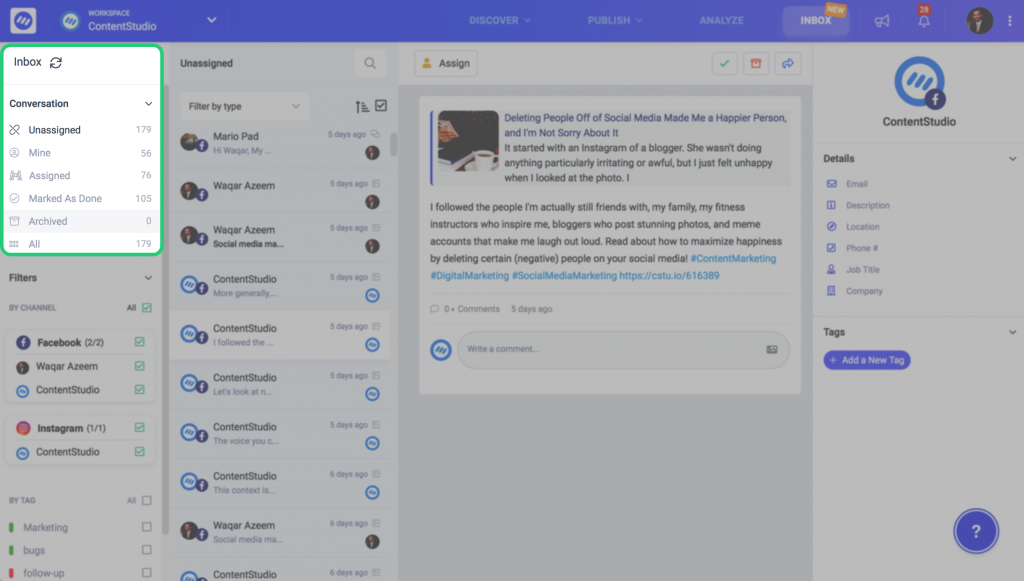
Unassigned: These are the messages or conversations that have not been assigned to any team member. It is always recommended to assign messages to appropriate team members so they can take necessary actions and resolve the ticket.
Mine: These are the conversations that are assigned to you by yourself or other team members.
Assigned: These are all messages that being assigned to any of the team members currently in the Social Inbox team.
Marked As Done: Once a conversation or ticket has reached the end of its life cycle e.g. an issue or ticket was resolved, it can be marked as done.
Archived: Archive completed conversations to keep your inbox clean.
All: This count signifies all conversations for the selection of social accounts.
Filter by Channel
The lower-left corner Social Inbox panel, you see all connected social accounts for which you will be receiving conversations and posts. These will include Facebook and Instagram pages. Instagram API does not support fetching private messages, you will only see interaction on your posts. Very soon you will also be able to manage Twitter messages and mention tweets in the Social Inbox.

Here you can select/ unselect the pages against which the conversations you want to view. All pages with page messaging permission granted will have a green tick box in front of them. For the pages with no permission, you will see a red warning sign. You will not be shown interactions from these pages.
Filter by Tags
Another easy way to quickly search for user interaction is by searching for Tags assigned to conversations or messages. Tags are custom identifiers that you can create to sort your messages.
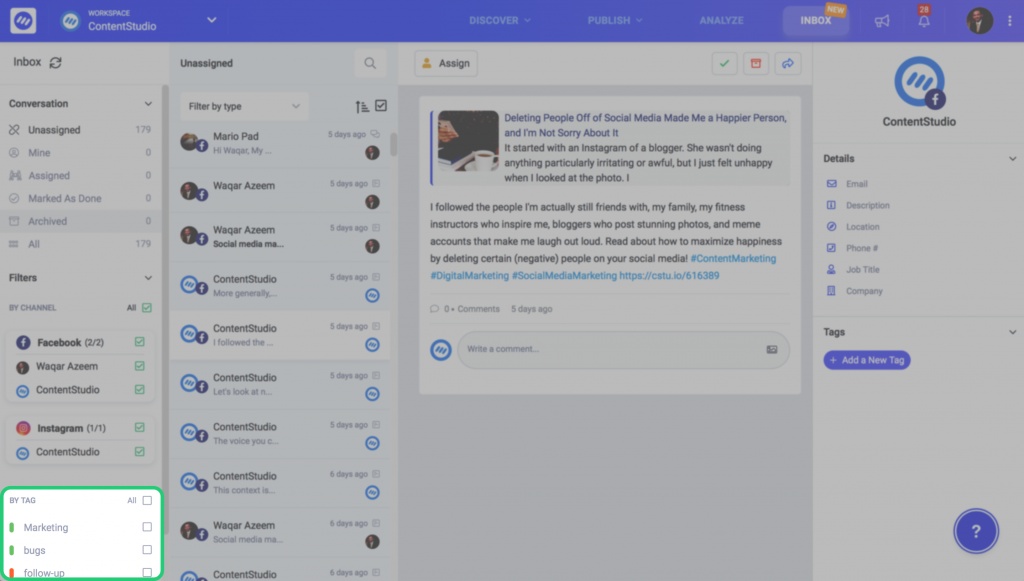
Scroll the left-most toolbar to the end to see the tags you had previously created. Click on any of them to load the conversion where the tag was placed. Creating and editing tags are explained later in this document.
User Interactions
This Column contains all conversations and posts from the pages you have selected in the Filter section. Each entry shows the icon of the channel from where the conversation originated (Facebook, Instagram, etc), the account (page), the time stamp and its nature (message or comment).
You can further filter them on the basis of their type to get a clear view of how many massages or posts a particular page has received.
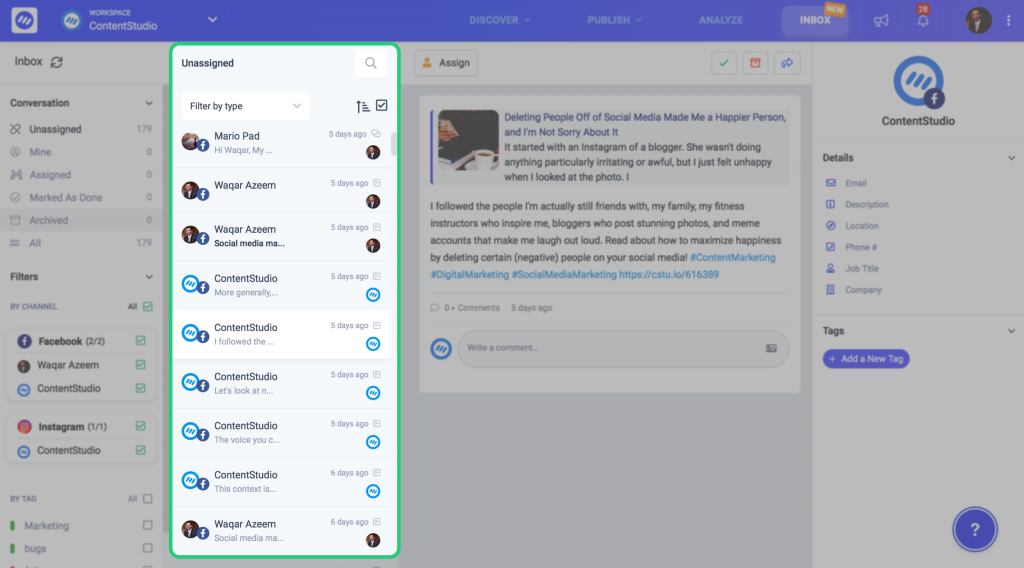
You can also see a little icon beside the time stamp that will signify whether this is a private message or comment on page posts.
When you start your Social Inbox, you will see a lot of messages in your conversation tab. By default, the system will fetch the first five posts created by an admin with comments from your page. All conversations where users have mentioned your page will be fetched. All private messages will be fetched from the last 5 months.
You can use the toggle button shown in the image below to bring the Newest or Oldest content to the top in descending order.
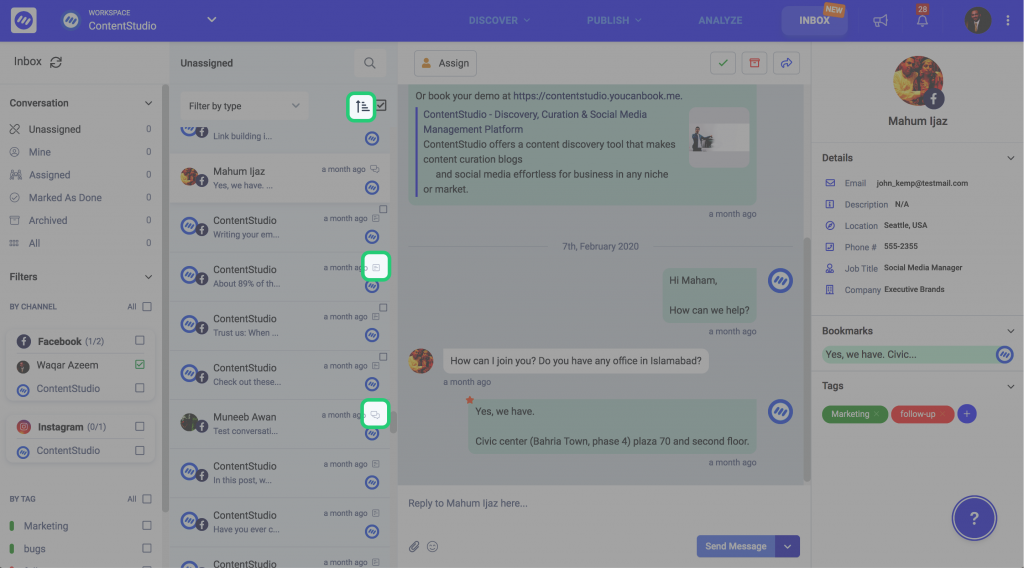
Use the icon with each conversation to identify whether its a comment on a post or a private message.
Search Messages
The Social Inbox has the search option to dig out messages or comments from a particular person. At the top of the conversation panel, you will see the search bar. Type in the name of the person whose interaction you wan tot search and press enter. You will see all their messages and posts where they have commented.

You can further filter the results by applying the “Private Replies” or “Posts” filter.
Private Messages and Posts
The third column reveals the actuals messages and posts that users have sent to your page. Private messages may range from product information, tickets or pricing.
Similarly, you can see posts on which group members commented and also the ones where your page was tagged. How these are distinguished is explained later.
Check the comment threads on your posts and reply to them right there and then.
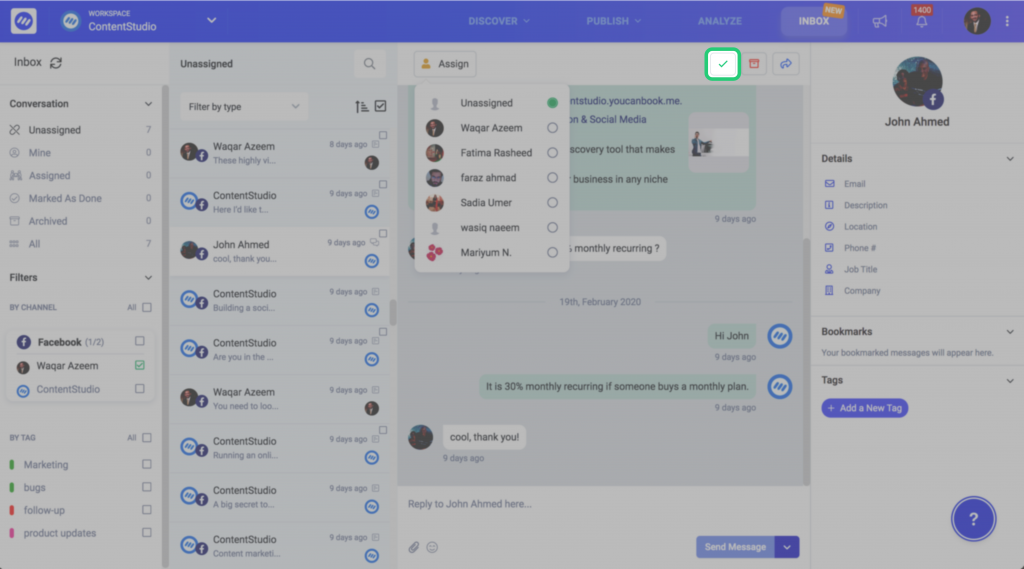
This window also enables you to assign customer interactions to designated team members. For example, if there is a support ticket, you can assign it to the customer support representative in the team.

You will see only those team members that have been granted access by adding them to the Workspace.

In order to keep your inbox clean, you can mark the conversations as Done or Archive. These actions help you clean up and organize your inbox.
You can also view the post or message on Facebook by clicking the Forward button.
Private Message Composer
The Social Inbox is the only tool you will ever need to manage all social media conversations. Use the message/ comment composer to reply to people interacting with your page.
The composer allows you to create text replies, add emojis, and attached files from your local machine. Once you hit the send button, the message/ comment is instantly delivered to the intended conversation or comment respectively.
You can also delete a comment in the social inbox and the changes will be translated to your page. Similarly, you can like or unlike comments from this platform.
Private Reply on Comments
Much like on Facebook, you can reply privately to people commenting on your posts. For information that is confidential or should only be shared with certain people, you can reply to them privately through the comment section.
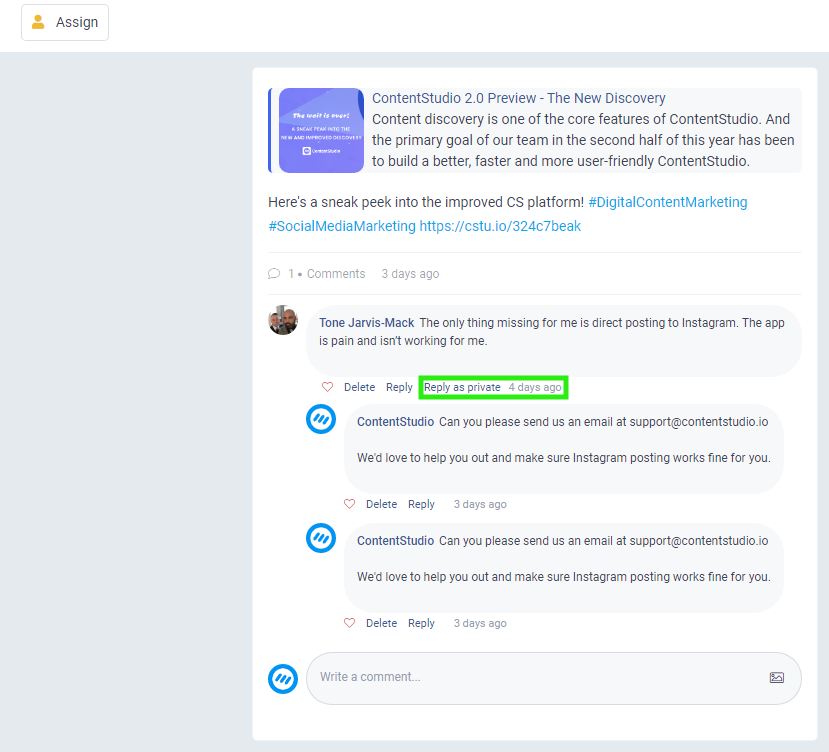
You can only reply privately on comments no older than 7 days. Comment older than 7 days will not show the option to reply privately. Also, Facebook allows you to send private messages only to people and not other pages. So, if another page is interacting with your post, you can not send them private messages.
Bookmarked Pages in Private Conversations
With Social Inbox you get the freedom of bookmarking important conversations. This way whenever you want to reference a previous commitment, pricing, or model, you can easily find it without scrolling through endless transcripts. Click on the little star icon on top of any message to bookmark it.
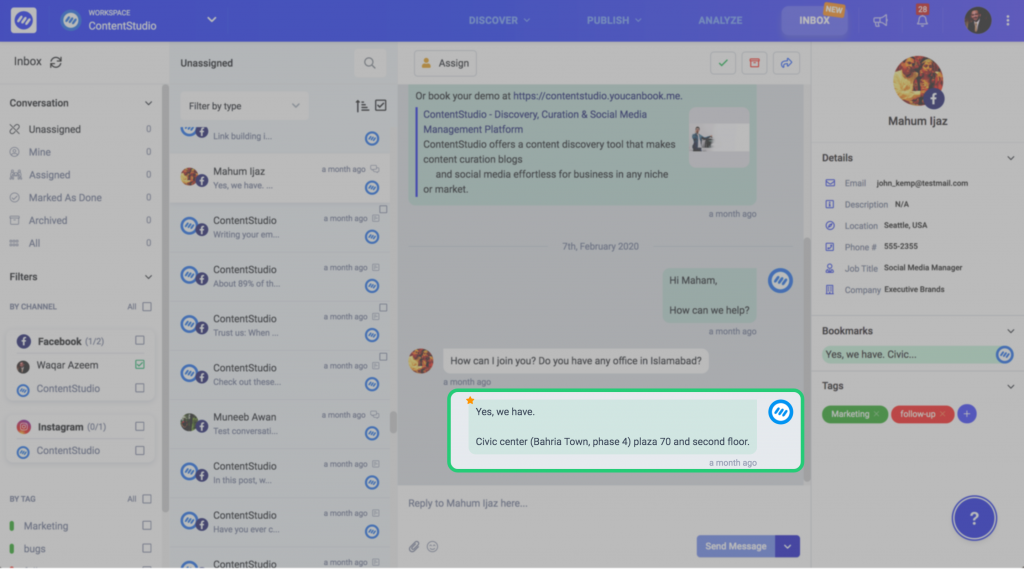
While conversing with clients or brands, bookmark a message that you feel is important. Later when you feel like finding that particular message, simply click on bookmarked conversations. This will point to the specific conversation and open up a chat history 24hours before and after the bookmark.
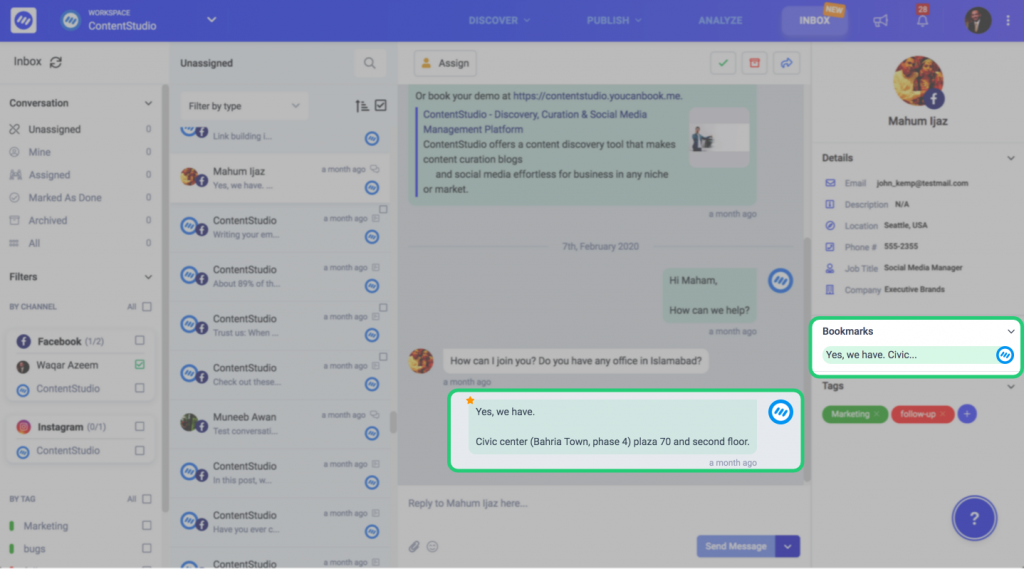
Clicking on the bookmarks of a particular conversation will open a popup window showing the 24hr before and after chat history of the message. This way you can make sense of the messages by reading a brief history. You can avoid reading lengthy transcripts and quickly get to the point.
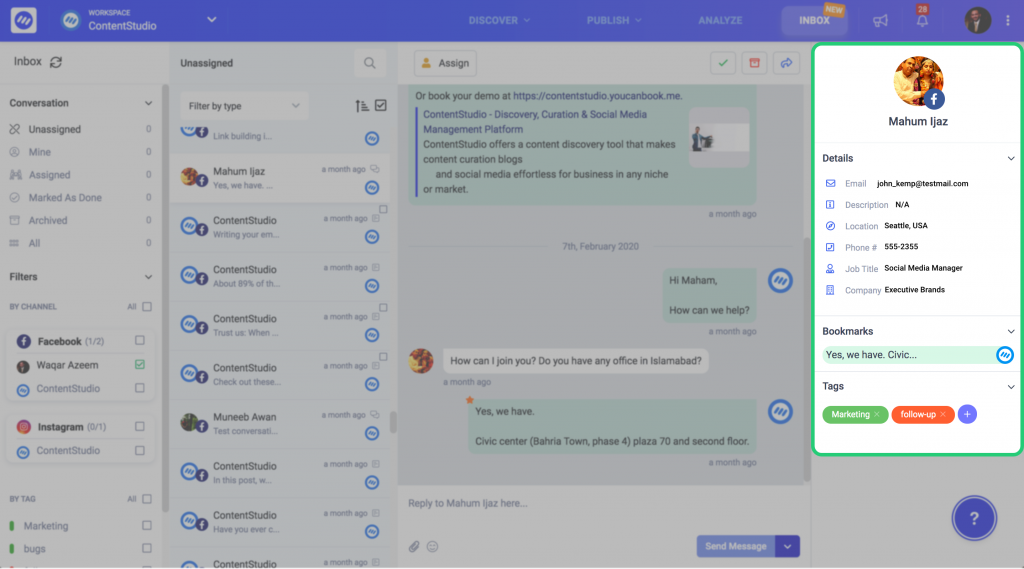
Profile Info
This is the rightmost section of the Social Inbox. This column depicts the user information that has initiated the interaction. This way you are better able to understand and categorize the nature of the tickets you have receiving.
This section includes their profile picture, with a social account icon. Their email, description, location, phone #, job title, and company. All this information is subject to availability. You can also see bookmarked messages in this tab.
Tags
Tags are like badges or identifiers for each conversation. These not only help to sort the conversations but also provide analytical information about what type of interactions are most common on your page.
You can create intelligent tags and assign them to the conversations. Navigate to system settings in the top right corner of your screen and scroll down to the Tags section.
Here you can see all the tags that you have previously created. Create new tags depending upon your needs. You can edit a tag e.g. change its color or name. Finally and more importantly, you can merge two or more existing tags. Merging two tags helps you search within two categories at the same time.
Take for example you have two tags, Customer and Clothes. If you want to search for messages from all customers who were interested in clothes, you can merge these two tags in settings and search all conversations from your business page.
Your Turn
Now you have the tool to handle your brand’s customer support through social media. Instantly engage with people interacting with your page and try to convert them to paying customers.
Master customer interaction handling and speed up your response time. Let us know if using the Social Inbox feature has helped you with social customer service.

Wasiq Naeem
Wasiq Naeem is a content and digital marketing veteran who is passionate about his writing. Extensive research and producing high-quality content is just another day at the office for him.