AI content creation has already taken the world by storm. There are gazillions of AI writers, image generators, video editors, brand name generators, and whatnot.
No wonder software and SAAS companies are rapidly embracing artificial intelligence and integrating AI-based tools in their softwares.
In the given circumstances, it’ll be foolish for a social media management tool not to include AI features in the mix.
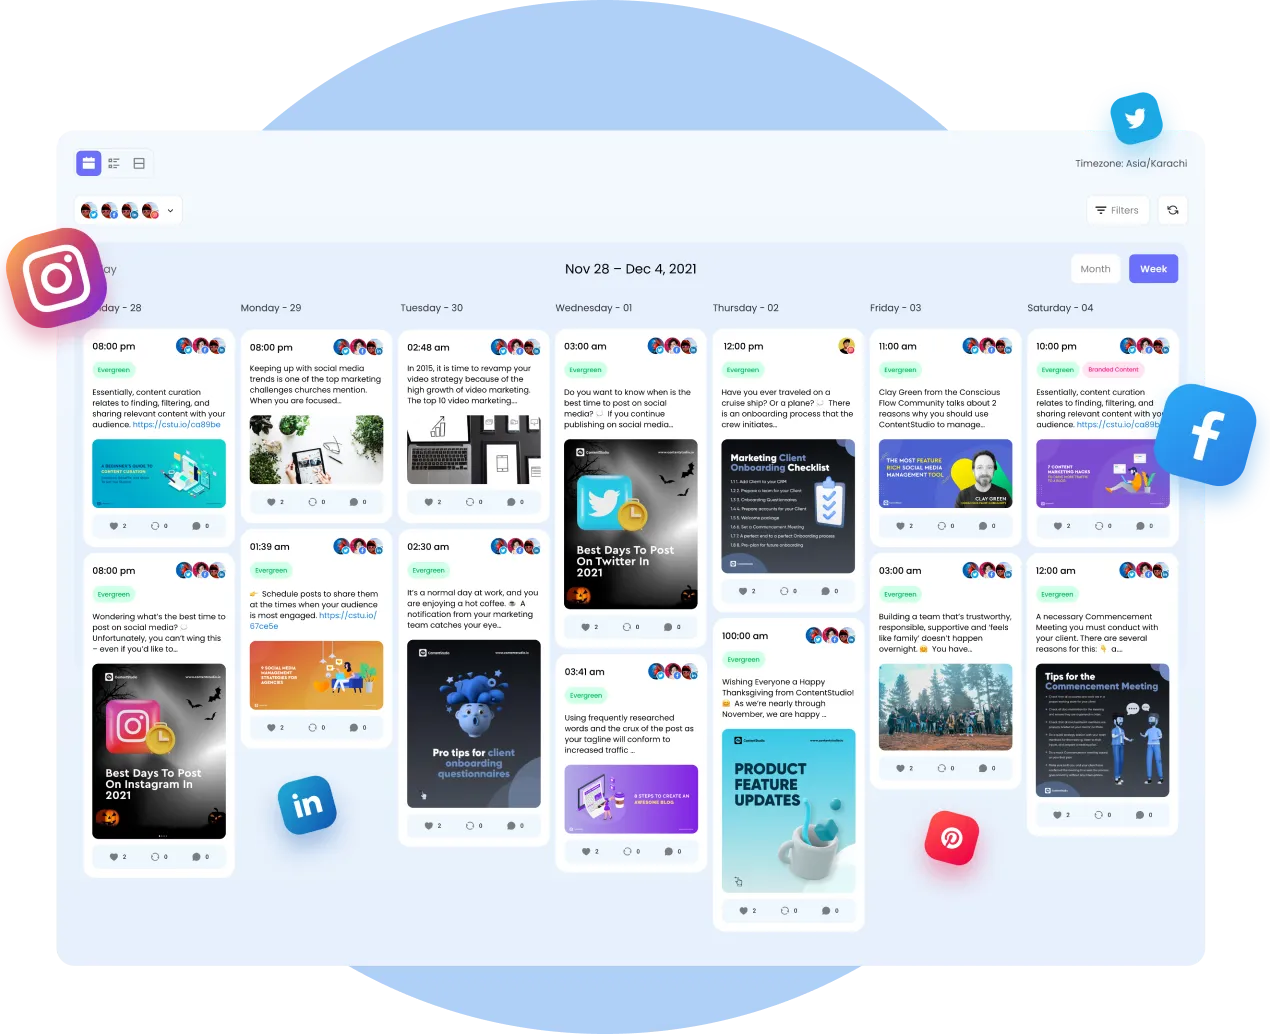
ContentStudio is an excellent social media marketing tool for marketers, agencies, and influencers that helps in social content scheduling, discovery, and analytics. Now, it’s also equipped with AI-based tools.
Let’s dig deeper and find out more about it.
What is ContentStudio’s AI writing assistant?
ContentStudio’s AI writing assistant is an exceptional AI-based blog writing feature embedded into the dashboard that has made blog publishing easier than ever.
AI assistant has revolutionized blog post-composition. Not only has it changed the way users publish blog posts, but it has also made it way faster to put out blog content.
The ContentStudio’s AI assistant is full of surprises. Here are some of the perks of using this tool:
- The users who have no idea about blogging can now publish blog posts within a few clicks
- The steps involved in the process (of using this AI tool) are quite simple
- Default prompts are suggested in the AI assistant section that are worth checking out
- ChatAI is a chat feature (built right into the AI writing assistant) that lets users talk to the AI chatbot
- Blog post insertion is rather simple; it just requires a single click
- AI text credit limit depends on the pricing plan of the user
Difference between ContentStudio’s AI writing assistant and AI caption generator
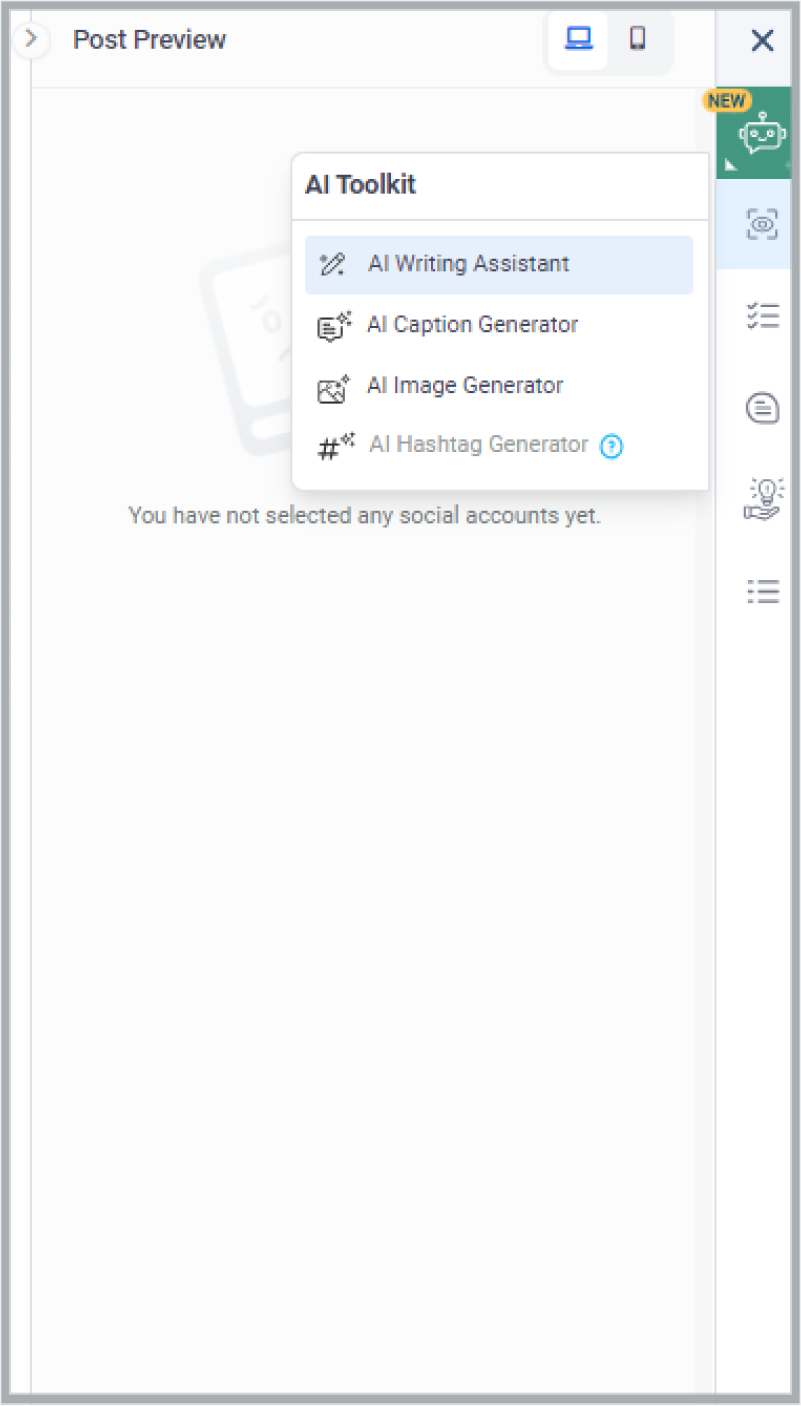
AI writing assistant and AI caption generator are both part of ContentStudio’s AI Toolkit. ContentStudio offers four AI-powered tools for content creators that make it easier for them to create and schedule social media content. The AI tools include AI writing assistant, AI caption generator, AI hashtag generator, and AI image generator.
The main difference between the AI writing assistant and the AI caption generator is that the AI writing assistant serves as an AI-based chatbot and responds to the chat prompts to process the request. Whereas, a caption generator generates suitable captions for your social media posts only.
Users can use the default prompts, such as summarize, continue writing, shorten, rewrite, or expand to interact with the AI assistant. This AI-assistant tool is quite useful when creating long-form content, such as detailed social media posts or blog posts.
To create such a long-form post or blog post, the user simply needs to access the AI writing assistant through a social media post composer or blog post composer. Provide the prompt and press the send button to get started. Furthermore, users can interact with the AI chatbot to come up with a perfect write-up.

On the other hand, the AI caption generator is a handy tool for crafting AI-powered captions for social media posts. Captions are the text section of a social media post that explains what the image video or gif is about. Simply put, it’s a brief helping text that elaborates on the social media post as well as improves the organic reach and SEO performance of the content.
To start using this feature, here’s what users need to do: opt for the type of caption to write, such as a tweet idea, an Instagram post, or an inspirational post for social media. Then, all the user needs is to write down the prompt, mention the word count, set the tone of the caption, and hit the generate button – voila!
Here’s a quick comparison table between the AI writing assistant and AI caption generator:
| AI writing assistant | AI caption generator |
| Helpful in creating blog posts or in-depth social media posts | Assists in writing creative captions for the social media posts |
| Ability to chat and interact with the users | It doesn’t directly interact with the users |
| Default prompts can make the AI content creation faster | Allows to use default prompts or write new ones |
| Doesn’t have default options for emojis, voice tone, etc. | Features like emojis, tone of voice, and word count are available |
A step-by-step guide to using ContentStudio’s AI writing assistant
ContentStudio has a user-friendly interface when it comes to navigating the dashboard. Here’s the step-by-step guide on using ContentStudio’s AI assistant:
Step 1: Log in to your ContentStudio account
First things first, sign up for a ContentStudio account if you haven’t already. It has a 14-day free trial with no strings attached.
Now, log in to your ContentStudio account to get started with using this AI writing tool. Remember the login credentials, such as username and password, for the future.
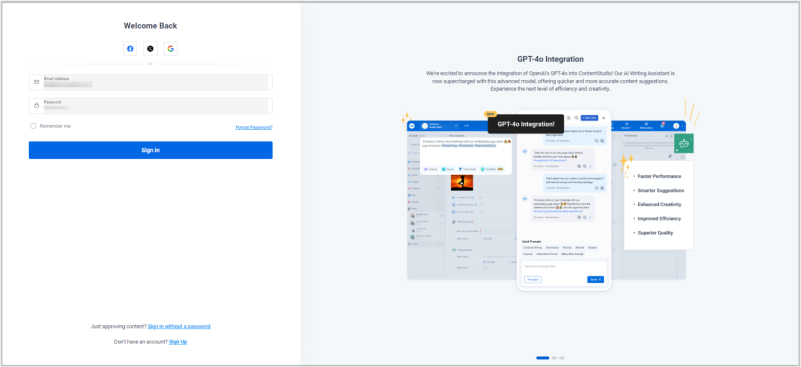
Upon the successful login to your account, you’ll see the ContentStudio dashboard. It’s the section that may look overwhelming at the beginning, but you’ll be fine.
Head over to the next step.
Step 2: Connect blogging and social channels to ContentStudio
Before you get on hands with the AI writing assistant, it’s vital to set up the necessary channels for content creation or publication.
Since the AI assistant is available for both blog and social channels, we’ll quickly explain how to integrate both of these options.
To do this, open the drop-down menu by clicking on the profile button at the top right corner.
You’ll see two options; social accounts and blogs/websites.

Set up both of these for a smooth, publishing experience using the ContentStudio’s AI writing assistant.
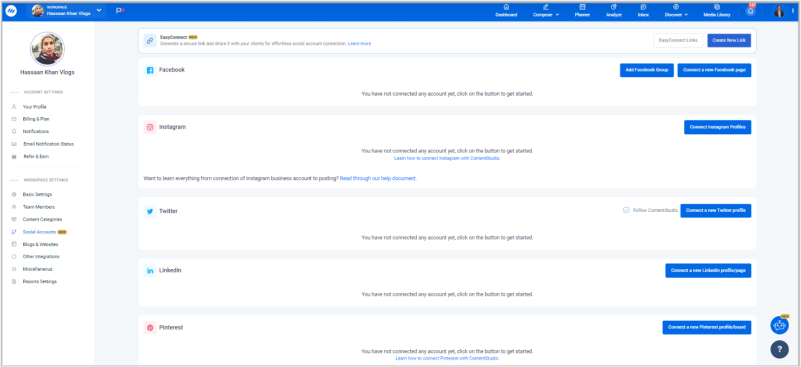
To set up the social accounts, click on the social accounts option, choose the social accounts, and proceed with connecting your chosen social media accounts to ContentStudio.
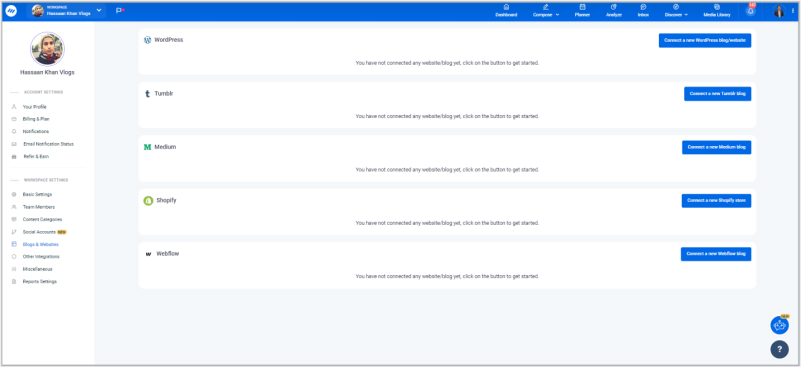
Similarly, go to the blogs/websites section and choose the blogging platform you want to connect with ContentStudio for AI content generation.
Once connected, you’re ready to start posting or blog composing through an AI assistant.
Still confused? Here’s a video to get you started:
Step 3: Compose a new post to get started
When you have successfully connected your social media and blogging channels to the ContentStudio dashboard, now it’s time to compose a new post. It doesn’t matter whether you’re composing a social media post or a blog post.

To do this, click on the “Compose” button from the top menu. Choose the blog post option if you’re composing a blog post. A blog composer would appear and that’s the area where the magic happens.
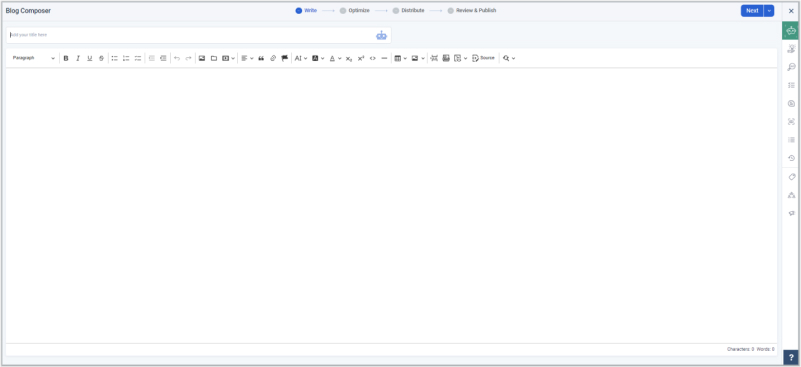
You can see the Article Title bar where the blog post title goes and there is a robot sign at the of the bar – press that icon to use AI to improve your title.
If you want to compose a social media post, hover over the “Compose” option on the top menu and select “social post.”
Now, a social media composer would appear. Select the social media accounts to publish or schedule content and get ready to see the AI writing assistant in action.
Step 4: Access the AI writing assistant
You can access the AI writing assistant for both social posts and blog posts. However, the methods to access the AI writing assistant vary in both cases.
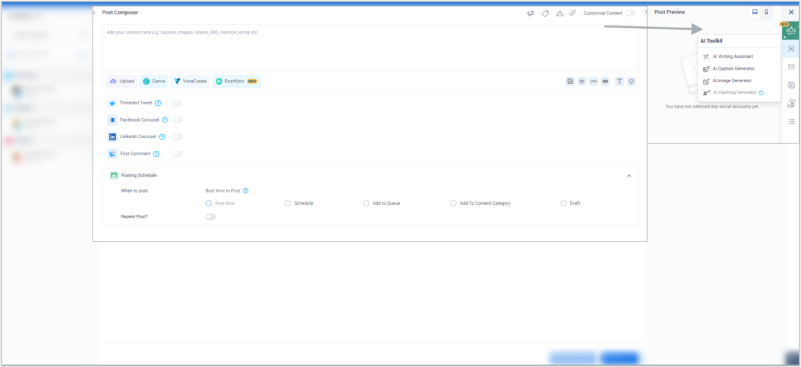
If you’re composing a social media post, then look out for the “AI Toolkit” option from the right side of the page. Click on the “AI Toolkit” and choose the “AI Writing Assistant” if you want to utilize that for your social media post.
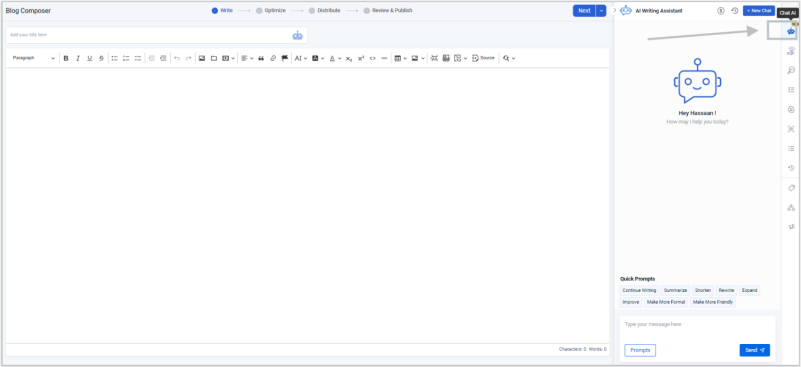
On the other hand, if you’re composing a blog post, you can access the Chat AI from the top right and a window would appear on the right – that would be the AI writing assistant.
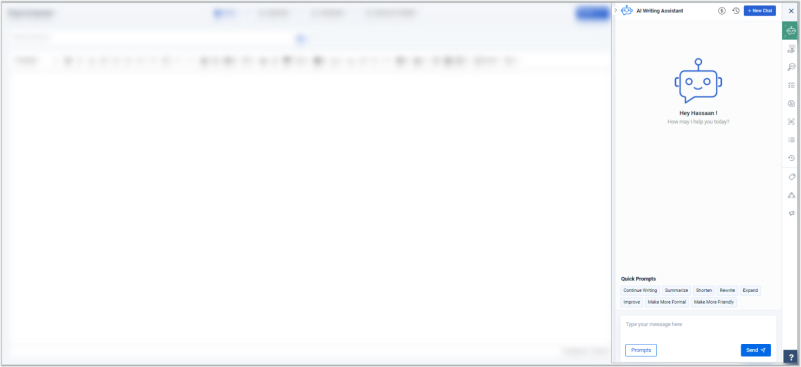
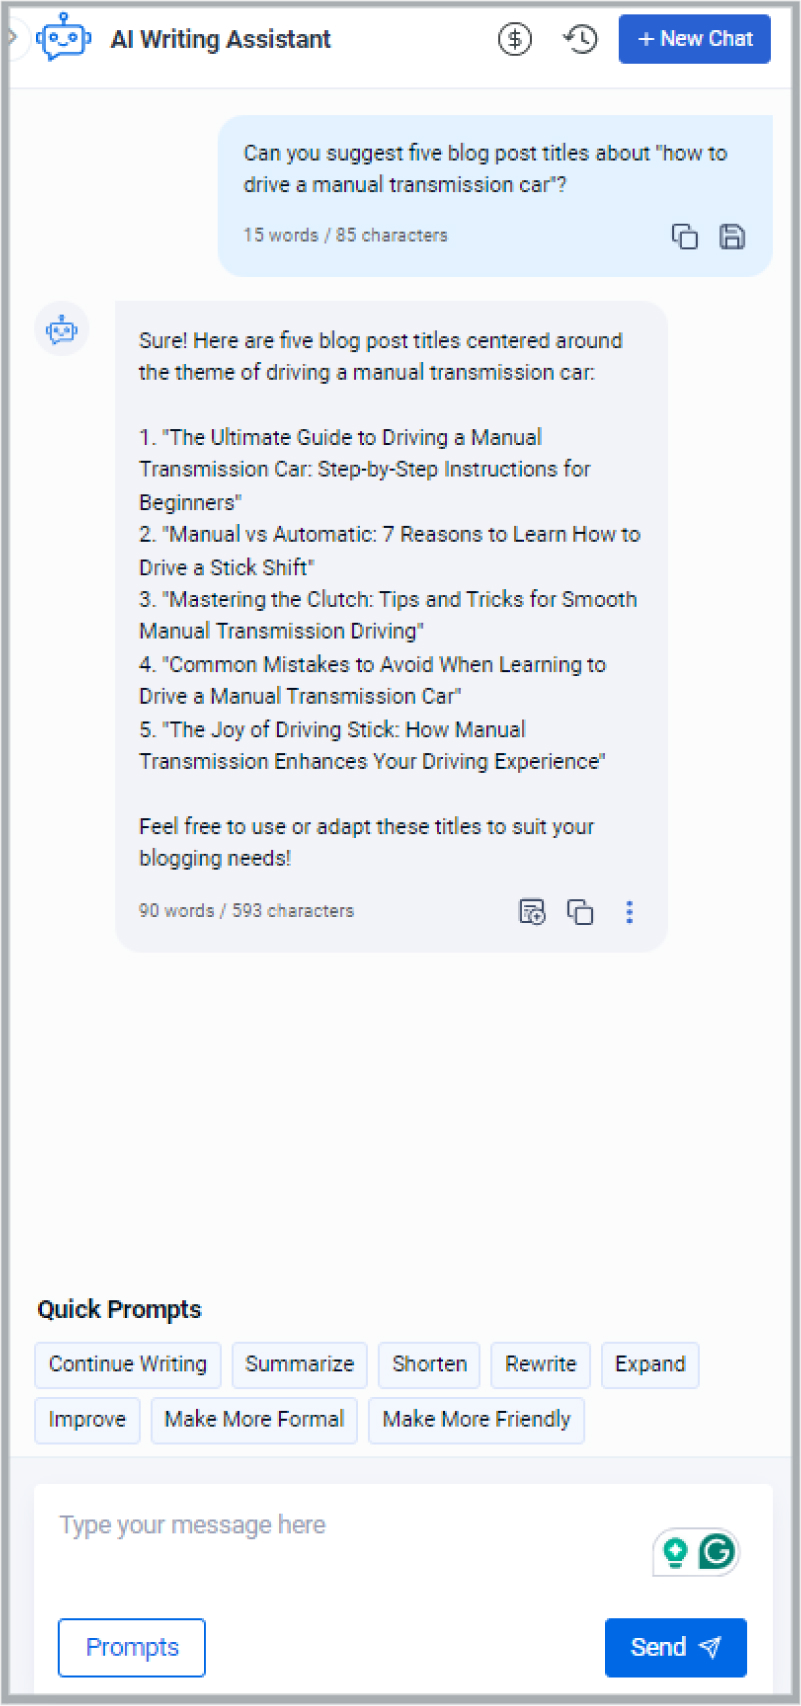
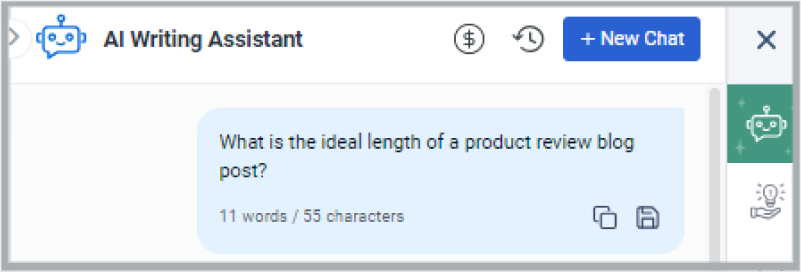
Step 5: Write the prompt to interact with the AI assistant
Once you have accessed the AI writing assistant, the next up is to write a prompt to put the writing assistant to work. Some default prompts can be used, but try to come up with a relevant and specific prompt to get the desired results.
Remember that the AI writing assistant is a chatbot, meaning you can interact with it. It’s smart enough to understand your perspective and provide answers accordingly.

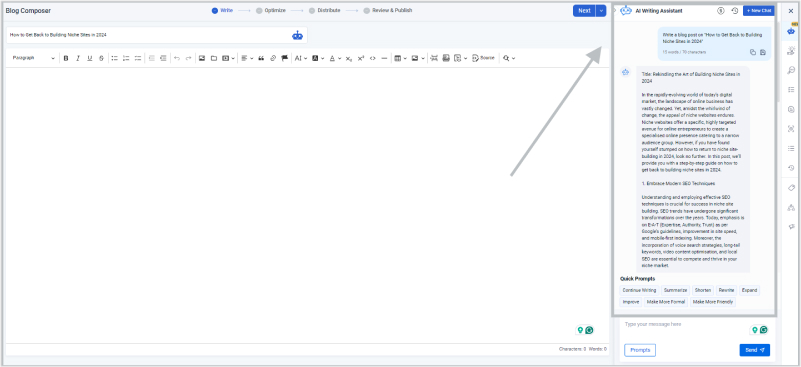
Use the prompt to write blog posts, generate sub-headings, or ask questions to make your blog post better. Keep in mind that the AI credits quota is limited, depending on the pricing plan you’re on.
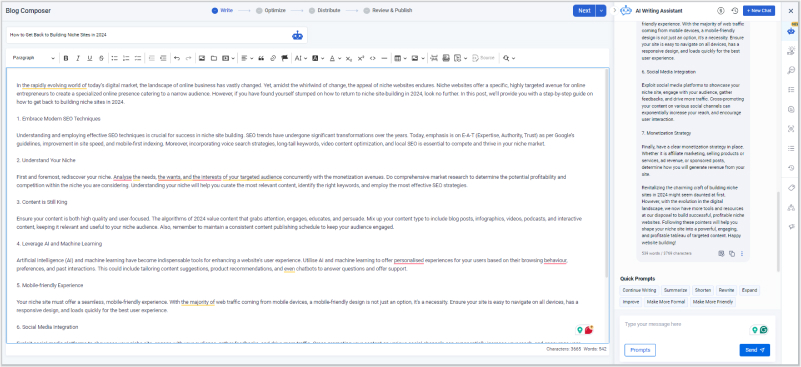
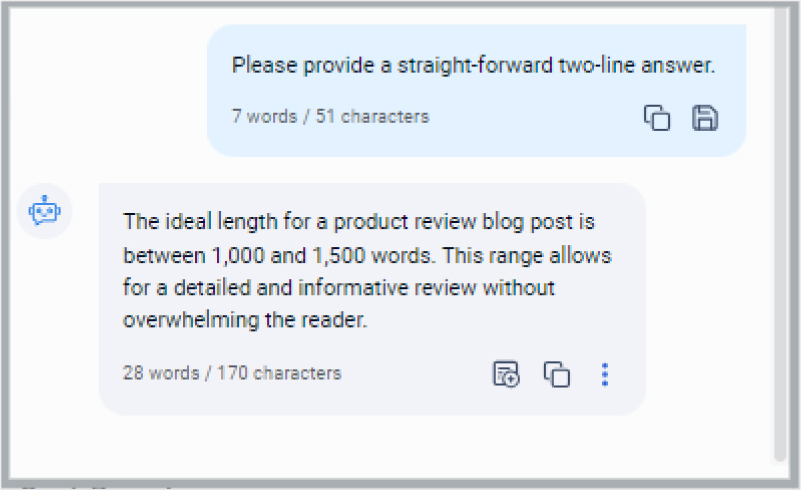
Step 6: Insert the AI-generated text into the editor
When you have finished generating the text, it’s time to add the content to your post. ContentStudio’s AI writing assistant has an option called “Add to Editor” that quickly puts your AI-generated content into the editor section.
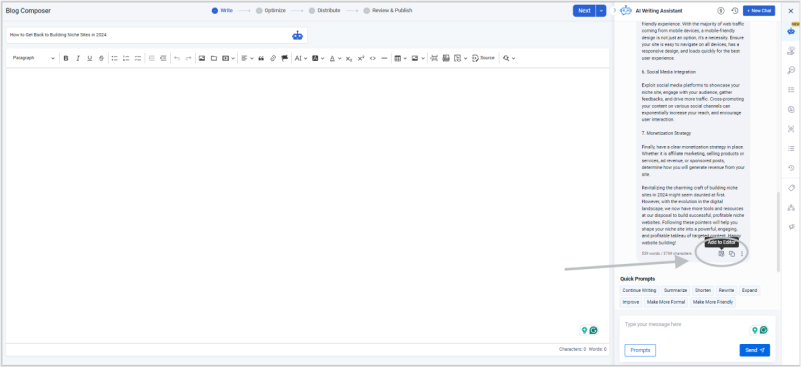
So, you don’t have to manually copy and paste the generated text – all it takes is a one-click to add your AI-generated text to your blog or social media post.
These are the steps to use ContentStudio’s AI writing assistant.
The easiest way to manage and grow your social channels.
Try ContentStudio for FREE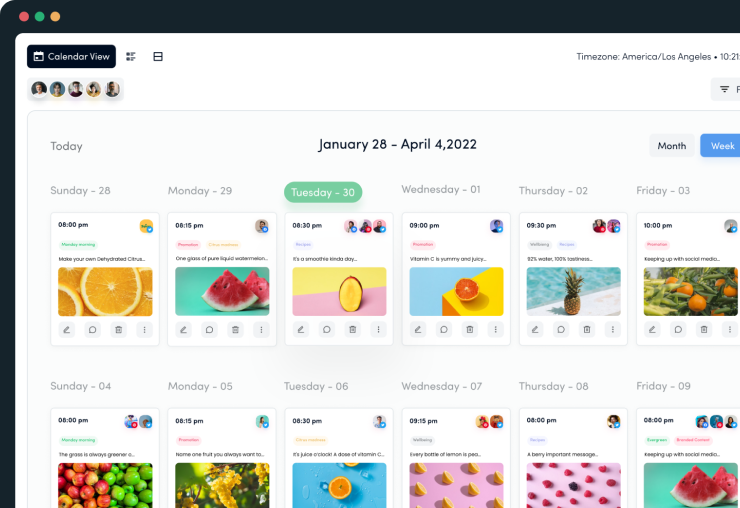
Tips for making the most of AI writing assistant
Let’s take a look at some of the useful tips on using the AI writing assistant:
i. Use AI writing assistant for both social and blog content
The best use case of AI-powered tools is to improve the content creation process to put out more, high-quality content across different platforms. Since AI writing assistant is an excellent tool available to ContentStudio users, it’s necessary to put it to good use.
One of the tips to make the most of an AI writing assistant is to get assistance for blog posts and social media content. Users can access AI writing assistance while publishing blog posts through ContentStudio and use this tool to generate, improve, or alter blog content.
Similarly, this tool can also be accessed through the AI Toolkit feature while publishing social media posts through ContentStudio.
The reason for highlighting this point is that a lot of users might think that the AI writing assistant is only available for the blog post section in ContentStudio, which isn’t correct. It’s available for both social media and blog posts.
ii. Write clear, to-the-point prompts for better results
AI writing assistant works based on the instructions provided by the users called “Prompts” – The AI technology behind the AI writing assistant processes the request and responds to the user accordingly.
It’s crucial to write clear, no-fluff prompts when generating content through this AI tool in the ContentStudio. Otherwise, the user won’t be able to get the desired results.
The easiest way to assess the quality of your written prompt is by analyzing the quality of the output. Sometimes, the word selection, sentence structuring, and unclear instructions lead to bad output. So, try to be concise, to the point, and clear with your prompts no matter what AI tool you’re using.
Also read: 80+ AI prompts for social media post generation
iii. Interact with an AI writing assistant to get more out of it
One of the capabilities of the AI writing assistant is to interact with the user. It has a chat feature that allows an AI chatbot to interact with human users.
It’s pretty much the same as ChatGPT, but the only difference is that this AI tool is built right into the ContentStudio dashboard.
So, one of the tips you can take away from this guide is to talk to the AI writing assistant like you’re talking to a person.
Try to provide as much clarity as possible when interacting with the AI writing assistant, enabling the AI to fully understand your viewpoint and bring the best outcome.
iv. Utilize default prompts in the AI writing assistant
There are several default prompts available in the ContentStudio’s AI writing assistant. Don’t just rely on the quick prompts mentioned in the pop-up window.
Instead, explore the prompts option and try to access the prompts library containing dozens of pre-built prompts.
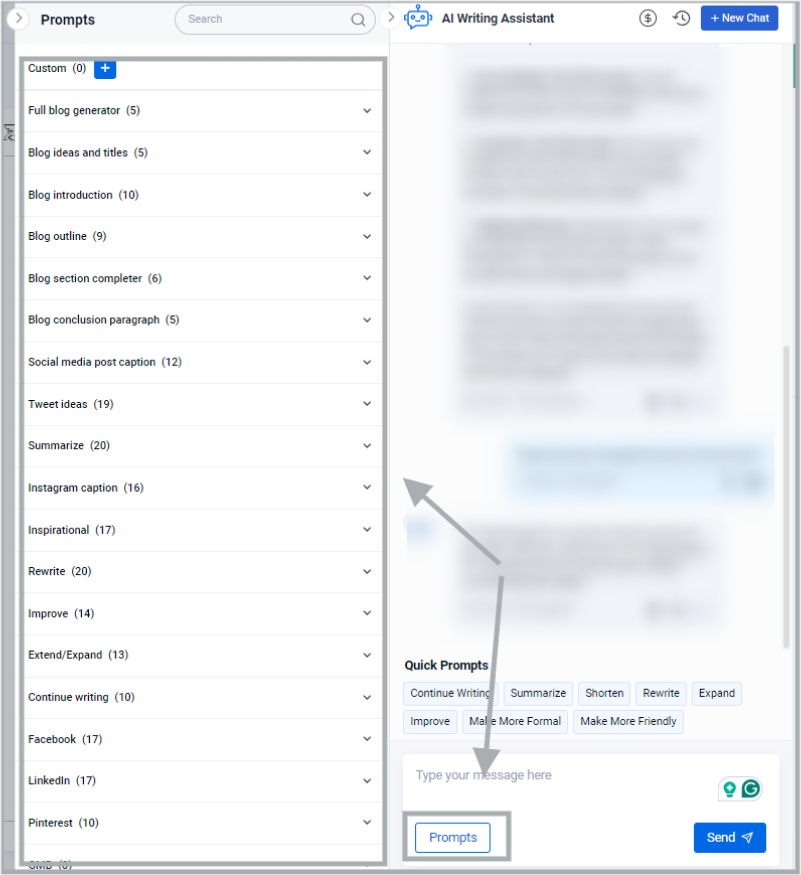
You may want to add some specific details, such as a product or company name to make them properly work.
The better the AI prompts, the better the AI-generated content.
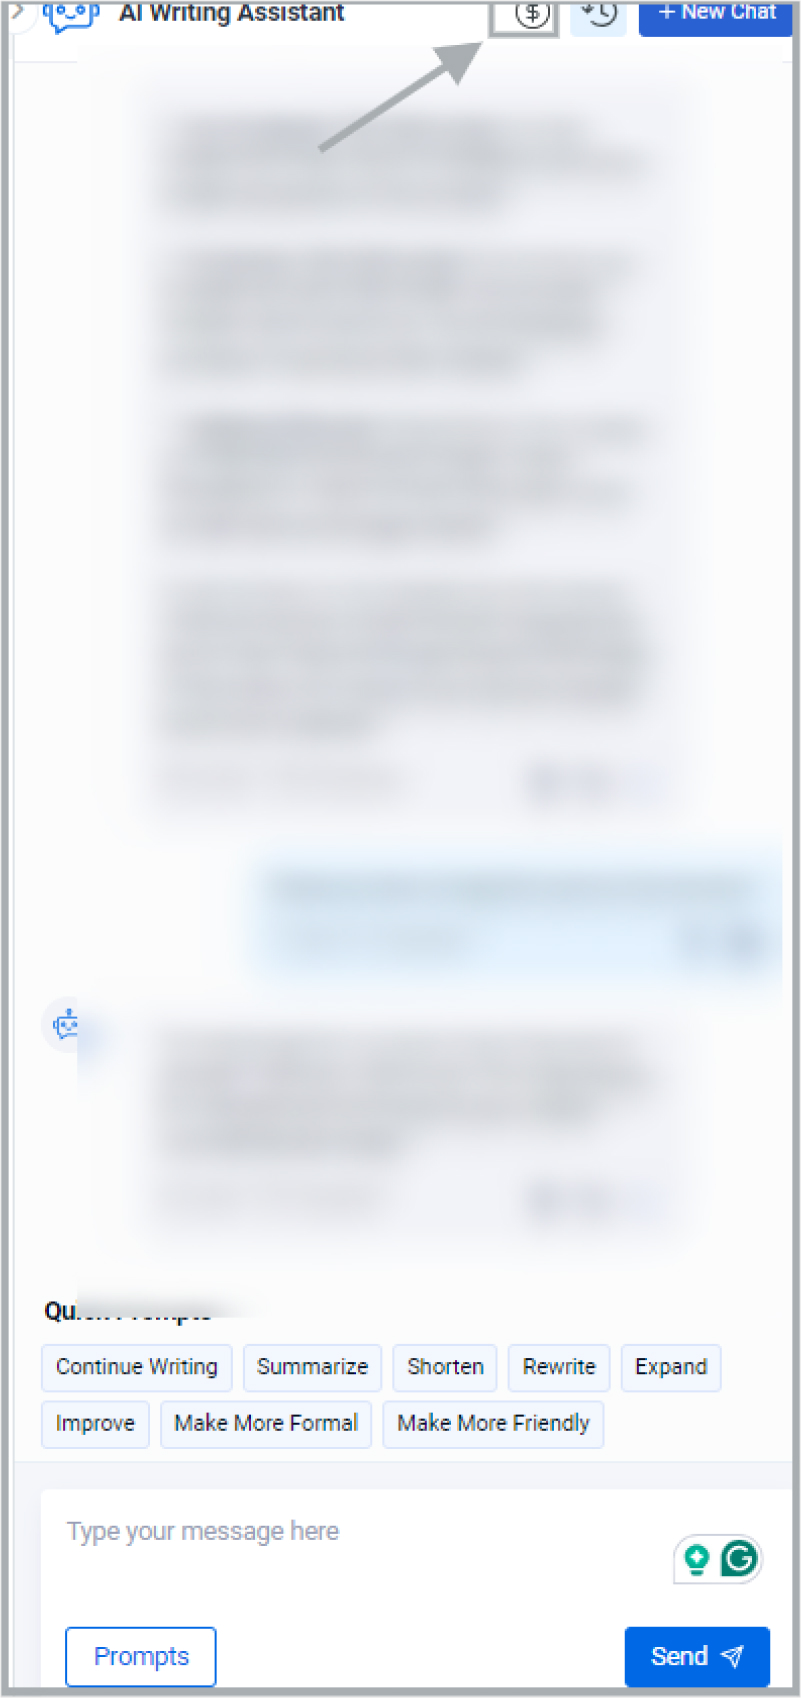
v. Access the chat history to explore previous AI chats
ContentStudio’s AI toolkit has a chat history feature that allows users to access the chat history. It helps them analyze what they asked earlier.
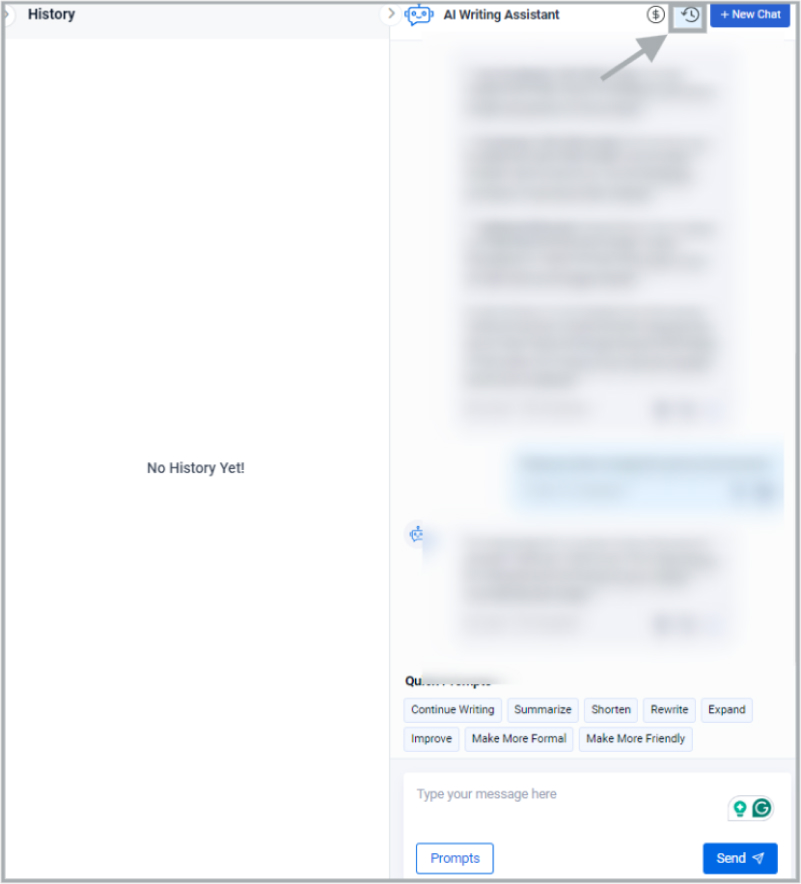
However, such an option is useful when you’re trying to train the AI chatbot with your brand or product’s details. This is one of those features that aren’t widely popular among the users.
Anyway, don’t sleep on any feature of the AI writing toolkit no matter what. You never know when you need to access the AI chat history.
vi. Keep an eye on the AI credits usage
AI credits are required for the AI features in the ContentStudio. Every paid plan has a different AI credits quota. The AI credits quote is usable for all the AI features, such as AI writing assistant, AI image generator, AI hashtag generator, etc.
One of the tips we can give you is to keep a close eye on the AI credits. If you don’t keep track of your AI credits, you may consume all of your AI credits faster than you expect.
Conclusion
ContentStudio’s AI writing assistant is a top-notch AI tool for improving blog and social media content. It’s a new addition to the whole heap of features in the tool.
Now, ContentStudio isn’t just a social media management dashboard for scheduling, managing, and analyzing content. It’s a powerful AI-based social media management tool for brands, agencies, and influencers to revitalize their social media campaigns.
If you’re thinking of exploiting this tool like ChatGTP or any other freemium AI tool, then it won’t happen. The reason is that the AI toolkit uses your AI credits quote available to you in your ContentStudio account.
However, if you’re considering this AI-powered tool to get assistance in content creation, improving the copy, speed up the process, and increase content efficiency, then you’re en route to success.

Hassaan Khan
Hassaan Khan is a freelance writer for SAAS companies, e-commerce stores, and niche websites. He has contributed to SEMrush, ThriveGlobal, BloggingCage, AllBloggingTips, and several other publications. He builds niche websites, publishes e-books, and helps website investors with his done-for-you niche site-building service.

![How to make and post TikTok carousels [complete 2024 guide]](https://blog.contentstudio.io/wp-content/uploads/2024/05/How-to-make-and-post-TikTok-carousels-complete-2024-guide.jpg)